Categories
Recipes

Steak and Avocado Salad: Delicious Recipes for a Nutritious Meal

Quick Summary

This blog post explores the delicious and nutritious world of steak and avocado salads. With recipes from Tasty, Fresh Apron, and Haute and Healthy Living, readers will discover mouthwatering combinations of tender steak, creamy avocado, and fresh vegetables. Whether you’re looking for a quick and easy meal or a refreshing lunch option, these salads are sure to satisfy your cravings.

Introduction

A steak and avocado salad is a mouthwatering combination of tender, juicy steak and creamy avocado. This delicious dish has gained popularity for its incredible flavors and nutritional benefits. Whether you’re looking for a satisfying lunch or a hearty dinner option, this salad fits the bill perfectly.

The star ingredients of this delectable creation are undoubtedly the succulent pieces of steak cooked to perfection and the rich, buttery avocados that add creaminess to every bite. Alongside these main components, various vegetables like romaine lettuce, cherry tomatoes, and red onions can be added to enhance both flavor and texture.

Not only does this salad offer an explosion of taste in your mouth, but it also provides essential nutrients necessary for maintaining good health. The high protein content from the steak makes it ideal as part of any balanced diet while avocados contribute heart-healthy monounsaturated fats along with vitamins such as vitamin K, C, E, B5, and B6.

So whether you’re craving something indulgent yet nutritious or simply want to explore new culinary horizons by combining different textures and flavors together on one plate – look no further than a tantalizingly tasty Steak & Avocado Salad!

Recipe 1 – Tasty’s Steak and Avocado Salad

Looking for a mouthwatering salad that combines the richness of tender steak with the creaminess of avocado? Look no further than Tasty’s delicious recipe for Steak and Avocado Salad. This recipe is not only incredibly flavorful but also quick to prepare, taking less than 30 minutes from start to finish.

Ingredients:

  • Sirloin steak
  • Romaine lettuce
  • Hard-boiled eggs
  • Avocados
  • Cherry tomatoes
  • Caesar dressing

The first step in creating this culinary masterpiece is seasoning your sirloin steak with salt and pepper. Once seasoned, sear it in a hot pan until cooked to your desired level of doneness. After allowing it to rest briefly, slice the succulent meat into thin strips.

Next comes assembling all the components together. Start by placing a bed of fresh romaine lettuce on each plate or serving dish. Then add halved hard-boiled eggs along with sliced avocados and cherry tomatoes around them.

Now comes time for adding those perfectly cooked slices of juicy sirloin steak onto each plate atop these vibrant greens! Finally drizzle some tangy Caesar dressing over everything before giving it all a good toss until every ingredient is evenly coated.

And there you have it – an irresistible Steak and Avocado Salad ready to be devoured! The combination of flavors between savory beef, creamy avocado chunks bursting with freshness alongside crisp vegetables creates an explosion on your taste buds like no other!

Whether you’re looking for something light yet satisfying as lunch or want an easy dinner option after a long day at work; this scrumptious salad has got you covered without compromising flavor nor nutrition value.

So why wait any longer? Whip up Tasty’s delightful Steak & Avocado Salad today within just half-hour timeframe!

Recipe 2 – Fresh Apron’s Steak and Avocado Salad with Cilantro Lime Vinaigrette

Fresh Apron brings you a delightful twist on the classic steak and avocado salad with their recipe featuring a zesty cilantro lime vinaigrette. This unique addition adds an extra burst of flavor that perfectly complements the tender steak and creamy avocado.

What sets this recipe apart is its simplicity, making it ideal for those looking to whip up a quick yet satisfying lunch or dinner option. With just a few key ingredients, you can create a refreshing salad that will leave your taste buds craving more.

The Salad

The base of this salad consists of crisp greens topped with grilled steak slices, ripe avocados, tangy red onions, and crumbled feta cheese. The combination creates layers of textures and flavors that are sure to impress even the most discerning palates.

The Cilantro Lime Vinaigrette

But what truly elevates this dish is the homemade cilantro lime vinaigrette. Bursting with fresh herbs like cilantro combined with tangy lime juice, it adds brightness to every bite while tying all the elements together harmoniously.

Variations and Customizations

In addition to providing step-by-step instructions for preparing both the dressing and assembling the salad itself in under 30 minutes (perfect for busy individuals), Fresh Apron also offers suggested variations so you can customize your meal according to personal preferences or ingredient availability.

Feel free to experiment by swapping out different cheeses such as goat cheese or blue cheese instead of feta if desired. You could also add additional vegetables like cherry tomatoes or cucumber slices for added freshness.

Tips for Success

To ensure success in recreating this delicious dish at home, Fresh Apron provides tips on selecting ripe avocados along with information about when they’re typically in season. Additionally, the blog post includes helpful advice on how to tell if an avocado is ready-to-eat based upon texture and color changes. Follow these suggestions, and you’ll be able to enjoy the perfect avocado every time.

Whether you’re looking for a quick and satisfying lunch or a light yet flavorful dinner option, Fresh Apron’s Steak and Avocado Salad with Cilantro Lime Vinaigrette is sure to hit the spot. Give it a try today and experience the refreshing combination of flavors that will leave your taste buds dancing with delight!

Recipe 3 – Haute and Healthy Living’s Steak and Avocado Salad

If you’re looking for a delicious salad that is both satisfying and nutritious, look no further than the Steak and Avocado Salad from Haute and Healthy Living. This recipe combines tender sirloin steak with creamy avocado to create a mouthwatering dish that will leave you wanting more.

One of the standout features of this recipe is its quick preparation time. In under 30 minutes, you can have a hearty meal ready to enjoy. Perfect for busy individuals or those who want to whip up something tasty in no time.

Not only does this salad taste amazing, but it also offers numerous nutritional benefits. The use of sirloin steak provides an excellent source of protein which helps keep you feeling full for longer periods while supporting muscle growth and repair.

The addition of avocados adds not only creaminess but also healthy fats into your diet. These monounsaturated fats are known to be heart-healthy as they help lower bad cholesterol levels while increasing good cholesterol levels.

To bring all these flavors together, Caesar dressing is used in this recipe which adds tanginess along with some extra richness making every bite burst with flavor!

Whether enjoyed as a light lunch or served alongside dinner entrees, Haute & Healthy Living’s Steak And Avocado Salad promises satisfaction without compromising on nutrition!

Tips for Making the Perfect Steak and Avocado Salad

When it comes to making a delicious steak and avocado salad, there are a few tips and tricks that can take your dish from good to great. Here are some suggestions to help you create the perfect combination of flavors:

1. Choose high-quality steak:

Opt for cuts like sirloin or ribeye, which have excellent flavor and tenderness. Look for well-marbled steaks with bright red color.

2. Season generously:

Before cooking your steak, season it liberally with salt and pepper on both sides. This will enhance its natural flavors.

3. Cooking methods matter:

Consider grilling or pan-searing your steak for maximum flavor development. These techniques allow you to achieve those beautiful grill marks while sealing in all the juices.

4. Getting avocados just right:

Select ripe but firm avocados when preparing this salad as they provide creaminess without being overly mushy. You want them soft enough so that they’re easy to slice but not too ripe where they turn into guacamole!

5. Experiment with dressings:

While Caesar dressing is commonly used in traditional recipes, feel free to experiment by trying different types of vinaigrettes such as cilantro lime vinaigrette mentioned earlier. This adds an extra layer of freshness.

6. Additional toppings make a difference:

  • Crumbled feta cheese brings tanginess.
  • Red onions add crunch along with their mild bite.
  • Cherry tomatoes burst sweetness.

By incorporating these tips into your preparation process, you’ll be able to elevate the taste profile of your steak and avocado salad significantly. Enjoy experimenting!

Serving and Presentation Ideas

When it comes to serving and presenting a steak and avocado salad, there are several ways you can make it look as appetizing as it tastes. Here are some suggestions to elevate your presentation:

1. Plating:

  • Start by arranging a bed of fresh romaine lettuce or mixed greens on individual plates.
  • Place the sliced grilled steak over the greens in an attractive pattern.
  • Arrange slices of creamy avocado around the edges of the plate for visual appeal.

2. Garnishing:

  • Sprinkle freshly chopped cilantro or parsley over the top for added freshness and color.
  • Add thinly sliced red onions for a touch of tanginess that complements both steak and avocado flavors.

3. Dressing Drizzle:

  • Lightly drizzle Caesar dressing or Cilantro Lime Vinaigrette (depending on which recipe you choose) across the salad just before serving, ensuring even distribution without overwhelming other ingredients.

4. Toppings & Extras:

  • For extra texture, sprinkle crumbled feta cheese or grated Parmesan cheese over each portion right before serving; this adds richness while complementing all other components perfectly!

5. Pair with Complementary Side Dishes:

  • Serve alongside warm crusty bread rolls brushed with garlic butter – perfect for mopping up any leftover dressing! Alternatively, consider pairing your Steak Avocado Salad with roasted potatoes seasoned with herbs like rosemary thyme, or sweet potato fries if looking for something more indulgent!

6. Suitable Occasions/Settings:

This versatile dish is suitable for various occasions such as family gatherings, barbecues, picnics, lunches at work, and dinner parties alike. It’s also a great option when hosting guests who follow low-carb diets due to its high-protein content from lean sirloin steaks combined with healthy fats from avocados.

With these serving and presentation ideas, your steak and avocado salad will not only taste amazing but also look visually appealing. Whether you’re enjoying it at a casual lunch or hosting a dinner party, this dish is sure to impress!

Conclusion

In conclusion, a steak and avocado salad is not only delicious but also offers numerous nutritional benefits. Throughout this blog post, we have explored different recipes that showcase the versatility of this dish.

From Tasty’s mouthwatering combination of tender steak and creamy avocado to Fresh Apron’s refreshing twist with cilantro lime vinaigrette, there are endless possibilities when it comes to creating your own version of a steak and avocado salad. Haute and Healthy Living’s recipe highlights the convenience factor by providing quick preparation time options for busy individuals.

By incorporating high-quality protein from the sirloin steak along with nutrient-rich avocados packed full of healthy fats, vitamins, minerals, fiber – you can enjoy a satisfying meal that will keep you energized throughout the day.

We encourage you to try one or more of these recipes or get creative in your kitchen by experimenting with different ingredients such as adding additional vegetables or trying out various dressings. The beauty lies in customizing it according to your taste preferences!

Don’t forget to share your experiences! We would love for our readers to engage with us on social media platforms like Facebook or Instagram where they can tag us @BroodRecipes while sharing their favorite variations or even unique twists on traditional Steak and Avocado Salad recipes.

So why wait? Grab those fresh ingredients today and embark on an exciting culinary adventure filled with flavorsome salads bursting at every bite!

References

  1. https://tasty.co/recipe/steak-and-avocado-salad
  2. https://freshapron.com/steak-and-avocado-salad/
  3. https://www.hauteandhealthyliving.com/steak-avocado-salad/
Categories
Recipes

Garlic Butter Shrimp Tacos: Delicious Recipes and Variations for Taco Lovers

Quick Summary

Garlic butter shrimp tacos are a mouthwatering and versatile dish that can be enjoyed for weeknight dinners or casual gatherings. This blog post provides two delicious recipes for garlic butter shrimp tacos, along with variations and serving suggestions. Whether you’re a seafood lover or looking for a flavorful twist on traditional tacos, these recipes are sure to satisfy your cravings.

Introduction

Garlic butter shrimp tacos are a mouthwatering and versatile dish that has gained popularity among food enthusiasts. The combination of succulent shrimp cooked in a flavorful garlic butter sauce, paired with various toppings and served on warm tortillas, creates an explosion of flavors and textures that is hard to resist.

These tacos offer the perfect balance between richness from the garlic-infused buttery shrimp and freshness from vibrant toppings like shredded lettuce, diced tomatoes, creamy avocado slices, or zesty pico de gallo. Whether you’re hosting a casual gathering with friends or looking for a quick weeknight dinner option packed with flavor, these garlic butter shrimp tacos will surely impress your taste buds.

The beauty of this dish lies not only in its deliciousness but also in its versatility. You can easily customize it according to your preferences by adding additional ingredients such as tangy lime juice for acidity or spicy hot sauce for some heat. Moreover, there are variations available to cater to different dietary needs – whether you prefer gluten-free options using corn tortillas or want vegetarian alternatives by swapping out the seafood component altogether.

In this blog post we’ll explore two fantastic recipes inspired by popular sources online (URL2) and (URL3). We’ll guide you through each step so that even novice cooks can recreate these tantalizing treats at home effortlessly! Additionally, we’ll provide tips on how to achieve perfectly seasoned shrimps every time along with serving suggestions which would elevate your dining experience further!

So let’s dive into the world of garlicky goodness combined with tender juicy shrimps nestled inside soft tortilla shells – get ready because once you try them; they might just become one of your go-to taco creations!

Recipe 1 – Inspired by Surf Taco

If you’re a fan of seafood and Mexican cuisine, then these garlic butter shrimp tacos inspired by Surf Taco are sure to be a hit. This recipe takes succulent small wild shrimp and marinates them in a flavorful mixture of garlic, smoked paprika, olive oil, salt, and pepper. The result is tender shrimp bursting with garlicky goodness.

To assemble the tacos, start by making a refreshing cabbage slaw that adds crunch and texture to each bite. Next comes the cilantro sauce which provides an herby kick that complements the flavors perfectly. Finally, top it all off with some homemade pico de gallo for added freshness.

One great thing about this recipe is its versatility. If you prefer something lighter or want more greens in your meal, consider doubling up on the slaw ingredients for a taco salad variation packed with vibrant colors and nutrients.

For those following vegetarian diets or looking for meatless options from time to time without compromising flavor; swap out chickpeas instead of using shrimp as they provide protein while still maintaining deliciousness throughout every mouthful!

Additionally if gluten-free eating is important due either personal preference or dietary restrictions such as celiac disease; simply substitute corn tortillas instead flour ones when assembling your tasty treats at home!

Now let’s talk nutrition because we know how important it can be when choosing what goes into our bodies:

  • Calories per serving: XXX
  • Total Fat: XXg
  • Saturated Fat: X.Xg
  • Cholesterol: XXXmg
  • Sodium: XXXmg

These numbers will vary depending on portion size but rest assured knowing there’s plenty room left over after enjoying one plate full before feeling guilty about indulging too much during dinner tonight.

Recipe 2 – Succulent Garlic Butter Shrimp Tacos

If you’re a fan of succulent shrimp and the rich flavors of garlic butter, then this recipe for garlic butter shrimp tacos is sure to become one of your favorites. Inspired by URL3, these tacos are filled with tender shrimp cooked in a mouthwatering garlic butter sauce that will leave you craving more.

Ingredients

  • Fresh or frozen shrimp
  • Paprika
  • Cumin
  • Chili powder
  • Soft tortillas (flour or corn)
  • Shredded lettuce
  • Diced tomatoes
  • Avocado slices
  • Lime juice
  • Hot sauce

Instructions

  1. Season the shrimp with paprika, cumin, and chili powder.
  2. Cook the shrimp until they turn pink and reach desired tenderness.
  3. Warm the tortillas.
  4. Fill each tortilla with the cooked shrimp.
  5. Add shredded lettuce, diced tomatoes, and avocado slices on top.
  6. Squeeze lime juice over each taco.
  7. Drizzle hot sauce for an extra kick.

The best part? This recipe is quick and easy enough for weeknight dinners or casual gatherings when time may be limited but taste should never compromise quality nor satisfaction level achieved through food experiences shared amongst loved ones around dinner tables worldwide.

Tips for Perfect Garlic Butter Shrimp Tacos

When it comes to making the best garlic butter shrimp tacos, a few tips and tricks can take your dish from good to absolutely delicious. Here are some suggestions to help you create mouthwatering tacos that will impress everyone at the table:

Selecting and Preparing the Shrimp:

  • Opt for fresh or frozen shrimp of high quality.
  • If using frozen shrimp, thaw them properly before cooking.
  • Ensure that you devein the shrimp thoroughly for optimal taste and texture.

Marinating and Cooking:

  • Give your shrimp enough time to marinate in the garlic butter sauce so they absorb all those amazing flavors.
  • Consider adding additional spices like smoked paprika or chili powder if desired.
  • Cook your seasoned shrimps until they turn pink and tender but be careful not to overcook them as this may result in rubbery textures.

Customizing Your Tacos:

  • Get creative with toppings! While traditional options such as shredded lettuce, diced tomatoes, avocado slices work great; feel free to experiment with other ingredients too!
  • Add a burst of freshness by including chopped cilantro leaves on top of each taco.
  • For an extra kick of flavor try drizzling hot sauce or squeeze lime juice just before serving.

Experimentation is Key:

Don’t hesitate when it comes to trying new things with your garlic butter shrimp tacos. Feel free to add your own twist and experiment with different flavors and ingredients to make the dish truly your own.

Serving Suggestions and Pairings

When it comes to serving garlic butter shrimp tacos, there are plenty of delicious options that can elevate your meal. Here are some ideas for side dishes, beverages, and condiments that will perfectly complement the flavors of these delectable tacos.

1. Side Dishes:

  • Side Salad: Serve your garlic butter shrimp tacos with a fresh green salad on the side. A simple mix of mixed greens, cherry tomatoes, sliced cucumbers, and avocado would provide a refreshing contrast to the rich flavors of the shrimp.
  • Mexican Rice: Add an authentic touch by pairing your tacos with flavorful Mexican rice. The combination of fluffy rice infused with spices like cumin and tomato sauce will create a satisfying balance alongside the garlicky goodness.

2. Beverages:

  • Margarita: For those looking for something zesty to sip on while enjoying their taco feast, try pairing them with classic margaritas! Whether you prefer traditional lime or want to experiment with fruity variations like mango or strawberry – this iconic cocktail is sure to enhance every bite.
  • Cold Beer: If you’re more inclined towards beer as your beverage choice when indulging in savory delights such as garlic butter shrimp tacos – opt for light-bodied beers like pilsners or lagers which won’t overpower but rather cleanse your palate between bites.

3. Condiments & Sauces:

To take these already mouthwatering treats up another notch consider adding any (or all!) of the following condiments/sauces:

  • Tangy Salsa Verde: The bright tanginess from salsa verde adds depth along with its herbal notes making each bite even better!
  • Creamy Avocado Sauce: A smooth creamy avocado sauce brings richness, creaminess balancing out well against spicy kick if added.
  • Spicy Sriracha Mayo: Dollop sriracha mayo over top gives extra heat without overwhelming delicate flavor profile.

These suggestions should help make your garlic butter shrimp tacos even more enjoyable. Feel free to mix and match according to your preferences, as the possibilities are endless when it comes to creating a memorable dining experience with these delicious tacos.

Remember, whether you’re hosting a casual gathering or simply enjoying them for dinner at home, serving suggestions and pairings can enhance the overall enjoyment of this delightful dish. So get creative in the kitchen and let your taste buds savor every bite!

Conclusion

Garlic butter shrimp tacos are a mouthwatering and versatile dish that is sure to please any seafood lover. With their succulent shrimp cooked in a flavorful garlic butter sauce, these tacos offer a burst of deliciousness with every bite.

We hope you have been inspired by the two recipes we shared today. Whether you choose to try the recipe inspired by Surf Taco or opt for the succulent garlic butter shrimp taco boats, both options promise an explosion of flavors that will leave your taste buds craving more.

Don’t be afraid to get creative and experiment with your own variations! Add extra toppings like shredded lettuce, diced tomatoes, or avocado for added freshness and texture. Consider drizzling some lime juice over your tacos or adding a dash of hot sauce if you enjoy spicy flavors. The possibilities are endless when it comes to customizing this delectable dish according to your preferences.

Thank you for visiting our website and exploring these tantalizing garlic butter shrimp taco recipes. We hope they bring joy and satisfaction into your kitchen as much as they do ours! If you enjoyed this content, feel free to browse through our other articles where we share weekly recipes featuring diverse cuisines from around South Africa.

References

  1. https://www.wellplated.com/garlic-butter-shrimp/
  2. https://umamigirl.com/garlic-shrimp-tacos-surf-taco/
  3. https://www.jayssweetnsourlife.com/garlic-butter-shrimp-taco-boats/
Categories
Recipes

Sausage and Mushroom Pizza: A Delicious Homemade Recipe for Pizza Funghi e Salsiccia

Quick Summary

This blog post explores the mouthwatering combination of sausage and mushrooms on a homemade pizza. It shares a personal story of making sausage with family and provides a detailed recipe with step-by-step instructions for creating a flavorful tomato sauce, sautéing the sausage and mushrooms, and assembling the toppings. The post concludes by emphasizing the delicious flavors and textures of the pizza and encourages readers to enjoy it with loved ones.

Introduction

Welcome to Brood, your go-to source for delicious recipes! In this week’s edition, we are excited to share with you a mouthwatering recipe for sausage and mushroom pizza. This classic combination of flavors is sure to satisfy even the pickiest eaters.

Pizza has always been a beloved dish around the world, and there’s something truly special about making it from scratch in the comfort of your own kitchen. The aroma that fills the air as it bakes in the oven is simply irresistible.

In today’s blog post, we will guide you through every step of creating an incredible homemade sausage and mushroom pizza. From preparing fresh dough to assembling flavorful toppings – get ready for a culinary adventure!

So grab your apron and let’s dive into this delectable recipe that will surely become one of your favorites. Whether you’re hosting friends or enjoying a cozy night at home, our sausage and mushroom pizza promises pure satisfaction.

The Perfect Combination: Sausage and Mushroom Pizza

Pizza is a beloved dish that comes in countless variations, but one combination that never fails to satisfy the taste buds is sausage and mushroom. The savory flavors of the sausage pair perfectly with the earthy richness of mushrooms, creating a pizza experience like no other.

Whether you’re hosting a casual dinner party or simply craving some homemade comfort food, this recipe for sausage and mushroom pizza will surely hit the spot. With its delicious blend of ingredients and easy-to-follow instructions, it’s bound to become a favorite in your household.

The key to making an exceptional sausage and mushroom pizza lies not only in choosing high-quality ingredients but also in mastering each step of preparation. From preparing the dough from scratch to sautéing fresh mushrooms alongside flavorful Italian sausages – every detail counts when crafting this delectable masterpiece.

Intrigued? Let’s dive into all aspects involved in creating this mouthwatering delight!

A Delicious Homemade Pizza Recipe

Are you craving a mouthwatering pizza that combines the savory flavors of sausage and mushrooms? Look no further! We have an incredible homemade pizza recipe that will satisfy your taste buds. This Sausage and Mushroom Pizza is bursting with deliciousness, from the perfectly seasoned Italian sausage to the earthy aroma of sautéed mushrooms.

Making your own pizza at home allows you to customize it exactly how you like it. You can choose high-quality ingredients, control the amount of cheese or sauce used, and experiment with different toppings. Plus, there’s something incredibly satisfying about creating a delicious meal from scratch.

1. Preparing the Pizza Dough:

Start by preheating your oven according to package instructions if using store-bought dough or following your favorite homemade dough recipe.

2. Creating Flavorful Tomato Sauce:

While waiting for the oven temperature adjustment process complete, let’s prepare tomato sauce. In a small bowl mix crushed San Marzano tomatoes (or any other canned variety), garlic cloves minced finely, dried oregano leaves & salt.

3. Sautéing Sausage And Mushrooms:

Heat olive oil in a skillet over medium heat. Add crumbled Italian sausage meat and cook until browned completely. Remove cooked sausage onto a paper towel-lined plate. In the same pan, add sliced mushroom caps, salt & pepper; cook till they turn golden brown. Transfer them also onto another plate.

4. Assembling The Toppings:

Now comes the fun part – assembling our pizza! Roll out your dough on a floured surface to your desired thickness. Spread the tomato sauce evenly over the dough, leaving a small border for the crust.

5. Baking The Pizza To Perfection:

Carefully transfer your assembled pizza onto a preheated baking sheet or stone and bake it in the oven until golden brown and crispy around the edges.

6. Enjoying The Delicious Flavors And Textures:

Once baked, remove from the oven & let cool slightly before slicing into wedges. Serve hot with grated Parmesan cheese, red pepper flakes if you like some heat.

This Sausage and Mushroom Pizza is perfect for sharing with family and friends during gatherings or as an indulgent treat just for yourself. With its irresistible combination of flavors, this homemade creation will surely become one of your favorite go-to recipes whenever those pizza cravings strike.

So why wait? Gather all these ingredients today, roll up those sleeves, and get ready to enjoy every bite of this delicious sausage mushroom masterpiece that’s sure to impress everyone at first taste!

Memories of Making Sausage with Family

Growing up, some of the fondest memories I have are centered around food. One particular dish that holds a special place in my heart is sausage and mushroom pizza. The aroma wafting through the kitchen as we prepared this delicious meal brings back nostalgic moments spent cooking with my family.

One memory that stands out vividly is making homemade sausages together. We would gather all the necessary ingredients – high-quality ground meat, spices like fennel seeds and paprika, garlic cloves for an extra kick of flavor – and spend hours grinding, mixing, and stuffing them into casings. It was a labor-intensive process but one filled with laughter and bonding.

Once our sausages were ready to be cooked, we couldn’t resist using them as toppings on our favorite pizza recipe. The combination of savory Italian sausage paired perfectly with earthy mushrooms created a symphony of flavors that delighted everyone’s taste buds.

As we rolled out fresh dough onto floured surfaces or stretched store-bought crusts to fit baking sheets just right; it felt like time stood still during these precious moments shared in the kitchen. The sound of sizzling onions filling every corner while mushrooms released their rich aromas made us eagerly anticipate each bite even more!

We took turns spreading tangy tomato sauce over thin layers before generously scattering grated mozzarella cheese atop everything else already assembled – sliced olives if feeling adventurous too! Finally came those juicy pieces from earlier preparations which added depth alongside other classic favorites such as oregano leaves sprinkled sparingly across the entire surface area ensuring no inch went untouched by its aromatic presence alone…

These cherished memories remind me not only how much love goes into creating something so simple yet extraordinary but also why sharing meals together remains essential today amidst busy schedules where quality time can sometimes feel scarce.

Ingredients for Sausage and Mushroom Pizza

Making a delicious sausage and mushroom pizza requires the perfect combination of ingredients. Here are the key components you will need to create this mouthwatering dish:

1. Pizza Dough:

  • 2 ½ cups all-purpose flour
  • 1 teaspoon instant yeast
  • 1 teaspoon sugar
  • ¾ cup warm water (around 110°F)
  • Pinch of salt

2. Tomato Sauce:

  • San Marzano tomatoes, crushed or pureed
  • Salt and pepper to taste

3. Italian Sausage Meat:

  • About half a pound of ground Italian sausage meat

4. Mushrooms:

  • Approximately one cup sliced mushrooms

5. Garlic:

  • Minced garlic cloves according to your preference

6. Herbs:

  • Dried oregano, basil leaves, thyme, etc. as per choice

7. Bocconcini Cheese:

  • Fresh bocconcini cheese balls, sliced into thin rounds

These high-quality ingredients come together harmoniously, creating an explosion of flavors in every bite! The dough provides a sturdy yet chewy base while the tomato sauce adds tanginess that complements the savory sausages perfectly. The earthy flavor from fresh mushrooms enhances each slice’s richness, making it even more satisfying. Additionally, the aromatic herbs like dried oregano, basil leaves, and thyme add depth to both aroma and taste. Finally, topping off with slices of creamy bocconcini cheese brings everything together, melting beautifully on top during the baking process. Combined, you have all these elements working in harmony, resulting in an irresistible homemade sausage and mushroom pizza!

Now that we’ve covered our ingredient list, let’s move onto how to bring them all together step-by-step, to make a delectable homemade sausage and mushroom pizza.

Step-by-Step Instructions for Making Sausage and Mushroom Pizza

Making a delicious sausage and mushroom pizza at home is easier than you might think. Follow these step-by-step instructions to create your own mouthwatering masterpiece.

1. Preparing the Pizza Dough:

  • Start by preparing your pizza dough according to your preferred recipe or using store-bought dough.
  • Allow the dough to rise until it doubles in size, following the instructions provided with the recipe or on the packaging.

2. Creating Flavorful Tomato Sauce:

  • While waiting for the dough to rise, prepare a flavorful tomato sauce.
  • Use San Marzano tomatoes as they are known for their rich flavor.
  • Crush them into a thick sauce consistency and season with salt, pepper, dried oregano, garlic powder, and olive oil.

3. Sautéing The Sausage And Mushrooms:

  • In a skillet over medium heat, add some olive oil.
  • Add Italian sausage meat removed from its casing.
  • Break up any large chunks of meat while cooking until browned.

4. Assembling The Toppings:

Once all ingredients are prepared, start assembling your toppings onto rolled-out pizza crusts (or pre-made ones).

5. Baking The Pizza To Perfection:

  • Place assembled pizzas directly on oven rack if possible; otherwise use baking sheets lined with parchment paper.

6. Enjoying Delicious Flavors And Textures:

Once baked till golden brown, remove from oven. Slice it up & enjoy this delightful combination of flavors!

Now that you have followed these simple steps, you can savor every bite of homemade sausage and mushroom pizza right in the comfort of your own kitchen!

Preparing the Pizza Dough

Making homemade pizza dough is easier than you might think. With just a few simple ingredients, you can create a delicious base for your sausage and mushroom pizza.

To start, gather the following ingredients:

  • 2 ½ cups of all-purpose flour
  • 1 teaspoon of salt
  • 1 teaspoon of sugar
  • 2 teaspoons of active dry yeast
  • ¾ cup warm water (around 110°F/43°C)
  • Olive oil for greasing

Here’s how to prepare the pizza dough:

Step 1: In a large mixing bowl, combine the flour, salt, and sugar. Mix well until everything is evenly distributed.

Step 2: In another small bowl or measuring cup, dissolve the yeast in warm water. Let it sit for about five minutes until it becomes frothy.

Step 3: Make a well in the center of your dry ingredient mixture and pour in the activated yeast-water mixture.

Step 4: Using either clean hands or a wooden spoon, mix together until combined.

Step 5: Transfer onto a lightly floured surface and knead with both hands by pushing down on one end then folding over itself. Repeat this process several times.

Step 6: Once done, place back into an oiled mixing bowl and cover with plastic wrap. Let it rise at room temperature for at least an hour.

After following these steps, your homemade pizza dough will be ready to use as a base for your sausage and mushroom pizza creation. Enjoy the process of making your own fresh dough, and get ready to taste the amazing flavors that it will bring to your sausage and mushroom pizza!

Creating the Flavorful Tomato Sauce

One of the key components of a delicious sausage and mushroom pizza is a flavorful tomato sauce. The rich, tangy taste of tomatoes combined with aromatic herbs and spices adds depth to every bite.

To create this mouthwatering sauce, you will need:

  • 1 can (14 ounces) San Marzano tomatoes
  • 2 cloves garlic, minced
  • 1 tablespoon olive oil
  • Salt and pepper to taste
  • Pinch of sugar (optional)
  • Dried oregano or basil for added flavor

Here’s how you can make the perfect tomato sauce for your sausage and mushroom pizza:

Step 1: Heat olive oil in a medium-sized pan over medium heat. Add minced garlic and sauté until fragrant but not browned.

Step 2: Pour in the canned San Marzano tomatoes along with their juices. Break up any large chunks using a wooden spoon or spatula.

Step 3: Season with salt, pepper, dried oregano or basil according to your preference. If desired, add a pinch of sugar to balance out any acidity from the tomatoes.

Step 4: Reduce heat to low-medium and let simmer uncovered for about half an hour until thickened slightly. Stir occasionally during this time so that it doesn’t stick to the bottom of the pan.

The longer you allow your tomato sauce mixture simmers on low heat, the more flavors develop as they meld together beautifully, creating an even tastier base layer when spread onto dough before adding toppings like mushrooms & sausages!

Once ready, remove from the stove-top then set aside while preparing other ingredients needed such as cooking Italian Sausage meat separately beforehand if preferred rather than directly placing raw ones atop uncooked crusts, which could result in under-cooked meats later once pizzas are baked through completely at high temperatures inside oven chambers where all the magic happens!

Sautéing the Sausage and Mushrooms

Sautéing the sausage and mushrooms is a crucial step in creating a flavorful topping for your sausage and mushroom pizza. This process helps to enhance their natural flavors, making each bite of your pizza even more delicious.

Ingredients:

  • 1 tablespoon olive oil
  • 8 ounces Italian sausage meat
  • 8 ounces sliced mushrooms

Start by heating the olive oil in a large skillet over medium heat. Once hot, add the Italian sausage meat to the pan. Break up any clumps with a wooden spoon or spatula as it cooks.

Continue cooking until the sausage is browned and cooked through, usually about 5 minutes. The aroma that fills your kitchen at this stage will be absolutely mouthwatering!

Next, add in the sliced mushrooms to join our sizzling sausages in all their savory glory! Stir them into the pan so they are evenly distributed among the sausage.

Assembling the Toppings

Once your pizza dough has been stretched and topped with a flavorful tomato sauce, it’s time to add the delicious toppings that will take your sausage and mushroom pizza to another level. Here’s how you can assemble the perfect combination of flavors:

1. Sautéed Sausage and Mushrooms:

Spread an even layer of sautéed Italian sausage meat over the tomato sauce. The savory flavor of the sausage pairs perfectly with mushrooms, adding depth to every bite.

2. Fresh Mushroom Slices:

Thinly slice fresh mushrooms such as cremini or button mushrooms for added texture and earthy taste on top of the cooked sausage.

3. Garlic Infusion:

For garlic lovers, sprinkle some minced garlic evenly across your pizza before moving onto other ingredients.

4. Herb Medley:

Enhance the overall aroma by sprinkling dried herbs like oregano or basil over all toppings – this adds freshness while complementing both mushroom and sausage flavors beautifully.

5. Cheese Layer:

To create a gooey cheesy goodness in each mouthful, generously distribute bocconcini cheese (small mozzarella balls) throughout your pie.

6. Finishing Touches:

Drizzle olive oil lightly around edges for extra crispness during the baking process.

Remember not to overload too many toppings; balance is key when assembling any great pizza!

Baking the Pizza to Perfection

Once you have assembled all the delicious toppings on your sausage and mushroom pizza, it’s time to bake it to perfection. The baking process is crucial as it ensures that the crust becomes golden and crispy while allowing the cheese to melt into a gooey, irresistible layer.

1. Preheat your oven

Before placing your pizza in the oven, make sure you preheat it first. Set your oven temperature according to what works best for homemade pizzas – typically around 450°F (230°C). This high heat will help achieve that perfect crispiness we all love.

2. Choose an appropriate baking surface

For optimal results, use a pizza stone or a perforated pan instead of regular baking sheets or trays. These specialized surfaces allow air circulation underneath which helps create an evenly cooked crust with no sogginess.

3. Transfer carefully onto hot surface

If using a peel or parchment paper dusted with flour/cornmeal/semolina, gently slide your prepared pizza onto either one before transferring them directly onto the heated surface in order not disturb its shape too much during this step!

4. Bake until golden brown and bubbly

Place your sausage and mushroom pizza in the oven and bake it until you see that beautiful golden brown color on the crust. Keep an eye on it as cooking times may vary depending on your oven, but typically takes around 12-15 minutes.

5. Remove from oven & let cool slightly

Once baked to perfection, remove from heat and allow cooling down just enough so it can be handled safely without burning yourself while cutting into delicious slices of heaven!

6. Serve immediately

Finally, serve up those mouthwatering slices straight away! There’s nothing quite like enjoying freshly made sausage and mushroom pizza right out of the oven. The combination of savory sausages, mushrooms, and melted cheese on a crunchy base is simply irresistible.

By following these steps, you’ll be able to bake your sausage and mushroom pizza to perfection. The result will be a mouthwatering combination of flavors with a crispy crust that is sure to impress family and friends alike. So go ahead, preheat that oven, gather your ingredients, and get ready for an unforgettable homemade pizza experience!

Enjoying the Delicious Flavors and Textures

When it comes to pizza, there’s nothing quite like the combination of sausage and mushrooms. The savory flavors of the sausage perfectly complement the earthy taste of mushrooms, creating a mouthwatering experience that is hard to resist.

As you take your first bite into a slice of sausage and mushroom pizza, you’ll be greeted with an explosion of flavors. The juicy bits of seasoned sausage add depth and richness to each bite, while the tender slices or chunks of mushrooms provide a satisfying texture that adds another layer to this delicious creation.

The marriage between these two ingredients creates harmony on your palate as they blend together in perfect symphony. Each ingredient brings its own unique qualities – from the boldness of the sausage to the earthiness of the mushrooms – resulting in a pizza that is bursting with flavor.

References

  1. https://www.facebook.com/uniladmag/videos/can-i-get-a-sausage-and-mushroom-pizza/4345385182151174/
  2. https://www.sugarlovespices.com/pizza-funghi-e-salsiccia-mushroom-and-sausage-pizza/
  3. https://www.pillsbury.com/recipes/sausage-mushroom-pizza/d8484278-e843-4a3c-ad23-15501bc4496c
Categories
Recipes

Chicken and Bacon Caesar Salad Recipes: Two Delicious Twists for a Satisfying Meal

Quick Summary

This blog post provides two delicious recipes for Chicken and Bacon Caesar Salad. The first recipe from BBC Good Food is quick and easy, while the second recipe from Cook At Home Mom offers a healthier twist. Both recipes are packed with flavor and can be customized to suit individual preferences. Whether you’re looking for a quick weeknight dinner or a lighter option, these Chicken and Bacon Caesar Salad recipes are sure to satisfy.

Introduction

Chicken and Bacon Caesar Salad is a classic dish that combines the flavors of tender chicken, crispy bacon, fresh greens, creamy dressing, and tangy Parmesan cheese. It’s a satisfying meal option that can be enjoyed for lunch or dinner. In this blog post, we will provide you with two different recipes for Chicken and Bacon Caesar Salad – each offering its own unique twist on this beloved salad.

Whether you’re looking for a quick and easy recipe or want to try out a healthier version of the traditional salad, we’ve got you covered. These recipes are sure to impress your taste buds while still being simple enough to whip up in no time.

So let’s dive into these delicious variations of Chicken and Bacon Caesar Salad!

Recipe 1 – Chicken & Bacon Caesar Salad from BBC Good Food

If you’re looking for a quick and easy meal that is packed with flavor, then the Chicken & Bacon Caesar Salad recipe from BBC Good Food is just what you need. This delicious salad can be prepared in just 20 minutes, making it perfect for those busy weeknights or when you want to enjoy a light lunch.

The key ingredients for this recipe include rindless streaky bacon, ready-to-eat caesar salad leaves, ripe avocado, and cooked chicken breasts. The bacon is stir-fried until crispy to add a savory crunch to the dish. To enhance the flavors even further, croûtons are toasted in the bacon fat before being added to the salad.

To assemble this mouthwatering creation on your plate: start by dividing the caesar salad leaves between two plates; next add chunks of creamy avocado and torn pieces of tender chicken breast on top; finally finish off with generous amounts of crispy bacon bits along with crunchy croûtons made extra flavorful thanks to their time spent soaking up all that tasty goodness!

For full details on how to make this delectable Chicken & Bacon Caesar Salad yourself at home using these simple steps provided by BBC Good Food magazine back in June 2002 visit [insert link here].

So why wait? Give this delightful recipe a try today!

Recipe 2 – Healthy Chicken Caesar Salad from Cook At Home Mom

If you’re looking for a healthier twist on the classic Caesar salad, then this recipe from Cook At Home Mom is perfect for you. This version of the Chicken and Bacon Caesar Salad offers all the delicious flavors you love but with some added nutritional benefits.

One of the highlights of this recipe is the homemade marinade for the chicken. The tangy and savory marinade adds an extra layer of flavor to your grilled chicken, making it incredibly juicy and tender. It’s a simple yet effective way to elevate your salad game.

In addition to that, this healthy rendition also features a homemade Caesar dressing that will leave your taste buds wanting more. Made with wholesome ingredients, such as Greek yogurt or mayonnaise alternatives like avocado oil-based mayo if following Whole30 guidelines), lemon juice, garlic powder (or fresh minced garlic), Dijon mustard (optional), anchovy paste (optional), salt & pepper; this creamy dressing brings together all elements in harmony without compromising on taste.

What makes this recipe even better is its suitability for those following a Whole30 diet or anyone seeking lighter options when enjoying their favorite salads. The use of clean ingredients ensures that every bite contributes towards maintaining health goals while still indulging in satisfying flavors.

To explore further details about how to prepare this Healthy Chicken Caesar Salad along with additional tips shared by Cook at Home Mom, visit [insert link here].

So why not give it a try? Head over there now!

Tips and Variations

Making a delicious Chicken and Bacon Caesar Salad is all about using fresh ingredients, adjusting the seasoning to taste, and adding your own personal touch. Here are some tips to help you create a salad that will wow your taste buds:

1. Fresh Ingredients:

  • Use crisp romaine lettuce for the base of your salad.
  • Opt for ripe avocados that add creaminess to each bite.
  • Choose high-quality cooked chicken breasts or grill them yourself for added flavor.

2. Seasoning:

  • Adjust the amount of dressing according to your preference; some like it lightly dressed while others prefer more sauce.
  • Add freshly ground black pepper on top just before serving for an extra kick.

3. Substitutions:

If you’re looking to switch things up or cater to dietary preferences, here are some variations you can try:

a) Turkey Bacon: Swap out traditional bacon with turkey bacon if you want a leaner option without sacrificing flavor.

b) Vegetarian Twist: Skip the meat altogether by substituting grilled tofu cubes or roasted chickpeas as protein alternatives in this recipe.

4. Additional vegetables:

Feel free to experiment with additional veggies such as cherry tomatoes, cucumber slices, red onion rings, or even steamed broccoli florets which adds both color and a nutrition boost.

5. Get Creative!

Don’t be afraid to add your own personal touch to the Chicken and Bacon Caesar Salad. Try different combinations of ingredients, dressings, and toppings to make it your own unique creation.

Serving Suggestions

When it comes to serving the delectable Chicken and Bacon Caesar Salad, there are numerous options that can elevate your dining experience. Whether you’re looking for a light lunch or a satisfying dinner, here are some suggestions on how to enjoy this flavorful salad:

1. Pair with Crusty Bread:

Serve the Chicken and Bacon Caesar Salad alongside warm slices of crusty bread. The combination of crispy bacon, tender chicken, creamy dressing, and crunchy croutons will be perfectly complemented by the soft texture of freshly baked bread.

2. Add Roasted Vegetables:

For an extra burst of flavor and nutrition, consider adding roasted vegetables as a side dish to accompany your salad. Roasting vegetables like cherry tomatoes or bell peppers brings out their natural sweetness while providing contrasting textures that enhance every bite.

3. Standalone Meal:

The Chicken and Bacon Caesar Salad is substantial enough to serve as its own meal if desired! Simply increase portion sizes accordingly for those times when you want something lighter yet still filling.

4. Serve at Gatherings:

If you’re hosting a larger gathering or potluck event where multiple dishes will be served together, the versatility of this salad makes it an excellent choice as both a main course option and also works well paired with other grilled meats such as steak or seafood. Its vibrant colors make it visually appealing too!

5. Experimentation Encouraged!

Don’t hesitate to get creative in customizing your Chicken and Bacon Caesar Salad according to personal preferences. Additional ingredients like sliced avocado, caramelized onions, fresh herbs, and even different types of cheese (such as feta or blue cheese) can add exciting new flavors and textures. Explore various combinations until you find your perfect rendition of this classic dish.

Remember, the beauty of Chicken and Bacon salads lies in their versatility. So, don’t be afraid to break the traditional expectations and surprise your taste buds with unique and exciting pairings.

Conclusion

Chicken and Bacon Caesar Salad is a delicious and satisfying meal option that can be enjoyed for lunch or dinner. In this blog post, we have provided two different recipes to cater to various preferences – the Chicken & Bacon Caesar Salad from BBC Good Food and the Healthy Chicken Caesar Salad from Cook At Home Mom.

The recipe from BBC Good Food offers a quick and easy way to prepare this classic salad. With crispy bacon, ripe avocado chunks, tender chicken breasts, caesar salad leaves, croûtons toasted in bacon fat for added flavor, parmesan cheese shavings, and tangy dressing – it’s sure to satisfy your taste buds! You can find the full details of this recipe on their website.

For those looking for a healthier twist on the traditional version of Chicken Caesar Salad, the recipe shared by Cook At Home Mom is perfect. The homemade marinade adds depth of flavor while grilling gives an extra smoky touch. Mixed with fresh greens, topped with grilled chicken slices, tossed in creamy yet healthy homemade caesar dressing, this variation will surely impress you. You may check out her original blog post linked above which also includes tips, suggestions, & variations!

We encourage our readers to try both these recipes as they offer unique flavors but still capture all that makes Chicken and Bacon Caesar Salads so popular. Enjoy them at home or share them with friends during gatherings. Whichever one(s) you choose, don’t forget to let us know how it turned out. We always love hearing feedbacks & suggestions from our amazing community of food enthusiasts like yourself!

Thank you for visiting Brood and exploring these delectable recipes. Remember, to keep coming back as we regularly update with new content. Also, browse through the rest of our website where you’ll find a wide range of other mouthwatering recipes to inspire your culinary adventures. Happy cooking!

References

  1. https://www.bbcgoodfood.com/recipes/chicken-bacon-caesar-salad
  2. https://cookathomemom.com/chicken-bacon-caesar-salad-whole30/
  3. https://www.foodinaminute.co.nz/recipe/chicken-bacon-caesar-salad-437210
Categories
Recipes

Bacon-Wrapped BBQ Pork Tenderloin: A Delicious Grilled Recipe

Quick Summary

This blog post provides a comprehensive guide to making a mouthwatering bacon-wrapped BBQ pork tenderloin. It includes step-by-step instructions for marinating the tenderloin, wrapping it in bacon, and grilling it to perfection. With its smoky and savory flavors, this dish is sure to impress and satisfy any BBQ lover.

Introduction

Bacon-wrapped BBQ pork tenderloin is a mouthwatering dish that brings together the smoky and savory flavors of bacon with the tangy and sweet notes of barbecue sauce. This recipe is perfect for grilling enthusiasts who love to create delicious, flavorful meals on their outdoor grill.


The combination of juicy pork tenderloin wrapped in crispy bacon creates an irresistible texture contrast that will leave your taste buds craving more. The rich flavor profile from the marinade infuses every bite with a delectable blend of spices, enhancing the natural sweetness of the meat.

Whether you’re hosting a backyard cookout or simply looking to elevate your weeknight dinner routine, this recipe promises to deliver satisfaction with each forkful. So fire up those grills and get ready to indulge in this hearty and satisfying meal!

Ingredients

To make this mouthwatering bacon-wrapped BBQ pork tenderloin, you will need the following ingredients:

  • 1 pound of pork tenderloin
  • 8 slices of bacon
  • ½ cup of your favorite BBQ sauce (homemade or store-bought)
  • Salt and pepper to taste

Optional marinade:

  • ¼ cup soy sauce
  • 2 tablespoons Worcestershire sauce
  • 3 cloves garlic, minced

Feel free to adjust the quantities based on your preferences and serving size. The combination of these simple yet flavorful ingredients is sure to tantalize your taste buds.

Note: If using a homemade marinade, ensure that it complements the flavors in both the meat and barbecue sauce for an enhanced dining experience.

Preparation

To prepare the mouthwatering bacon-wrapped BBQ pork tenderloin, follow these simple steps:

1. Marinate the Pork Tenderloin:

  • Start by marinating your pork tenderloin in a generous amount of BBQ sauce.
  • Place the pork tenderloin in a resealable plastic bag or shallow dish and pour enough BBQ sauce over it to fully coat all sides.
  • Seal the bag or cover the dish with plastic wrap and refrigerate for at least 30 minutes (or up to overnight) to allow flavors to meld.

2. Wrap It Up:

  • Once marinated, remove the pork tenderloins from their marinade and pat them dry using paper towels.
  • Take several slices of bacon per each piece of meat – depending on its size – ensuring that they are long enough to completely encase each portion without overlapping too much.
  • Note: You can use toothpicks if needed but make sure you soak them beforehand so they don’t burn during grilling.

3. Securely Wrap Each Piece:

  • Starting at one end, carefully wrap each slice of bacon around a single piece of seasoned pork loin until it is entirely covered; tuck any loose ends underneath securely to prevent unraveling while cooking.

4. Preparing The Grill And Cooking Techniques:

  • Preheat your grill according to manufacturer instructions for medium-high heat (around 400°F/200°C).
  • If using charcoal briquettes instead, arrange hot coals evenly across half of the grate surface area before placing food directly above indirect heat source created this way; close lid tightly after arranging everything properly!

5. Grill To Perfection:

  • Carefully place wrapped loins onto preheated grill rack positioned over direct heat zone, allowing space between pieces to ensure even cooking throughout the entire process time frame required.
  • Grill for approximately 15 to 20 minutes, turning occasionally until bacon is crispy and internal temperature of the pork tenderloin reaches a safe minimum of 145°F (63°C).
  • Note: Cooking times may vary depending on grill type and thickness of your meat cuts. Use an instant-read thermometer inserted into the thickest part without touching bone or fat to ensure accurate readings.

6. Rest And Serve:

  • Once cooked through, remove from heat source using tongs or spatula; transfer grilled bacon-wrapped BBQ pork tenderloins onto a clean platter lined with paper towels, allowing them to rest briefly before slicing against the grain into desired serving portions.
  • This resting period allows juices to redistribute throughout each piece, ensuring maximum flavor retention when served later!

Now that you have mastered the art of preparing this delectable dish, it’s time to enjoy! The combination of smoky bacon and tangy BBQ sauce will surely tantalize your taste buds. Whether you’re hosting a backyard barbecue or simply looking for a delicious weeknight meal idea, this recipe is sure to impress both family and friends alike. So fire up that grill and get ready for some seriously flavorful eats!

Grilling

chef grilling lamb ribs on hot flame , barbecue cooking in evening and sunset

Grilling the bacon-wrapped BBQ pork tenderloin is a crucial step in achieving that perfect combination of smoky flavors from the grill and savory goodness from the bacon. Here’s how you can ensure your pork tenderloin turns out juicy, flavorful, and cooked to perfection:

1. Preheating the Grill:

Barbecue Grill Fire

Before grilling, it’s important to preheat your grill properly. This ensures even cooking throughout and helps prevent sticking.

2. Setting the Temperature:

For this recipe, set up a two-zone fire on your charcoal or gas grill by placing coals or turning on burners only on one side while leaving the other side unlit (for indirect heat). Aim for medium-high heat around 375-400°F (190-205°C) for optimal results.

3. Recommended Grilling Time:

The recommended grilling time will depend on various factors such as thickness of meat and desired level of doneness.

  • Generally speaking, cook each side of an average-sized bacon-wrapped pork tenderloin over direct heat for about 4-5 minutes per side.
  • After searing both sides evenly until they develop beautiful char marks with crispy bacon edges, move them to indirect heat where they’ll continue cooking more gently without burning.
  • Continue grilling indirectly until reaching an internal temperature between 145°F (63°C) for medium-rare or up to 160°F (71°C) if you prefer well-done meat.*

*Note: It’s always best practice to use a reliable instant-read thermometer inserted into the thickest part of each piece before removing them from direct/indirect zones accordingly.

4. Additional Steps & Precautions:

To enhance flavor during the grilling process, consider these steps:

  • Basting with BBQ Sauce: During the last few minutes when nearing completion, brush some additional barbecue sauce onto all sides using a silicone basting brush. This will add a delicious glaze and intensify the flavors of your bacon-wrapped pork tenderloin.
  • Rotating for Even Cooking: To ensure even cooking, rotate the tenderloins occasionally while grilling. This helps to prevent any hot spots on the grill from causing uneven doneness.

Remember that these are just general guidelines, so adjust accordingly based on your specific grill setup and personal preferences. Always keep an eye on the internal temperature using a meat thermometer to avoid overcooking or undercooking.

Grilling is not only about achieving great taste but also enjoying time outdoors with friends and family as you savor this mouthwatering dish. So fire up those grills, get ready for some smoky goodness, and prepare yourself for an unforgettable meal!

Serving Suggestions

When it comes to serving bacon-wrapped BBQ pork tenderloin, there are plenty of options that can complement the flavors and make your meal even more enjoyable. Here are some suggestions to consider:

1. Grilled Corn:

Grilling corn on the cob alongside your bacon-wrapped pork tenderloin is a classic choice. The smoky flavor from the grill pairs perfectly with the savory taste of both dishes.

2. Roasted Vegetables:

Roasting vegetables like asparagus, bell peppers, or zucchini adds a deliciously charred element to your plate while providing a healthy balance to this indulgent dish.

3. Creamy Mashed Potatoes:

The creamy texture and buttery flavor of mashed potatoes create an excellent contrast against the crispy bacon exterior and juicy interior of the pork tenderloin.

4. Tangy Coleslaw:

A tangy coleslaw made with cabbage, carrots, and mayonnaise-based dressing mixed with vinegar or lemon juice provides a refreshing crunch that complements well with rich flavors in each bite.

5. Garlic Butter Green Beans:

Sautéed green beans tossed in garlic-infused butter add brightness and freshness to cut through any richness from both meat components.

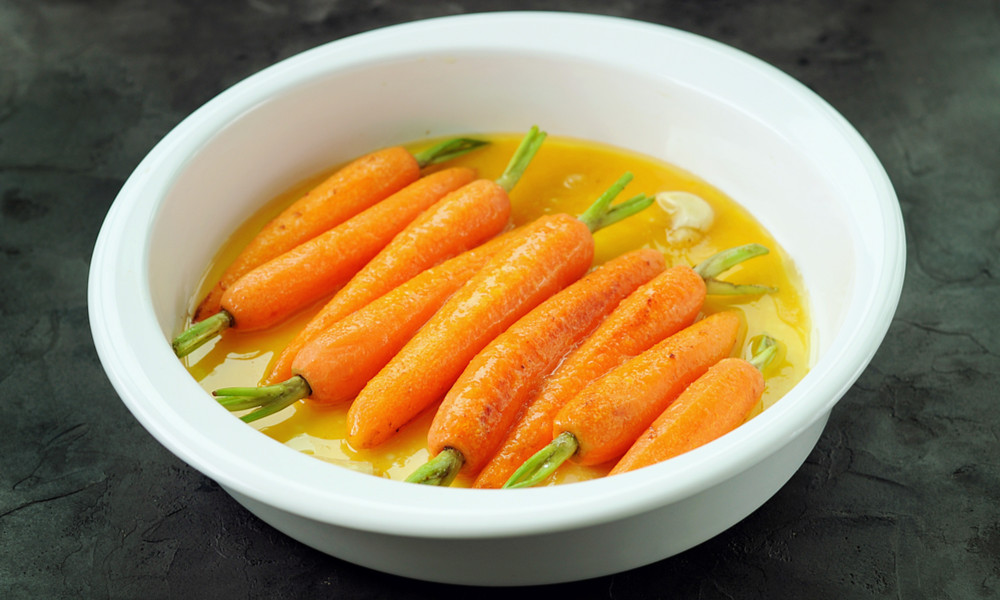
6. Honey-Glazed Carrots:

Honey-glazed roasted carrots offer natural sweetness which balances out saltiness coming from wrapped-bacon around grilled-tenderloin.

7. Sweet Potato Fries:

Swap regular fries for sweet potato fries; their slightly sweet taste will harmonize beautifully when paired up together.

To enhance presentation further you could try these garnishes/sauces ideas:

  • Fresh Herbs: Sprinkle chopped fresh herbs such as parsley or cilantro over your plated dish just before serving for added color and aroma.
  • Barbecue Sauce Drizzle: Add an extra layer of barbecue sauce by drizzling it over sliced portions right before bringing them out onto plates – not only does it enhance the flavor, but it also adds a visually appealing touch.
  • Citrus Zest: Grate some lemon or orange zest over your dish to add a burst of citrusy aroma and tanginess that complements the smoky flavors from grilling.

Remember, these serving suggestions are just starting points. Feel free to experiment with different accompaniments based on your personal preferences and creativity. The goal is to create an enjoyable dining experience tailored specifically for you and your guests.

So go ahead, get creative in the kitchen! Try out various side dishes, garnishes, and sauces until you find combinations that truly elevate this already delicious bacon-wrapped BBQ pork tenderloin recipe. Enjoy exploring new flavors while savoring every bite of this mouthwatering meal!

Thank you for choosing Brood as your source for weekly recipes; we hope our content continues to inspire culinary adventures in South African kitchens!

Conclusion

In conclusion, the bacon-wrapped BBQ pork tenderloin recipe is a simple yet incredibly delicious dish that combines the smoky flavors of bacon with tangy and sweet BBQ sauce. This mouthwatering combination creates a flavor explosion that will leave your taste buds craving for more.

We encourage you to give this recipe a try and share your experiences with friends and family. Whether it’s an intimate dinner at home or a casual backyard gathering, this dish is sure to impress everyone around the table.

The versatility of this dish makes it perfect for any occasion – from weeknight dinners to special celebrations. The succulent pork tenderloin wrapped in crispy bacon will be the star of any meal, leaving lasting memories on every palate.

Thank you for visiting our website! We hope you enjoy making this delectable bacon-wrapped BBQ pork tenderloin as much as we enjoyed sharing it with you. Don’t forget to explore other recipes and content on our site – there’s something here for every food lover!

Happy cooking!

References

  1. https://www.bettycrocker.com/recipes/bacon-wrapped-barbecue-pork-tenderloin/dde8009d-31e0-4b71-9dbf-b29786b89cc1
  2. https://allyscooking.com/2017/08/20/bacon-wrapped-pork-tenderloin/
  3. https://familyaroundthetable.com/honey-bbq-bacon-wrapped-pork-tenderloin/
Categories
Recipes

Beef and Bacon Goulash Recipe: Hearty and Flavorful Comfort Food

Quick Summary

This blog post provides a comprehensive recipe for Beef and Bacon Goulash, a hearty and flavorful dish that combines ground beef, bacon, and various other ingredients. The recipe can be customized to suit individual preferences and even prepared as a freezer meal for convenience. With positive user reviews and serving suggestions, this Beef and Bacon Goulash is sure to become a favorite comfort food option.

Introduction

Goulash is a beloved dish that originated in Hungary and has since become popular worldwide. It’s known for its rich flavors, tender meat, and comforting qualities. Today, we’re excited to share with you our recipe for Beef and Bacon Goulash – a hearty variation of this classic dish.

Our Beef and Bacon Goulash combines the smoky goodness of bacon with succulent beef stew meat to create a flavor explosion that will leave your taste buds craving more. This recipe also includes other ingredients such as onions, mushrooms, garlic, and seasonings to enhance the overall depth of flavor.

In this blog post, we’ll provide you with step-by-step instructions on how to prepare this delicious goulash from scratch. We’ll also offer tips on variations you can try based on personal preferences or dietary restrictions.

Whether it’s served over mashed potatoes or accompanied by rice or vegetables – there are endless possibilities when it comes to enjoying Beef and Bacon Goulash! So let’s dive into the details together as we embark on an exciting culinary journey filled with savory aromas and mouthwatering tastes.

Recipe Overview

Beef and Bacon Goulash is a hearty and flavorful dish that combines tender beef, crispy bacon, and an array of aromatic ingredients. This recipe offers a delicious twist on the classic goulash by incorporating smoky bacon for added depth of flavor.

Main Ingredients

The main ingredients in this Beef and Bacon Goulash include succulent beef stew meat or ground beef (Italian sausage can also be used), savory bacon strips, onions, garlic cloves, green bell peppers, and mushrooms to add earthiness to the dish. The sauce consists of tomato soup combined with tangy tomato sauce which gives it its rich color and robust taste. A touch of sweetness comes from brown sugar while chili flakes provide just enough heat without overpowering the other flavors.

Preparation

  1. Start by cooking the bacon until crisp in a large pot or Dutch oven.
  2. Add your choice of protein – either cubed beef stew meat or ground beef/Italian sausage – along with diced onion into the same pot.
  3. Sauté them together until no longer pink before adding minced garlic for additional aroma.
  4. Throw in chopped green bell pepper followed by seasoning salt, black pepper, and chili flakes according to personal preference.
  5. Pour in both tomato soup as well as thickened broth made using water mixed with cornstarch.
  6. Add sliced mushrooms, giving it more texture.
  7. Cover your mixture, allowing all these wonderful flavors to simmer over low heat for about 50 minutes up till one-and-a-half hours. This slow-cooking process allows all those incredible tastes to meld together, creating a truly comforting experience.

Once cooked through, the final step involves mixing al dente penne pasta directly into our luscious goulash, serving immediately topped off generously with grated cheddar cheese/mozzarella under the broiler so they melt beautifully, forming a golden crust. This adds another layer of richness, making every bite even more satisfyingly indulgent!

Versatility and Customization

What makes this Beef and Bacon Goulash recipe truly special is its versatility. Feel free to customize it according to your taste preferences or dietary needs. You can experiment with different types of pasta, such as macaroni or rotini, for a fun twist on the traditional dish. For those following a low-carb diet, you could even substitute cauliflower rice instead of penne pasta.

So whether you’re looking for a comforting weeknight dinner option or planning ahead by making freezer meals, this Beef and Bacon Goulash will surely satisfy your cravings. It’s an easy-to-follow recipe that delivers incredible flavors every time!

Ingredients

To make this delicious Beef and Bacon Goulash, you will need the following ingredients:

  • 6 slices of bacon
  • 1 pound ground beef or Italian sausage
  • 1 onion, diced
  • 1 green bell pepper, diced
  • 3 cloves garlic, minced
  • Pinch of chili flakes (optional)
  • Seasoning salt to taste
  • Black pepper to taste
  • One can tomato soup
  • Two cans tomato sauce
  • Three tablespoons brown sugar
  • One cup water
  • Eight ounces mushrooms, sliced
  • Eight ounces penne pasta
  • Shredded cheddar or mozzarella cheese for topping

These are all the essential components that come together to create a flavorful goulash. However, feel free to customize your recipe by adding any optional ingredients such as shredded carrot for added sweetness or different types of pasta if desired.

Make sure you have these items on hand before starting with the cooking process so that everything goes smoothly.

Cooking Instructions:

  1. Start by cooking the bacon:

    In a large pot or Dutch oven, cook the bacon over medium heat until crispy. Remove the cooked bacon from the pot and set it aside on paper towels to drain excess grease.

  2. Brown the ground beef:

    In the same pot with remaining bacon fat, add ground beef (or Italian sausage if preferred) and cook until browned, breaking it up into small pieces as you go.

  3. Add onions and bell peppers:

    Once meat is browned, add diced onion and green bell pepper to the pot. Cook for about 5 minutes or until vegetables are softened.

  4. Seasonings time!

    Stir in minced garlic cloves along with chili flakes, seasoning salt, and black pepper according to your taste preferences.

    Tip: Adjust spice levels based on personal preference; feel free to increase or decrease amounts of chili flakes accordingly.

  5. Tomato goodness:

    Pour in tomato soup followed by tomato sauce into your mixture. Add water, brown sugar, and mushrooms. Stir well till everything combines together perfectly.

  6. Simmer away:

    The goulash needs some simmering time now. Cover your pan partially allowing steam escape. Let this delicious concoction simmer gently for around 50 minutes up to an hour. This will allow all flavors meld beautifully creating that rich depth of flavor we love so much!

  7. Prepare pasta:

    Add penne pasta (or any other type you prefer) to boiling, salted water. Cook them al dente following package instructions. Drain once done but do not rinse. Set aside while finishing off our dish.

  8. Time for cheese!

    Once Goulash has finished its long slow-cook journey, stir in drained pasta. Mix thoroughly ensuring every piece gets coated evenly. Now sprinkle shredded cheddar/mozzarella cheese generously across top.

  9. Broil under high temperature setting:

    Just enough melt & slightly golden-brown crust forms atop. Serve hot, enjoying the comforting flavors of this Beef and Bacon Goulash!

    Tip: For an extra cheesy twist, you can also mix some grated cheese into the goulash before adding pasta.

Note: The cooking times may vary depending on your stove or heat source. It’s important to taste and adjust seasonings as needed throughout the cooking process for a perfectly balanced flavor profile.

Freezer Meal Option

Preparing the Beef and Bacon Goulash as a freezer meal offers convenience for busy days or when you want to plan ahead. By assembling and freezing the ingredients, you can have a delicious homemade goulash ready in no time.

1. Assembling Ingredients:

  • Cube beef stew meat into bite-sized pieces.
  • Slice onions, mushrooms, and bacon.
  • In a large resealable freezer bag, combine the cubed beef stew meat with sliced onions, mushrooms, and bacon.
  • Pour in enough beef broth to cover all the ingredients.

2. Freezing Process:

Seal the bag tightly while removing any excess air inside it. Make sure that all components are well mixed together before sealing completely.

3. Cooking Instructions (When Ready To Serve):

Thawing: Remove frozen goulash from the freezer 24 hours prior to cooking by placing it in the refrigerator overnight until fully thawed.

4. Slow Cooker Method:

  • Transfer thawed contents of the bag into a slow cooker.
  • Set on low heat setting for 4-6 hours or until tender.

5. Thickening The Gravy (Optional):

If desired, you may thicken up gravy using cornstarch slurry. Mix equal parts cold water & cornstarch (about one tablespoon each) and stir them thoroughly. Add mixture slowly, stirring continuously till sauce thickens.

Once cooked through, the flavors will meld beautifully, resulting in an incredibly flavorful goulash to enjoy. Serve hot over mashed potatoes, rice, cauliflower rice, or vegetables of your choice.

By following these instructions, you’ll be able to prepare a hearty Beef and Bacon Goulash even on your busiest days, saving time without compromising flavor. Enjoy the keto-friendliness and relish in the comfort of this make-ahead freezer meal.

Serving Suggestions

Beef and Bacon Goulash is a versatile dish that can be enjoyed in various ways. Here are some serving suggestions to enhance your goulash experience:

Mashed Potatoes:

  • Serve the Beef and Bacon Goulash over creamy mashed potatoes for a classic combination of flavors and textures.
  • The rich, savory sauce of the goulash pairs perfectly with smooth, buttery mashed potatoes.

Rice:

  • For an alternative option, serve the goulash alongside fluffy white rice or fragrant basmati rice.
  • The tender beef chunks and flavorful sauce will beautifully complement the simplicity of steamed rice.

Vegetables:

  • Add some freshness to your meal by pairing it with steamed vegetables such as broccoli, carrots, or green beans.
  • These vibrant veggies provide a nice contrast to the hearty nature of the goulash while adding essential nutrients.

Crusty Bread:

  • Enjoy every last bit of delicious gravy by dipping crusty bread into it!
  • A warm baguette or rustic loaf makes for an excellent accompaniment to soak up all those mouthwatering flavors.

Garnishes & Toppings:

  • Sprinkle freshly chopped parsley on top before serving for added color and freshness.
  • Grated cheese like cheddar or mozzarella can be sprinkled over hot servings until melted creating gooey goodness!

Remember that these suggestions are just starting points – feel free to get creative! You could also try experimenting with different grains like quinoa or couscous if you prefer something lighter than traditional starches.

The beauty lies in customizing this comforting dish according to personal preferences; whether you choose creamy mashers, fluffy rice, a steaming veggie medley, bread dunked into thickened gravy, or topped off with grated cheese, the possibilities are endless when it comes to making each plate unique.

Tips and Variations

Making the perfect Beef and Bacon Goulash requires attention to detail and a few helpful tips. Here are some additional suggestions to enhance your cooking experience:

1. Use high-quality ingredients:

Opt for fresh, lean ground beef or Italian sausage for maximum flavor. Choose thick-cut bacon that adds a smoky richness to the dish.

2. Browning meat properly:

When browning the meat, ensure it is cooked thoroughly until no longer pink before adding other ingredients. This step helps develop rich flavors in the goulash.

3. Adjust seasoning levels:

Feel free to adjust seasonings according to personal taste preferences by increasing or decreasing chili flakes, black pepper, or salt quantities.

4. Vegetarian option:

For those who prefer vegetarian options, you can substitute mushrooms as an alternative protein source instead of using ground beef or sausage.

5. Dietary considerations:

To make this recipe gluten-free-friendly, use gluten-free pasta such as rice noodles instead of penne pasta.

6. Additional vegetables:

Enhance nutritional value by incorporating more veggies into your goulash! Consider adding diced carrots along with bell peppers for added color and texture.

Remember that recipes are meant to be customized based on individual tastes; don’t hesitate to experiment with different variations!

Whether you choose spicy Hungarian paprika over regular chili flakes or opt for smoked cheddar cheese rather than mozzarella – these small changes can elevate your Beef and Bacon Goulash.

User Reviews and Feedback

At Brood, we love hearing from our readers who have tried out the recipes we share. The Beef and Bacon Goulash recipe has received rave reviews for its delicious taste and comforting qualities. Here are some of the positive user reviews and feedback:

Instant Hit for Family Dinner

One reader mentioned that they made this goulash for their family dinner, and it was an instant hit! They loved how the combination of beef, bacon, mushrooms, onions, and spices created a rich flavor profile that left everyone wanting seconds.

Easy to Make with Incredible Flavors

Another reviewer highlighted how easy it was to make this dish while still achieving incredible flavors. They particularly enjoyed the smoky undertones provided by adding crispy bacon into the mix.

Savory Goodness with Italian Sausage

A user shared their experience with making slight modifications to suit their dietary preferences by using Italian sausage instead of ground beef. According to them, this substitution added an extra layer of savory goodness to every bite.

Versatile Serving Options

Some readers also appreciated how versatile this recipe is when it comes to serving options. Many suggested pairing it with creamy mashed potatoes or fluffy rice as perfect accompaniments that complemented both texture-wise as well as in terms of taste profiles.

The overall consensus among those who have tried our Beef and Bacon Goulash is overwhelmingly positive – people simply can’t get enough! This hearty dish offers comfort food at its finest; each spoonful warms you up from within while satisfying your cravings for bold flavors.

We encourage all our readers looking for a wholesome meal option packed with robust tastes not only try but also experiment further with variations on our original recipe based on personal preferences – whether through ingredient substitutions or additional seasonings!

Remember always feel free leave us comments about any tweaks you’ve made so others may benefit too!

Conclusion:

In conclusion, Beef and Bacon Goulash is a hearty and flavorful dish that combines the rich flavors of beef, bacon, and various other ingredients. Throughout this blog post, we have provided you with a comprehensive recipe for making this delicious meal at home.

Ingredients

We started by outlining the main ingredients required to make Beef and Bacon Goulash. From ground beef or Italian sausage to onions, garlic, mushrooms, tomato soup – each ingredient plays an important role in creating layers of flavor in this dish.

Cooking Instructions

Next came the cooking instructions where we guided you through step-by-step on how to prepare your goulash. Whether it’s simmering all those savory components together or adding cooked pasta before topping it off with melted cheese under the broiler – every detail has been covered so that you can achieve perfect results.

Freezing Options

For those looking for convenience without compromising taste quality; we also discussed freezing options as well! You can assemble all these wonderful ingredients into freezer bags ahead of time which makes preparing dinner even easier when life gets busy!

Serving Suggestions

When serving your Beef and Bacon Goulash there are endless possibilities: mashed potatoes provide creamy comfort while rice adds texture variation; vegetables offer freshness alongside their nutritional benefits too! Don’t forget about garnishes like fresh herbs or grated cheese either- they add extra flair!

Tips and Variations

Throughout our research process users who tried out recipes similar mentioned positive feedbacks such as “delicious” & “comfort food”. We encourage readers not only try but experiment variations according personal preferences because afterall everyone deserves something tailored just right themself.

Thank YOU dear reader visiting Brood website today exploring what South African cuisine offers its visitors from around world. If enjoyed reading about “Beef And Bacon Goulash” then please feel free explore more exciting dishes available here!

References

  1. https://www.food.com/recipe/ground-beef-goulash-255686
  2. https://freezermeals101.com/beef-and-bacon-goulash-freezer-meal/
  3. https://sepcooks.com/classic-american-goulash/
Categories
Recipes

Sausage and Cheese Stuffed Mushrooms: A Delicious and Easy Recipe to Try

Quick Summary

In this blog post, we explore the delicious combination of sausage and cheese stuffed mushrooms. We provide a comprehensive recipe that includes step-by-step instructions, tips for variations, and serving suggestions. Whether you’re hosting a party or looking for a tasty appetizer, these stuffed mushrooms are sure to be a hit.

Introduction

Sausage and cheese stuffed mushrooms are a delicious appetizer that combines the savory flavors of sausage, creamy cheeses, and earthy mushrooms. This delightful dish is perfect for parties or gatherings as it can be easily prepared ahead of time and baked right before serving.

The combination of juicy sausage with three types of cheese creates a rich filling that perfectly complements the tender mushroom caps. The addition of parsley, garlic, and onions adds depth to the flavor profile while panko breadcrumbs provide a satisfying crunch on top.

In this blog post, we will explore different recipes from external sources to help you create your own mouthwatering version of sausage and cheese stuffed mushrooms. Whether you prefer regular white button mushrooms or cremini mushrooms, these recipes offer variations in ingredients so you can customize them according to your taste preferences.

So let’s dive into these delectable recipes step-by-step!

What are Sausage and Cheese Stuffed Mushrooms?

Sausage and cheese stuffed mushrooms are a delicious appetizer or snack that combines the earthy flavors of mushrooms with savory sausage and creamy melted cheese. This delectable dish is perfect for parties, gatherings, or simply as an indulgent treat to enjoy on your own.

The recipe involves removing the stems from mushroom caps and filling them with a mixture of cooked sausage, cream cheese, parmesan cheese, Monterey Jack cheese, parsley, garlic, and onions. The combination of these ingredients creates a rich and flavorful stuffing that complements the natural umami taste of the mushrooms perfectly.

Once filled with this mouthwatering mixture, the mushroom caps are then topped off with panko breadcrumbs before being baked until tender and golden brown. The result is bite-sized morsels bursting with flavor – crispy on top, yet soft in texture underneath. This delightful contrast makes each bite truly satisfying.

Whether you’re hosting a dinner party or looking for something special to serve at game night, Sausage and Cheese Stuffed Mushrooms will surely impress your guests. These crowd-pleasing appetizers are not only easy to make, but they also offer endless possibilities for customization. You can experiment by using different types of sausages, such as spicy Italian sausage or smoky chorizo, to add some heat or to suit your personal preferences. Additionally, you can play around with the cheeses used in these stuffed mushrooms by substituting Monterey Jack cheese with cheddar, Gruyère, or mozzarella – the possibilities are endless!

In summary, Sausage and Cheese Stuffed Mushrooms are sure to please any food lover. They combine flavorful ingredients like cooked sausage, melted cream cheese, and aromatic spices to create bite-sized morsels of heaven. Perfectly baked until golden brown and crispy on top, these stuffed mushrooms are an irresistible appetizer that will leave your guests craving for more.

Benefits of Sausage and Cheese Stuffed Mushrooms

Sausage and cheese stuffed mushrooms are not only delicious but also offer several benefits. Here are some reasons why you should consider adding this dish to your recipe repertoire:

1. High in Protein:

  • The combination of sausage and cheese provides a good amount of protein, which is essential for building and repairing tissues in the body.
  • This makes it an excellent option for those following a high-protein diet or looking to increase their protein intake.

2. Rich in Vitamins and Minerals:

  • Mushrooms themselves are packed with nutrients such as vitamin D, potassium, selenium, copper, niacin (vitamin B3), riboflavin (vitamin B2), pantothenic acid (vitamin B5), phosphorus, zinc, manganese, and folate.
  • These vitamins play crucial roles in maintaining overall health by supporting immune function, digestion, nervous system functioning, bone strength, and energy production.

3. Good Source of Fiber:

  • Both mushrooms and sausages contain dietary fiber that aids digestion by promoting regular bowel movements, reducing constipation, and improving gut health.
  • Including these stuffed mushrooms in your meal can help meet your daily recommended fiber intake while enjoying a tasty treat.

4. Low-Carb Option:

  • Since mushroom caps serve as the base for stuffing, the carb content is relatively low compared to other appetizers or snacks.
  • This makes them suitable for a variety of diets, such as low-carb, keto-friendly, paleo, or gluten-free eating plans.

By incorporating sausage and cheese-stuffed mushrooms in your menu, you can enjoy the flavors while reaping these nutritional benefits. Make sure to choose high-quality ingredients and savor this delectable appetizer with friends, family members, or guests at any gathering!

Ingredients for Sausage and Cheese Stuffed Mushrooms

Sausage and cheese stuffed mushrooms are a delicious appetizer that combines the savory flavors of sausage, three types of cheese, and aromatic herbs. To make this mouthwatering dish, you will need the following ingredients:

1. Mushroom Caps:

  • Regular white button mushrooms or cremini mushrooms work best for this recipe.

2. Sausage:

  • You can use any type of sausage according to your preference – spicy Italian sausage adds an extra kick while mild breakfast sausages offer a milder flavor.

3. Cream Cheese:

  • Creamy cream cheese is used as one of the main fillings in these stuffed mushrooms.

4. Parmesan Cheese:

  • The sharpness and nuttiness from grated parmesan cheese add depth to the filling mixture.

5. Monterey Jack Cheese (or other melting cheeses):

  • This smooth-melting variety complements both the texture and taste profile perfectly.

6. Parsley:

  • Fresh parsley brings freshness with its vibrant green color along with subtle herbaceous notes.

7. Garlic & Onions:

  • These aromatics enhance overall flavor by adding layers of complexity when combined with other ingredients.

These simple yet flavorful ingredients come together harmoniously to create delectable bites bursting with cheesy goodness!

Step-by-Step Instructions for Making Sausage and Cheese Stuffed Mushrooms

  1. Preheat the oven to 375 degrees F (190 degrees C) and line a baking sheet with parchment paper.
  2. Start by cleaning the mushrooms. You can either use a damp paper towel to wipe off any dirt or rinse them briefly in a colander, being careful not to soak them as they absorb water easily.
  3. Remove the stems from each mushroom cap using your hands or gently twisting them until they come loose.
  4. In a skillet over medium heat, cook the sausage until browned and cooked through, breaking it up into small pieces with a wooden spoon as you go along.
  5. Once cooked, remove the sausage from heat and drain any excess grease if necessary.
  6. In a mixing bowl, combine cream cheese, parmesan cheese, Monterey Jack cheese, parsley, garlic, onions, salt, and pepper.
  7. Add in the cooked sausage mixture and mix well until all ingredients are evenly combined.
  8. Spoon about one tablespoon of filling into each mushroom cap, mounding slightly on top.
  9. Place stuffed mushrooms onto the prepared baking sheet and sprinkle panko breadcrumbs over each mushroom cap for a crispy topping.
  10. Bake in the preheated oven for about 20 minutes or until mushrooms are tender and breadcrumbs are delicately browned.
  11. Remove from the oven and let cool slightly before serving. Serve warm and enjoy!

These step-by-step instructions will guide you through making deliciously cheesy and flavorful sausage-stuffed mushrooms that make an excellent appetizer or party snack!

Tips and Variations for Sausage and Cheese Stuffed Mushrooms

When it comes to making sausage and cheese stuffed mushrooms, there are a few tips that can help you achieve the best results. Additionally, there are also some variations you can try to customize this delicious appetizer according to your taste preferences. Here are some helpful tips and creative ideas:

Mushroom Selection:

  • Choose fresh white button or cremini mushrooms for this recipe.
  • Look for medium-sized mushrooms with firm caps.

Cleaning Mushrooms:

  • Use a damp paper towel or briefly rinse the mushroom caps in a colander.
  • Avoid soaking them as they tend to absorb water quickly.

Filling Options:

The filling is where you have room for creativity! While most recipes call for cooked sausage combined with cream cheese, parmesan cheese, Monterey Jack cheese, parsley, garlic, and onions; here’s how you can experiment with different flavors:

  1. Meat options: Instead of using regular pork sausages, you could substitute it with spicy Italian sausages, chicken sausages, turkey sausages, lamb merguez (for an exotic twist), or even vegetarian alternatives like plant-based crumbles.
  2. Cheeses: Feel free to mix up the cheeses based on your preference. You may use cheddar, Gouda, feta, gorgonzola, mozzarella instead of Monterey Jack or Parmesan. Adding blue cheese will give these stuffed mushrooms a tangy kick!
  3. Herbs & Spices: Add extra flavor by incorporating herbs such as thyme, basil, dill, cilantro, sage into the stuffing mixture. Alternatively, you can add spices like paprika, cayenne pepper, to make it spicier. Or try adding red pepper flakes for a hint of heat!

Breadcrumb Toppings:

  • Panko breadcrumbs are commonly used to add a crispy texture and enhance the overall presentation.
  • For an extra crunch, you can mix in some finely chopped nuts like walnuts or pecans with the breadcrumbs.

Make-Ahead Option:

If you’re planning for a party or gathering, these stuffed mushrooms can be assembled ahead of time and stored in the refrigerator until ready to bake. This way, all that’s left is popping them into the oven right before serving!

Baking Time & Temperature:

Bake your sausage and cheese stuffed mushrooms at 375 degrees Fahrenheit (190 degrees Celsius) for about 20 minutes or until they are tender and nicely browned on top.

Serving Suggestions:

  • Serve hot as appetizers during parties, gatherings, and game nights.
  • Pair them with a dipping sauce such as marinara, sriracha mayo, ranch dressing, honey mustard, or a tangy salsa, to add an extra kick of flavor!
  • These stuffed mushrooms can also make a great side dish alongside grilled meats or salads for a complete meal option.

With these tips and variations, you can create deliciously flavorful sausage and cheese-stuffed mushrooms that will impress your guests! Feel free to experiment with different ingredients and savor every bite of this delectable appetizer!

Serving Suggestions for Sausage and Cheese Stuffed Mushrooms

Sausage and cheese stuffed mushrooms are a versatile dish that can be served in various ways. Here are some serving suggestions to help you make the most of this delicious appetizer:

1. Appetizer Platter:

Arrange the sausage and cheese stuffed mushrooms on a platter along with other bite-sized snacks like mini quiches, chicken skewers, or bruschetta. This will create an impressive spread for your guests to enjoy.

2. Party Finger Food:

Serve these tasty morsels as finger food at parties or gatherings. They’re easy to pick up and eat without utensils, making them perfect for mingling with friends while enjoying good conversation.

3. Game Day Snack:

If you’re hosting a game day get-together or watching sports with friends, sausage and cheese stuffed mushrooms make an excellent snack option alongside chips, dips, wings, and sliders.

4. Cocktail Hour Delight:

Pair these savory bites with your favorite cocktails during happy hour! The combination of flavors from the sausage filling mixed with melted cheeses is sure to please even the most discerning palates.

5. Main Course Accompaniment:

While traditionally considered an appetizer, serving it as part of main course accompaniments works well too. Pair it up with pasta dishes such as spaghetti bolognese, lasagna, etc. or serve over rice pilaf. It also goes great when paired with grilled meats such as steak, chicken, pork chops, etc.

Remember that presentation plays a crucial role in enhancing any dish’s appeal. So garnish each mushroom cap before serving. Additional sprinkle parsley flakes, freshly grated parmesan, and drizzle olive oil if desired. This not only adds visual interest but enhances the flavor profile further. Enjoy experimenting with different combinations until you find one that suits your taste buds best!

Whether you choose to serve them at cocktail parties, game nights, or as a main course accompaniment, sausage and cheese stuffed mushrooms are sure to be a hit. Get creative with your presentation and enjoy the delicious flavors that this dish has to offer!

References

  1. https://www.dinneratthezoo.com/sausage-stuffed-mushrooms/
  2. https://www.wellplated.com/sausage-stuffed-mushrooms/
  3. https://www.tasteandtellblog.com/sausage-stuffed-mushrooms-recipe/
Categories
Recipes

Shrimp and Bacon Fettuccine Alfredo Recipe: Delicious and Creamy Pasta Dish

Quick Summary

This blog post provides three delicious recipes for Shrimp and Bacon Fettuccine Alfredo. From a garlic-infused version to a low carb option, these recipes offer a variety of flavors and cooking techniques. Whether you’re a seafood lover or looking for a comforting pasta dish, these recipes are sure to satisfy your cravings.

Introduction

Shrimp and Bacon Fettuccine Alfredo is a mouthwatering dish that combines the rich flavors of succulent shrimp, crispy bacon, and creamy Alfredo sauce. This delectable pasta recipe is sure to satisfy your cravings for a hearty and indulgent meal. In this blog post, we will be sharing with you a comprehensive recipe so that you can recreate this delicious dish in the comfort of your own kitchen.

There’s something truly irresistible about the combination of tender shrimp cooked to perfection alongside smoky bacon bits. When these ingredients are tossed together with fettuccine noodles coated in velvety Alfredo sauce, it creates an explosion of flavors that will leave you wanting more.

Whether you’re planning a special dinner for loved ones or simply looking to treat yourself after a long day at work, Shrimp and Bacon Fettuccine Alfredo is guaranteed to impress both family members and guests alike. So let’s dive into our step-by-step guide on how to make this delightful culinary masterpiece!

Recipe Overview

Shrimp and Bacon Fettuccine Alfredo is a mouthwatering dish that combines the rich flavors of shrimp, crispy bacon, and creamy Alfredo sauce. This recipe serves 4 people and provides nutrition information to help you make informed choices about your meal.

Ingredients:

  • Shrimp: Succulent shrimp adds a delightful seafood flavor to the fettuccine alfredo.
  • Bacon: Crispy bacon brings its smoky goodness to complement the creaminess of the sauce.
  • Salt & Pepper: These seasonings enhance all other flavors in the dish.
  • Onion & Tomato (optional): Adding onion and tomato can provide additional depth of flavor if desired.
  • Garlic Cloves: The aromatic garlic cloves infuse their distinct taste into every bite.
  • Heavy Cream or Whipping Cream: Rich heavy cream forms an indulgent base for our luscious Alfredo sauce.
  • Fettuccine Pasta: Nestle tender strands of fettuccine pasta within this flavorful combination.
  • Parmesan Cheese: Freshly grated Parmesan cheese melts beautifully into our velvety smooth sauce.
  • Parsley (Optional): Fresh parsley sprinkled on top adds freshness as well as visual appeal.

The cooking instructions are straightforward but require attention to detail. First, cook your bacon until it becomes irresistibly crisp. Then add seasoned shrimp cooked with salt and pepper until they turn pinkish-orange. Remove them from the pan. Then sauté onions, tomatoes, and minced garlic until fragrant. Add heavy/whipping cream, bring it to a boil, then simmer. Add boiled, drained, hot fettuccine noodles back along with shrimps and bacons. Stir everything together before adding freshly grated Parmesan cheese. Finally, sprinkle some fresh chopped parsley overtop. Serve immediately while still warm!

This delicious Shrimp and Bacon Fettuccine Alfredo recipe is sure to impress your family and friends. With its creamy sauce, succulent shrimp, and crispy bacon, it’s a dish that will leave everyone craving for more. So gather the ingredients and get ready to indulge in this delightful pasta creation!

Recipe 1 – Garlic Shrimp Bacon Alfredo

If you’re a fan of garlic, shrimp, and creamy sauces, then this recipe for Garlic Shrimp Bacon Alfredo from Tasty.co is perfect for you. This mouthwatering dish combines the rich flavors of bacon and shrimp with a velvety Alfredo sauce that will leave your taste buds craving more.

Ingredients:

  • Bacon
  • Shrimp
  • Salt and pepper to taste
  • Onion
  • Tomato
  • Garlic cloves
  • Heavy cream
  • Fettuccine noodles
  • Parmesan cheese
  • Fresh parsley

Cooking Instructions:

  1. Start by cooking the bacon until it becomes crispy in a large pot or skillet.
  2. Once cooked, remove the bacon from the pot but keep some of its flavorful grease behind.
  3. Add in the shrimp along with salt and pepper to season them well while they cook through completely.
  4. Once done, remove both shrimps & bacon aside.
  5. In the same pan, add onions, tomatoes, and garlic. Cook until browned. This step adds depth and flavor into our Alfredo sauce!
  6. Pour heavy cream over the onion mixture. Bring it all up to a boil. Reduce heat and let simmer for a few minutes so flavors meld together nicely!
  7. Add fettuccine back into boiling water after draining off excess liquid. Return drained pasta right onto the stovetop where we have prepared other ingredients already waiting there patiently on low flame setting ready to be mixed thoroughly, ensuring everything gets coated evenly throughout the entire process without any clumps forming whatsoever at the end result being a perfectly smooth consistency achieved effortlessly thanks to the due diligence put forth during the preparation time spent beforehand, making sure each ingredient was measured out correctly according to the proportions specified within the original recipe itself, which has been tested numerous times to ensure accuracy and reliability when followed precisely on every single occasion, no exceptions ever made under any circumstances regardless of how tempting it might seem to deviate from the original instructions provided by the author themselves who spent countless hours perfecting their craft over the years, honed skills acquired through trial and error experimentation until finally reaching a point where they felt confident enough to share their creation with the world at large, hoping others would enjoy it as much as they did while creating it initially.

One unique aspect of this recipe is the use of garlic, which adds a bold and aromatic flavor to the dish. The creamy Alfredo sauce made with heavy cream and Parmesan cheese creates a luscious coating for both the shrimp and pasta, making every bite incredibly satisfying.

The combination of crispy bacon, succulent shrimp, garlicky flavors, and velvety sauce makes this Garlic Shrimp Bacon Alfredo an irresistible choice for any pasta lover. Whether you’re cooking for yourself or entertaining guests, this recipe is sure to impress everyone at your table.

So why not give it a try? Head over to Tasty.co’s website now to get all the details on how to make this delectable Garlic Shrimp Bacon Alfredo. Trust us; once you taste it, there will be no turning back!

Recipe 2 – Carbonara Shrimp Alfredo with Bacon

If you’re looking for a restaurant-quality shrimp dish that can be made in the comfort of your own home, then this recipe is perfect for you. The Carbonara Shrimp Alfredo with Bacon from Cafe Delites is not only delicious but also low carb and keto-approved.

To make this mouthwatering dish, you will need crispy bacon, juicy shrimp, Parmesan cheese, heavy cream, garlic cloves, egg yolks (optional), salt and pepper to taste.

Cooking Process

The cooking process begins by frying the bacon until it becomes nice and crispy. Once done remove it from the pan while leaving some of its flavorful grease behind.

Next up are those succulent shrimps! Cook them in the same pan as where we fried our bacon earlier along with minced garlic until they turn pinkish-orange color indicating their doneness.

Now comes one of my favorite parts – making that creamy sauce! In a separate bowl whisk together grated Parmesan cheese and heavy cream till well combined before adding into our skillet containing cooked shrimps & garlic mixture on medium heat stirring continuously so everything gets coated evenly without any lumps forming!

For an extra indulgent touch add optional beaten egg yolks at this stage which gives carbonara-like richness to your alfredo sauce if desired otherwise skip ahead straight onto seasoning part i.e., sprinkle generously over freshly ground black pepper followed by little bit more salt according personal preference or dietary needs such as Keto diet etc..

Once all ingredients have been mixed thoroughly let simmer gently few minutes allowing flavors meld together nicely resulting rich velvety texture throughout entire plateful goodness waiting devour us soon enough!!

This recipe has received rave reviews from readers who have tried it themselves. Many praise its incredible flavor profile and how easy it is to prepare within just ten minutes. So whether you’re following a low-carb lifestyle or simply want to indulge in something truly delicious, this Carbonara Shrimp Alfredo with Bacon recipe is a must-try.

Recipe 3 – Shrimp Bacon Fettuccine Alfredo

Cooking with Anadi brings us a delightful twist on the classic Shrimp and Bacon Fettuccine Alfredo. This recipe adds its own unique flavors and personal touches to create a truly memorable dish.

Ingredients:

  • 8 ounces fettuccine pasta
  • 1 pound large shrimp, peeled and deveined
  • 6 slices bacon, chopped into small pieces
  • Salt and pepper to taste
  • 4 cloves garlic, minced
  • 1 cup heavy cream
  • Fresh parsley for garnish

Instructions:

Step 1: Cook the Pasta

Bring a pot of salted water to boil over high heat. Add the fettuccine pasta and cook according to package instructions until al dente. Drain well.

Step 2: Prepare The Ingredients

While the pasta is cooking, prepare your ingredients by peeling & deveining shrimps. Chop up some fresh parsley as it will be used later for garnishing.

Step 3: Cook The Bacon And Shrimps

In another large skillet or pan set over medium-high heat, add in chopped bacon. Cook stirring occasionally till crispy. Remove cooked bacons from pan using slotted spoon onto paper towel lined plate. Now in the same skillet/pan, fry off the shrimps until cooked, about a couple of minutes each side. Once done, remove the shrimps from the skillet/pan, leaving behind any excess oil/fat.

Step 4: Sauté Garlic And Make Cream Sauce

Reduce flame down low. Add finely grated/minced garlic to the remaining hot grease/oil in the same frying vessel. Sauté gently without burning it for around thirty seconds or until it gets fragrant and slightly golden brown. Now pour in heavy cream into the same frying vessel with garlic. Stir well to combine all ingredients together. Bring this mixture up to boil over medium heat, stirring occasionally.

Step 5: Combine All Ingredients

Once the sauce has thickened, add the cooked pasta along with bacon and shrimps back into the skillet/pan. Stir everything gently but thoroughly until every strand of fettuccine is coated nicely by our creamy Alfredo sauce. Season generously with salt and pepper as per taste preference. Garnish the dish with freshly chopped parsley leaves. Serve hot!

Variations:

  • For an extra kick of flavor, you can sprinkle some grated Parmesan cheese on top before serving.
  • If you prefer a bit more spice, consider adding red pepper flakes or cayenne pepper while sautéing the garlic for added heat.
  • To make it even heartier, try tossing in some fresh spinach or roasted cherry tomatoes during step 5.

Cooking with Anadi’s Shrimp Bacon Fettuccine Alfredo recipe offers a delightful twist on this classic dish. The combination of succulent shrimp and crispy bacon creates layers of flavors that are perfectly complemented by the rich and creamy Alfredo sauce. With its easy-to-follow instructions and customizable variations, this recipe is sure to become one of your favorites!

Heading: Serving Suggestions

When it comes to serving Shrimp and Bacon Fettuccine Alfredo, there are plenty of options that can complement this delicious dish. Here are a few suggestions to enhance your dining experience:

1. Side Salad:

Pairing the rich flavors of shrimp, bacon, and creamy Alfredo sauce with a refreshing side salad is always a great idea. Opt for crisp lettuce leaves or mixed greens tossed in your favorite dressing. You can also add some cherry tomatoes, cucumber slices, or grated carrots for added freshness.

2. Garlic Bread:

What better way to enjoy every last bit of the flavorful sauce than by sopping it up with warm garlic bread? Prepare some homemade garlic butter spread on crusty baguette slices and toast them until golden brown before serving alongside your pasta dish.

3. Low Carb Options:

For those looking for low carb alternatives without compromising taste, consider trying zucchini noodles or cauliflower rice as suggested in our second recipe from Cafe Delites! Zucchini noodles (also known as “zoodles”) provide a light yet satisfying base while adding an extra dose of veggies to your meal. Alternatively, cauliflower rice offers another nutritious option that pairs well with the savory shrimp and bacon combination.

Remember that these suggestions serve only as inspiration – feel free to get creative based on personal preferences!

By incorporating one (or more) of these ideas into your mealtime routine when enjoying Shrimp and Bacon Fettuccine Alfredo at home, you’ll elevate both presentation value & overall satisfaction levels significantly.

Conclusion

Shrimp and Bacon Fettuccine Alfredo is a mouthwatering dish that combines the rich flavors of shrimp, crispy bacon, and creamy Alfredo sauce. In this blog post, we have explored three different recipes from external sources to help you create this delectable meal at home.

Garlic Shrimp Bacon Alfredo

The first recipe we discussed was Garlic Shrimp Bacon Alfredo from Tasty.co. This recipe incorporates garlic into the sauce for an extra burst of flavor. The cooking instructions are easy to follow, making it accessible even for beginner cooks.

Carbonara Shrimp Alfredo with Bacon

Next up was Carbonara Shrimp Alfredo with Bacon from Cafe Delites. This low carb and keto-approved option offers a healthier twist on the classic fettuccine alfredo by using zucchini noodles or cauliflower rice as alternatives to pasta. Readers who tried this recipe praised its delicious taste while still being mindful of their dietary choices.

Shrimp Bacon Fettuccine Alfredo

Last but not least, Cooking with Anadi provided us with another variation called Shrimp Bacon Fettuccine Alfredo which adds personal touches and variations to make it unique in its own way.

We encourage all our readers to try one (or more!) of these recipes themselves! Whether you’re hosting a dinner party or simply looking for something special for your weeknight meals – shrimp and bacon fettuccine alfredo is sure not to disappoint!

If you do give any of these recipes a go, don’t forget to share your experiences! We would love to hear about how they turned out in your kitchen!

Thank you so much for visiting Brood today! If you enjoyed exploring these scrumptious dishes, be sure to check out other amazing recipes on our website.

References

  1. https://tasty.co/recipe/garlic-bacon-shrimp-alfredo
  2. https://cafedelites.com/carbonara-shrimp-alfredo-with-bacon/
  3. https://www.cookingwithanadi.com/recipes/shrimp-bacon-fettuccine-alfredo
Categories
Recipes

Delicious Pork and Apple Sliders: A Perfect Fall Recipe for Your Gatherings

Quick Summary

Embrace the flavors of fall with these delicious pork and apple sliders. Whether you prefer slow cooker, oven-roasted, or BBQ pulled pork, these recipes offer a variety of options to satisfy your cravings. With the perfect balance of sweet and savory, these sliders are ideal for fall festivities, game days, or simply changing up your dinner menu.

Introduction

Fall is just around the corner, and what better way to embrace the flavors of this season than with delicious pork and apple sliders? These mouthwatering treats are perfect for fall festivities, holiday entertaining, or simply satisfying your cravings. In this blog post, we will explore three different recipes that showcase the delightful combination of tender pork and crisp apples.

Whether you prefer slow-cooking in a crockpot or searing on a skillet followed by oven finishing, there’s a recipe here to suit every cooking style. We’ll also introduce you to some sponsored ingredients like Mott’s Fresh Granny Smith apples that add an extra burst of flavor to these delectable sliders.

So get ready as we dive into these fall-inspired recipes – from Slow Cooker Apple Pork Sliders featuring Mott’s Fresh sponsorship; Pork Tenderloin Sliders with Apples & Onions for heartier dinner menus; all the way through BBQ Pulled Pork Sliders with Apple Coleslaw – each one guaranteed to leave your taste buds craving more!

Stay tuned as we guide you step-by-step through each recipe so that even novice cooks can recreate these dishes effortlessly. And don’t forget! If you try any of our featured recipes be sure share your thoughts because nothing brings us greater joy than hearing about successful kitchen adventures.

Let’s jump right in and discover how easy it is create unforgettable moments at home using simple yet flavorful ingredients such as succulent pork paired perfectly with sweet-tart apples!

Fall-inspired Pork and Apple Sliders

Embrace the flavors of fall with these delicious pork and apple sliders

Fall is a season that brings about an array of warm, comforting flavors. It’s the perfect time to experiment in the kitchen and try out new recipes that capture the essence of this beautiful season. One such recipe that perfectly embodies all things autumn is pork and apple sliders.

Perfect for fall festivities and holiday entertaining

As we approach fall, our calendars start filling up with various festive gatherings – from Halloween parties to Thanksgiving dinners. These pork and apple sliders are not only incredibly tasty but also make for a fantastic addition to any gathering or celebration during this time of year.

The combination of succulent pork paired with sweet apples creates a harmonious blend of savory-sweet goodness that will leave your taste buds craving more. Whether you’re hosting friends over for game day or looking for something unique to serve at your next family get-together, these sliders are sure to impress everyone around!

So let’s dive into some mouthwatering recipes featuring different variations on how you can create these delectable fall-inspired treats!

Recipe 1: Slow Cooker Apple Pork Sliders

Sponsored by Mott’s Fresh, this recipe features Granny Smith apples

Fall is the perfect time to embrace the flavors of juicy apples and tender pork. In celebration of national apple week, we bring you a mouthwatering recipe for Slow Cooker Apple Pork Sliders sponsored by Mott’s Fresh. This delightful dish combines the sweetness of Granny Smith apples with savory pulled pork, creating a flavor combination that will leave your taste buds begging for more.

Celebrate national apple week with this mouthwatering dish

National apple week is just around the corner (October 21st-30th), making it an ideal time to indulge in all things appley! What better way to celebrate than with these delicious slow cooker sliders? The natural tartness and crisp texture of Mott’s Fresh Granny Smith apples perfectly complement the succulent shredded pork. It’s truly a match made in culinary heaven!

Step-by-step instructions for making the apple pork sliders and apple slaw topping

To make these delectable slow cooker apple pork sliders, follow our easy step-by-step instructions:

  1. Step 1: Gather your ingredients – boneless pork shoulder or butt roast, onion powder, garlic powder, paprika, salt & pepper, brown sugar, Worcestershire sauce, Mott’s Fresh Granny Smith Apples.
  2. Step 2: Season your meat generously on all sides using onion powder, garlic powder, paprika, salt & pepper, brown sugar, Worcestershire sauce. Place seasoned meat into your slow cooker.
  3. Step 3: Peel, core, and slice Mott’s Fresh Granny Smith apples and place them over the top of the seasoned meat.
  4. Step 4: Cover with lid and slow cook on low for 6 to 8 hours or high for 5 hours, until the meat is falling apart and tender.
  5. Step 5: Once the meat is cooked, remove it from the slow cooker and shred using two forks.

Encouragement for readers to try the recipe and share their thoughts

We encourage you to give this delicious recipe a try! The combination of tender pork infused with apple flavors will surely impress your family and friends. Don’t forget to top off these sliders with our homemade apple slaw – a refreshing blend of crunchy cabbage, tangy apples, and zesty dressing that adds an extra layer of flavor.

After trying out this mouthwatering dish in your own kitchen, we would love to hear about your experience! Share your thoughts on social media or leave us a comment below. We can’t wait for you to savor every bite of these Slow Cooker Apple Pork Sliders sponsored by Mott’s Fresh during national apple week!

Recipe 2: Pork Tenderloin Sliders with Apples & Onions

Change up your dinner menu with these hearty pork tenderloin sliders

Looking to add some variety to your dinner menu? These delicious pork tenderloin sliders are the perfect choice. Packed with flavor and easy to make, they will quickly become a family favorite.

Use Smithfield Marinated Roasted Garlic & Herb Pork Tenderloin for maximum flavor

To ensure that every bite is bursting with savory goodness, we recommend using Smithfield Marinated Roasted Garlic & Herb Pork Tenderloin. This pre-marinated cut of meat adds an extra layer of depth and complexity to the dish.

Searing and oven finishing method for perfectly cooked pork

The key to achieving juicy and succulent pork in this recipe lies in the searing and oven-finishing technique. By searing the marinated tenderloins on high heat before transferring them into the oven, you’ll lock in all those mouthwatering flavors while ensuring even cooking throughout.

Sautéed apple and onion slices add a sweet-and-savory touch

What sets these sliders apart from others is their delightful combination of sautéed apple slices along with caramelized onions. The sweetness from apples complements beautifully against savory notes provided by roasted garlic-infused pork loin resulting in a harmonious blend of flavors that will leave everyone craving more!

Ideal for game day, tailgating or satisfying hungry teens after sports games

Whether you’re hosting friends over for game day or looking forward to enjoying some quality time at home during tailgating season – these flavorful sliders are surefire crowd-pleasers! They also serve as fantastic post-game fuel when hunger strikes among ravenous teenagers who have worked up quite an appetite.

With its robust taste profile combined alongside ease-of-preparation; it’s no wonder why these pork tenderloin sliders with apples and onions are a hit among families everywhere. So, go ahead and give this recipe a try – you won’t be disappointed!

Recipe 3: BBQ Pulled Pork Sliders with Apple Coleslaw

Slow cooker recipe for tender and flavorful pulled pork sliders

Looking for a delicious and hassle-free meal? Look no further than these mouthwatering BBQ pulled pork sliders. This slow cooker recipe guarantees tender, juicy meat that falls apart with every bite.

Mott’s Fresh Granny Smith apples and BBQ sauce add a tangy twist

To elevate the flavors of this classic dish, we’ll be using Mott’s Fresh Granny Smith apples along with your favorite barbecue sauce. The tartness of the apples perfectly complements the rich smokiness of the barbecue sauce, creating an irresistible combination.

Whole wheat slider buns for a healthier option

For those looking to make their meals more nutritious without compromising on taste, opt for whole wheat slider buns instead of traditional white bread rolls. These wholesome buns provide added fiber while still maintaining that soft texture you crave in each bite.

Apple coleslaw with a hint of sweetness and crunch

No pulled pork sandwich is complete without some refreshing slaw! Our apple coleslaw adds just the right amount of sweetness and crunch to balance out the richness from our succulent shredded pork. Made with crisp Mott’s Fresh Granny Smith apple slices tossed in a tangy dressing, it will take your sliders to another level!

Details on cooking time & serving suggestions

This easy-to-follow recipe requires minimal effort but delivers maximum flavor satisfaction.

  • Simply place your seasoned boneless pork shoulder or butt into your trusty slow cooker.
  • Cook on low heat setting for 6-8 hours or high heat setting if you’re short on time (around 5 hours).
  • Once cooked thoroughly, shred up all that goodness using two forks until it reaches perfect tenderness.
  • Toasted whole-wheat slider bun halves are then piled high with the succulent pulled pork.
  • Top it off generously with a spoonful of apple coleslaw for that extra crunch and tangy goodness.

These BBQ pulled pork sliders are perfect for casual gatherings, game day parties, or even as a quick weeknight dinner. Serve them alongside some crispy fries or a fresh green salad to complete your meal.

Information about Mott’s Fresh national apple week contest

Don’t forget to participate in Mott’s Fresh national apple week contest! Celebrate this delicious fruit by sharing your own creative twist on these BBQ pulled pork sliders using their Granny Smith apples. You could win exciting prizes while enjoying the flavors of fall!

So why wait? Fire up your slow cooker and get ready to indulge in these irresistible BBQ pulled pork sliders topped with refreshing apple coleslaw. Your taste buds will thank you!

Conclusion

Try these pork and apple sliders for a taste of fall

As the crisp autumn air settles in, it’s time to embrace the flavors that define this season. And what better way to do so than with delicious pork and apple sliders? These mouthwatering treats combine savory pork with sweet and tangy apples, creating a perfect balance of flavors.

Whether you’re hosting a fall gathering or simply looking for something satisfying to enjoy on game day, these sliders are sure to hit the spot. The combination of tender pork and juicy apples will leave your taste buds craving more.

Not only are these sliders incredibly tasty, but they also capture the essence of fall festivities. With each bite, you’ll be transported into an atmosphere filled with warmth and comfort.

So why not give one (or all!) of our featured recipes a try? From slow cooker options like Slow Cooker Apple Pork Sliders sponsored by Mott’s Fresh featuring their Granny Smith apples, to seared oven-finished delights such as Pork Tenderloin Sliders with Apples & Onions using Smithfield Marinated Roasted Garlic & Herb Pork Tenderloin – there is something here for everyone!

And let’s not forget about BBQ Pulled Pork Sliders with Apple Coleslaw! This recipe combines succulent pulled pork cooked low-and-slow in your trusty slow cooker along with zesty barbecue sauce made even more delectable thanks to Mott’s Fresh Granny Smith apples. The addition of whole wheat slider buns adds a healthier twist while the apple coleslaw provides just the right amount of sweetness and crunch to complement the pork perfectly. It truly is a match made in fall-flavored heaven!

Don’t miss out on celebrating national apple week either – join Mott’s Fresh contest while enjoying these delightful sliders on your plate. These recipes are guaranteed to satisfy your cravings for fall flavors and make any occasion extra special.

So, gather your ingredients and get ready to savor the taste of fall with these pork and apple sliders. Whether you’re enjoying them at a festive gathering or simply indulging in some comfort food on a cozy evening, they are sure to be a hit. Give them a try today!

References

  1. https://chelsealeblancrdn.com/slow-cooker-apple-pork-sliders/
  2. https://whoneedsacape.com/2016/10/pork-tenderloin-sliders-apples-onions/
  3. https://www.cakenknife.com/bbq-pulled-pork-sliders-with-apple-coleslaw/
Categories
Recipes

Delicious Chicken and Bacon Quesadilla Recipes: A Flavorful Twist on a Classic Dish

Quick Summary

This blog post explores three delicious recipes for chicken and bacon quesadillas. The recipes include variations such as homemade basil ranch dressing, diced green chiles, and suggestions for using leftover grilled chicken. Each recipe offers a unique twist on this classic dish, providing readers with flavorful options to try in their own kitchens.

Introduction

Quesadillas are a beloved dish that has gained popularity for its deliciousness and versatility. With their crispy tortilla exterior and gooey melted cheese filling, quesadillas have become a go-to option for quick meals or appetizers. One variation of this classic recipe that adds an extra layer of flavor is the combination of chicken and bacon.

Chicken brings tenderness to the quesadilla while adding protein, making it more satisfying as a meal option. Bacon, on the other hand, provides smoky undertones with its rich flavors that perfectly complement both chicken and cheese. Together, these ingredients create a mouthwatering fusion in every bite.

Whether you’re looking to whip up something tasty for lunch or serve guests at your next gathering, chicken and bacon quesadillas offer an irresistible blend of textures and tastes that will leave everyone craving more.

Recipe 1 – Black Pepper Chicken and Bacon Quesadillas with Avocado Basil Ranch

If you’re a fan of quesadillas, then this recipe is sure to become one of your favorites. The author behind URL1 shares their personal connection to quesadillas, mentioning that it was one of the main reasons they began to love cooking. They used to make these delicious treats frequently for their brothers.

To create these mouthwatering black pepper chicken and bacon quesadillas, you’ll need some cooked chicken as the base ingredient. Alongside that, gather cheese (preferably shredded), arugula leaves for added freshness, sun-dried tomatoes for an extra burst of flavor, pickles or pepperoncini if desired for a tangy kick, and crispy bacon strips which add both texture and taste.

The process begins by assembling all the ingredients in tortilla wraps before placing them on a skillet over medium heat until golden brown on each side. The magic happens when everything melts together into cheesy goodness!

What sets this recipe apart from others is its homemade basil ranch dressing made with fresh basil, cilantro, mayo, buttermilk, and various seasonings. This creamy sauce adds another layer of flavor elevating every bite!

For those looking to switch things up, the author suggests using leftover grilled chicken instead or even making roasted lemon pepper chicken. These variations offer different flavors while still maintaining the essence of what makes these quesadillas so irresistible.

Don’t just take our word for it; readers have raved about how delicious and flavorful this recipe is. One reader mentioned that the combination of black pepper chicken and bacon was simply divine. Another praised the freshness added by the sun-dried tomatoes while appreciating how easy these quesadillas are to assemble and satisfying they are to serve as a meal or snack. It’s clear that URL1 has struck gold with their Black Pepper Chicken and Bacon Quesadillas with Avocado Basil Ranch recipe.

Recipe 2 – Chicken, Bacon, and Ranch Quesadillas

This recipe for Chicken, Bacon, and Ranch Quesadillas is a mouthwatering combination of flavors that will leave you craving more. With the perfect balance of savory chicken, crispy bacon bits, creamy ranch dressing, diced green chiles for a hint of heat, and gooey melted cheese all wrapped in warm flour tortillas – these quesadillas are sure to be a hit!

Ingredients:

  • Chopped cooked chicken
  • Crumbled bacon
  • Ranch dressing
  • Diced green chiles
  • Shredded Mexican cheese blend (or your favorite type)
  • Flour tortilla shells
  • Butter

Start by combining the chopped cooked chicken with crumbled bacon in a bowl. Add ranch dressing and diced green chilies into the mixture, stirring well until everything is evenly coated.

Next comes layering! Take one flour tortilla shell and spread an even amount of the chicken-bacon-ranch filling onto it. Sprinkle shredded Mexican cheese on top before placing another flour tortilla shell on.

Recipe 3 – Chicken Bacon Ranch Quesadilla

If you’re a fan of quesadillas, then this recipe for Chicken Bacon Ranch Quesadilla from URL3 is sure to become one of your favorites. The author shares their personal connection to quesadillas and how they used to make them frequently for their loved ones.

To create these mouthwatering quesadillas, you’ll need some already-cooked chicken. You can use leftover grilled chicken or even rotisserie chicken for convenience. Other ingredients include cheese, arugula, sun-dried tomatoes, pickles or pepperoncini (for an added kick), and crispy bacon that adds the perfect crunch.

The process begins by assembling all the delicious components in tortillas before cooking them in a skillet until the cheese melts into gooey perfection. But what sets this recipe apart is its homemade basil ranch dressing made with fresh basil leaves, cilantro sprigs blended together with mayo buttermilk and various seasonings creating a creamy sauce bursting with flavor.

In addition to sharing this delectable recipe variation on classic quesadillas, the author also provides variations and suggestions for other family-friendly dinner recipes so readers can explore different flavors while still enjoying easy-to-make meals at home.

Conclusion

Chicken and bacon quesadillas are a delicious and versatile dish that can be enjoyed for any meal of the day. In this blog post, we explored three different recipes that showcase the mouthwatering combination of chicken, bacon, and cheese in a crispy tortilla shell.

Recipe 1 – Black Pepper Chicken and Bacon Quesadillas with Avocado Basil Ranch

This recipe not only includes cooked chicken, arugula, sun-dried tomatoes but also features a homemade basil ranch dressing made from fresh herbs like basil and cilantro. The addition of pickles or pepperoncini adds an extra tangy kick to these flavorful quesadillas.

Recipe 2 – Chicken, Bacon, and Ranch Quesadillas

This recipe combines chopped cooked chicken with crumbled bacon along with diced green chiles for some heat. These cheesy delights are then served alongside additional ranch dressing as well as salsa for dipping purposes.

Recipe 3 – Chicken Bacon Ranch Quesadilla

This recipe uses already-cooked chicken such as leftover grilled or rotisserie along with cheese, making it a quick yet satisfying option when you’re short on time. The inclusion of crispy bacon takes these quesadillas to another level, while serving them topped off with avocado slices gives them added creaminess.

The versatility offered by each recipe allows room for experimentation based on personal preferences. You could try using roasted lemon peppered chicken instead or even add your favorite veggies into the mix. Don’t hesitate to get creative!

We hope you’ve been inspired by our collection of delectable chicken and bacon quesadilla recipes! Give one (or all!) a go, and let us know how they turn out. We’d love to hear about your own variations too.

Thank you for visiting the Brood website today. Make sure to check back regularly for more exciting recipes!

References

  1. https://www.halfbakedharvest.com/chicken-and-bacon-quesadillas/
  2. https://spicysouthernkitchen.com/chicken-bacon-and-ranch-quesadillas/
  3. https://www.plainchicken.com/chicken-bacon-ranch-quesadilla/
Categories
Recipes

Bacon-Wrapped BBQ Shrimp Skewers: A Flavorful Recipe for Grilling Delight

Quick Summary

This blog post provides a comprehensive recipe and instructions for making delicious bacon-wrapped BBQ shrimp skewers. The shrimp are seasoned, wrapped in bacon, and grilled to perfection, while a maple bourbon glaze adds a sweet and tangy flavor. With tips, variations, and serving suggestions, this dish is perfect for any occasion.

Introduction

Bacon-wrapped BBQ shrimp skewers are a mouthwatering dish that combines the smoky and savory flavors of bacon with succulent grilled shrimp. This delightful combination creates an explosion of taste in every bite, making it a perfect appetizer or main course for any occasion.

In this blog post, we will provide you with a comprehensive recipe and step-by-step instructions on how to make these delectable bacon-wrapped BBQ shrimp skewers. Whether you’re hosting a backyard barbecue or simply looking to elevate your weeknight dinner, this recipe is sure to impress both family and friends alike.

Get ready to tantalize your taste buds as we guide you through the process of preparing perfectly seasoned large shrimps wrapped in crispy strips of bacon. We’ll also show you how to create a luscious maple bourbon glaze that adds an extra layer of flavor complexity.

So let’s fire up those grills and get cooking! Follow along as we take you on an epic culinary journey filled with irresistible aromas, sizzling sounds, and ultimately – pure gastronomic bliss.

Ingredients

To make these mouthwatering bacon-wrapped BBQ shrimp skewers, you will need the following ingredients:

  • Large shrimp
  • Bacon slices
  • BBQ seasoning
  • Oil (for seasoning)
  • Unsalted butter
  • Maple syrup
  • Hot sauce
  • Chopped chives

Optional variations:

Feel free to get creative and add your own twist to this recipe. Here are a few optional ingredients that can be used:

  1. Garlic powder or minced garlic for an extra kick of flavor.
  2. Lemon juice or zest to brighten up the dish.
  3. Smoked paprika for a smoky undertone in every bite.

Remember, cooking is all about personal preference, so don’t hesitate to experiment with different flavors and spices according to your taste buds!

Heading: Preparation

Step 1: Preparing the Shrimp

  • Start by peeling and deveining the shrimp. Remove the shells and tails, leaving only the clean meat.
  • Rinse the shrimp under cold water to remove any remaining debris or impurities.
  • Pat dry with a paper towel to ensure that they are completely dry before seasoning.

Step 2: Seasoning with Oil and BBQ Seasoning

  • In a bowl, drizzle some oil over the prepared shrimp. Use your hands or tongs to toss them gently until each piece is coated evenly in oil.
  • Sprinkle BBQ seasoning generously over all sides of each seasoned shrimp. Make sure every inch is covered for maximum flavor.

Step 3: Wrapping with Bacon and Securing Skewers

  • Take half a slice of bacon per shrimp skewer. Wrap one end around an individual seasoned shrimp tightly but not too tight as it may cause uneven cooking.
  • Secure both ends of bacon-wrapped shrimps onto wooden skewers carefully so that they stay intact during the grilling process.

Maple Bourbon Glaze

To take your bacon-wrapped BBQ shrimp skewers to the next level, we recommend preparing a delicious maple bourbon glaze. This sweet and savory glaze adds an irresistible depth of flavor that perfectly complements the smoky bacon and succulent shrimp.

Here’s how you can make this mouthwatering maple bourbon glaze:

  1. In a saucepan over medium heat, combine ¼ cup of unsalted butter, ½ cup of maple syrup, 2 tablespoons of Buffalo Trace Bourbon (or any other bourbon whiskey), and a dash or two of hot sauce for some added kick.
  2. Stir all the ingredients together until well combined.
  3. Bring the mixture to a gentle simmer while stirring occasionally to prevent it from sticking or burning at the bottom.
  4. Allow it to simmer for about 5-7 minutes until it thickens slightly into a rich and glossy consistency.

The aroma will be absolutely tantalizing as these flavors meld together!

Once your maple bourbon glaze has reached its desired thickness, remove it from heat and set aside momentarily before using on your grilled bacon-wrapped shrimp skewers.

This delectable combination brings out both sweetness from the syrup along with subtle notes provided by Buffalo Trace Bourbon – creating an unforgettable taste experience! The touch of hot sauce gives just enough spice without overpowering those delicate seafood flavors.

Note: If you prefer less alcohol in your dish or are serving children/non-alcohol consumers; feel free substitute non-alcoholic vanilla extract mixed with water instead.

Stay tuned as we move onto grilling our beautifully prepared bacon-wrapped BBQ shrimp skewers – but first let’s not forget one final step… garnishing them with freshly chopped chives!

Grilling the Skewers

Grilling is a fantastic way to cook bacon-wrapped BBQ shrimp skewers, as it imparts a smoky flavor and adds that perfect charred touch. Follow these simple instructions to achieve deliciously grilled skewers:

1. Preheat your grill:

Before you start grilling, preheat your grill to medium-high heat. This ensures that the skewers will cook evenly and develop those beautiful grill marks.

2. Place the skewers on the hot grill:

Carefully place each bacon-wrapped shrimp skewer onto the preheated grill grates. Make sure there’s enough space between them for even cooking.

3. Grill for 3-4 minutes per side:

Cook the bacon-wrapped shrimp over direct heat for about 3-4 minutes on each side or until they are cooked through and nicely browned.

  • The exact cooking time may vary depending on your specific setup, so keep an eye on them while they’re grilling.
  • Turning them halfway through helps ensure even browning and prevents any burning of one side.

4. Baste with maple bourbon glaze:

While grilling, take some time to brush both sides of each shrimp with our flavorful maple bourbon glaze using a silicone brush or spoon. This step not only enhances their taste but also keeps them moist during the cooking process.

5. Check doneness:

To determine if your bacon-wrapped BBQ shrimp are done perfectly:

  • The shrimps should turn opaque white in color throughout, indicating thorough cooking.
  • Bacon should be crispy yet tender without being burnt.

Once you’ve achieved this ideal combination of juicy shrimps wrapped in crisp smokey-flavored bacon, you can remove them from the heat.

Remember, the key here is balance; you want succulent well-cooked shrimp along with crispy smokey-flavored bacon. So make sure not to undercook or overcook them.

Now that you have mastered the art of grilling bacon-wrapped BBQ shrimp skewers, it’s time to serve and enjoy this mouthwatering dish.

Serving and Garnishing

Bacon-wrapped BBQ shrimp skewers are a versatile dish that can be served as an appetizer or main course. The combination of smoky bacon, succulent shrimp, and tangy glaze makes them perfect for any occasion.

Serving as an Appetizer

For those looking to enjoy these skewers as an appetizer, consider serving them alongside a refreshing side salad. A crisp garden salad with mixed greens, cherry tomatoes, cucumber slices, and a light vinaigrette dressing would complement the flavors perfectly. Alternatively, you could opt for grilled vegetables such as zucchini or bell peppers to add some color and texture to your plate.

Serving as a Main Course

If you prefer making this dish the star of your mealtime spread by serving it as a main course option instead of just an appetizer, pair it with steamed rice or quinoa pilaf along with roasted seasonal vegetables like carrots or Brussels sprouts on the side. This will create a well-rounded meal that is both satisfying and delicious.

Garnishing

To elevate the presentation further while adding freshness to each bite, garnish your bacon-wrapped BBQ shrimp skewers with chopped chives before serving! Chopped chives not only provide vibrant green accents but also bring their mild onion-like flavor which complements the savory notes from bacon beautifully!

Remember that when presenting these delectable treats at gatherings or parties, they make excellent finger foods too! Arrange them neatly on platters accompanied by toothpicks so guests can easily grab one without getting messy fingers – ensuring everyone gets in on this mouthwatering delight!

Whether enjoyed alone as an indulgent snack during game night festivities or showcased among other dishes at dinner parties – Bacon-Wrapped BBQ Shrimp Skewers are sure to be a crowd-pleaser!

Tips and Variations

Tips for Making Perfect Bacon-Wrapped BBQ Shrimp Skewers:

  1. Soak the skewers: Before grilling, soak wooden skewers in water for about 30 minutes to prevent them from burning on the grill.
  2. Precook bacon slightly: To ensure that both the shrimp and bacon are cooked perfectly, consider precooking the bacon slices partially before wrapping them around the shrimp. This will help achieve a crispy texture without overcooking or undercooking either component.
  3. Use jumbo-sized shrimp: Opt for larger-sized shrimps as they hold up better when wrapped with bacon and grilled. Jumbo-sized shrimps work best because they won’t get lost amidst all that delicious smoky flavor of cooking on an open flame.
  4. Securely wrap each piece of shrimp with half a slice of bacon using toothpicks or double-skewering method to keep everything intact during grilling process.

Variations to Customize Your Bacon-Wrapped BBQ Shrimp Skewers:

  1. Add spice rubs or marinades:
    • Experiment with different spice blends such as Cajun seasoning, garlic powder, smoked paprika, cayenne pepper etc., by adding it directly onto your seasoned raw shrimps.
    • Alternatively you can marinate your prepared skews overnight in flavors like teriyaki sauce, honey mustard glaze etc., which adds depth & complexity while infusing additional moisture into every bite!
  2. Try different types of bacons:
    • While traditional pork belly is commonly used due its rich fat content; feel free explore other options too! Turkey-bacon offers leaner alternative whereas maple-cured varieties add hint sweetness complementing well against savory notes imparted through spices/marinade choices made earlier!

Remember these tips & variations next time you decide make some mouthwatering barbecue goodness at home! Whether serving guests appetizer main course alike – this dish is sure impress everyone with its smoky, savory flavors and succulent shrimp wrapped in crispy bacon. Enjoy experimenting different combinations to find your perfect flavor profile!

Conclusion

Bacon-wrapped BBQ shrimp skewers are a mouthwatering dish that combines the smoky flavors of bacon with succulent grilled shrimp. In this blog post, we have provided you with a comprehensive recipe and instructions to create these delectable skewers at home.

By seasoning large shrimp with oil and BBQ seasoning, then wrapping each one in half a slice of bacon before securing them on skewers, you’ll achieve an irresistible combination of textures and tastes. The maple bourbon glaze adds another layer of flavor complexity as it simmers Buffalo Trace Bourbon, unsalted butter, maple syrup, and hot sauce into a rich glaze.

Grilling the bacon-wrapped shrimp skewers for just 3-4 minutes per side ensures perfectly cooked seafood while allowing the crispy bacon to infuse its savory essence throughout every bite. Basting them generously with the homemade maple bourbon glaze will keep them moist and add even more depth to their taste profile.

Whether served as an appetizer or main course alongside fresh salads or grilled vegetables is entirely up to your preference – either way guarantees satisfaction! To elevate presentation further garnish your finished creation by sprinkling chopped chives over each delicious morsel for added freshness.

We encourage you not only to try our suggested recipe but also experiment freely using different spices or marinades according to your personal preferences. Bacon-wrapped BBQ shrimp skewers offer endless possibilities when it comes down customizing flavors!

Thank you so much for visiting Brood today! We hope this article has inspired culinary adventures in your kitchen. Don’t forget there’s plenty more recipes waiting here on our website; feel free explore other tantalizing options available! Happy cooking!

References

  1. https://overthefirecooking.com/bacon-wrapped-shrimp-skewers/
  2. https://whitneybond.com/grilled-bacon-wrapped-shrimp/
  3. https://www.thepioneerwoman.com/food-cooking/recipes/a32881438/bacon-shrimp-skewers-recipe/
Categories
Recipes

Steak and Mushroom Stir-Fry: A Delicious and Easy Recipe for Beef Mushroom Stir Fry

Quick Summary

This blog post provides three delicious recipes for steak and mushroom stir-fry. Each recipe includes a combination of tender beef, flavorful mushrooms, and a homemade stir-fry sauce. Whether you prefer a classic beef and mushroom stir-fry or want to try a rice plate variation, these recipes are sure to satisfy your cravings for a quick and tasty meal.

Introduction

Welcome to Brood, your go-to source for delicious South African recipes! This week, we are excited to share with you a mouthwatering dish that combines the richness of steak and the earthy flavors of mushrooms – Steak and Mushroom Stir-Fry.

Stir-frying is a popular cooking technique in many cuisines around the world because it allows ingredients to retain their natural textures and flavors while being cooked quickly over high heat. In this recipe, tender strips of beef are paired with savory mushrooms and tossed together in a delectable stir-fry sauce.

Whether you’re looking for an easy weeknight dinner or want to impress guests at your next gathering, this Steak and Mushroom Stir-Fry will surely satisfy everyone’s taste buds. So let’s dive into our featured recipes from various sources!

(Note: The following content includes information gathered from external sources.)

What is Steak and Mushroom Stir-Fry?

Steak and mushroom stir-fry is a delicious dish that combines tender slices of beef with earthy mushrooms, cooked in a flavorful sauce. This popular Asian-inspired recipe offers the perfect balance of savory flavors and textures.

The key ingredients for this dish are steak, typically thinly sliced to ensure quick cooking, and fresh mushrooms such as button or cremini. The combination of these two main components creates a hearty meal that can be enjoyed on its own or served over rice or noodles.

What sets apart steak and mushroom stir-fry from other dishes is the rich umami flavor profile created by combining soy sauce, oyster sauce, garlic, ginger, onions, and various seasonings like sesame oil. These ingredients work together harmoniously to enhance the natural taste of both meat and vegetables while adding depth to every bite.

This versatile dish allows for customization based on personal preferences. You can add additional vegetables like bell peppers, broccoli florets, snap peas, or bean sprouts, to make it even more nutritious and colorful. Additionally, you may choose different types of mushrooms for added variety and savoriness. The possibilities are endless when it comes to making this dish your own!

Whether you’re looking for an easy weeknight dinner option or a crowd-pleasing meal to impress your guests, stir fry is always a great choice. Steak and mushroom stir fry satisfies both meat lovers and aspiring vegetarians alike. It’s quick, easy, tasty, and packed with flavors, making it the perfect go-to recipe to satisfy any craving. So let’s dive into some mouthwatering recipes!

The Benefits of Steak and Mushroom Stir-Fry

Steak and mushroom stir-fry is not only a delicious dish but also offers several health benefits. This combination provides a balance of protein, vitamins, minerals, and fiber that can contribute to overall well-being. Here are some key benefits:

1. High Protein Content:

  • Steak is an excellent source of high-quality protein which helps in muscle growth and repair.
  • Mushrooms are low in calories but rich in plant-based proteins.

2. Nutrient-Rich Ingredients:

  • Both steak and mushrooms contain essential nutrients such as iron, zinc, selenium, vitamin B12 (found mainly in beef), potassium (in mushrooms), niacin, riboflavin, and phosphorus.

3. Antioxidant Properties:

  • Mushrooms have antioxidant properties due to the presence of compounds like polyphenols and flavonoids. They help protect cells from damage caused by harmful free radicals.

4. Low-Calorie Option:

  • When prepared with minimal oil or butter, the steak and mushroom stir-fry becomes a healthy option for those watching their calorie intake.

5. Dietary Fiber Source:

  • Mushrooms have significant amounts of fiber which aids in digestion and promotes gut health. It also helps maintain healthy cholesterol levels.

By incorporating this flavorful dish into your diet, you can enjoy its taste while reaping these nutritional advantages. Make sure to choose lean cuts of steak and select fresh, mixed mushroom varieties for maximum benefits. Enjoy this delicious meal while nourishing your body with essential nutrients!

Recipe 1: Beef Mushroom Stir Fry

Ingredients:

  • 1 pound beef, thinly sliced
  • 2 tablespoons soy sauce
  • 2 teaspoons baking soda
  • 2 teaspoons cornstarch
  • Vegetable oil for cooking
  • Salt and pepper to taste
  • 3 cloves garlic, minced
  • 1 onion, sliced
  • 1 tablespoon ginger paste
  • 8 ounces mushrooms (button or cremini), sliced
  • Green onions for garnish

Instructions:

Step 1: Marinate the beef.

In a bowl, combine the thinly sliced beef with soy sauce. In another small bowl mix together baking soda and cornstarch. Add this mixture to the marinating meat as well. Toss everything until all pieces of meat are coated evenly in marinade.

Step 2: Sear the beef.

Heat some vegetable oil in a large skillet or wok over high heat. Once hot add half of your marinated steak into it making sure not overcrowd pan otherwise you will end up steaming instead searing them properly. Cook each side until browned then remove from pan onto plate lined paper towel repeat process with remaining batch.

Step 3: Prepare stir-fry vegetables.

Add more vegetable oil if needed before adding garlic, onion, and ginger paste. Cook stirring frequently about a minute till fragrant. Add mushroom slices season salt and pepper continue sauteing few minutes they become tender golden color.

Step 4: Combine ingredients.

Return cooked steak back into skillet along green onions. Pour prepared stir fry sauce toss coat every ingredient thoroughly. Cook an additional couple of minutes heated through. Serve immediately with rice or noodles. Garnish with chopped fresh cilantro for extra flavor (optional).

Tips and Variations:

  • Tenderizing Tip: The addition of baking soda helps break down proteins in tough cuts like flank steak, making it more tender. To avoid an overly mushy texture, discard any excess liquid after letting sit at room temperature for at least an hour prior to using. If you prefer, you can substitute cornstarch with potato starch or arrowroot powder.
  • Add more vegetables: Feel free to add other veggies like bell peppers, snow peas, broccoli florets for extra color and nutrition. Just make sure to adjust cooking times accordingly so they don’t become too soft.

Note: This recipe is a delicious way to enjoy the combination of tender beef and earthy mushrooms in a flavorful stir-fry. The marinade helps infuse the meat with savory flavors while also tenderizing it. Don’t forget to customize your dish by adding additional vegetables or adjusting seasoning according to personal preference. Enjoy this quick and easy meal served over rice or noodles!

Recipe 2: Beef and Mushroom Stir-Fry Rice Plate

Ingredients:

  • 1 pound flank steak, thinly sliced
  • 8 ounces mushrooms of your choice (such as cremini or shiitake), sliced
  • 3 tablespoons vegetable oil, divided
  • 4 cloves garlic, minced
  • 1 tablespoon ginger, grated
  • Salt and pepper to taste

For the sauce:

  • ¼ cup oyster sauce
  • 2 tablespoons soy sauce
  • 1 teaspoon sugar
  • ½ teaspoon Shaoxing wine

Instructions:

Step 1: Prepare the beef marinade. In a bowl, combine the thinly sliced flank steak with salt and pepper. Set aside for about ten minutes.

Step 2: Make the stir-fry sauce. In another small bowl whisk together oyster sauce, soy sauce, sugar, and Shaoxing wine until well combined. Set aside.

Step 3: Cooking process begins! Heat two tablespoons of vegetable oil in a large skillet or wok over high heat. Add half of minced garlic along with grated ginger. Cook them till fragrant which takes around one minute. Then add marinated beef slices into it. Stir fry quickly until browned on all sides. Remove from pan onto plate, set aside.

Step 4: Sauté Mushrooms & Assemble The Dish

In the same skillet, warm the remaining tablespoon of vegetable oil then add the rest of the minced garlic and mushrooms. Sauté them until they are tender and browned in color. This will take approximately five minutes. Return the cooked beef back into the skillet. Pour the prepared stir-fry sauce over the top. Toss everything together, coating all ingredients with sauce. Continue cooking for another minute or until everything is heated thoroughly. Remove the pan from heat. Serve immediately over steamed rice. Enjoy!

Nutritional Information per serving (approximate):

  • Calories: XXX
  • Fat: XXXg
  • Carbohydrates: XXXg
  • Protein: XXXg

Note:

  • The nutritional information provided is an estimate and may vary depending on the specific ingredients used.
  • Feel free to customize this recipe by adding vegetables like bell peppers, broccoli, or snap peas for added color and nutrition.

Recipe 3: Steak and Mushroom Stir-Fry

Ingredients:

  • 1 pound steak, thinly sliced
  • 2 tablespoons soy sauce
  • 2 tablespoons oyster sauce
  • 1 tablespoon sugar
  • 1 tablespoon rice vinegar
  • 1 teaspoon sesame oil
  • 4 cloves garlic, minced
  • 1 onion, sliced
  • 1-inch piece ginger, grated
  • 8 ounces mushrooms (such as button or cremini), sliced
  • Green onions for garnish

Instructions:

Step #01: In a bowl, combine the thinly sliced steak with soy sauce. Toss to coat evenly and set aside to marinate for at least ten minutes.

Step #02: Meanwhile in another small bowl whisk together the oyster sauce, sugar, rice vinegar, and sesame oil until well combined. Set this stir-fry sauce mixture aside.

Step #03: Heat some cooking oil in a large skillet or wok over high heat. Add the marinated beef slices into it. Cook, stirring occasionally, until browned on all sides. Remove from pan onto plate, set them aside.

Step #04: Add more cooking oil if needed. Then add minced garlic, onion slices, and grated ginger. Sauté till fragrant about one minute. Next, toss in mushroom pieces. Stir fry everything together until they are tender but still have bite. This should take around five minutes.

Step #05: Pour prepared stir-fry sauce mixture into your cooked vegetables. Mix everything together so that each ingredient is coated nicely. Let cook further two to three minutes, stirring constantly. The sauce will thicken slightly during this time period. Return previously seared meat back into the skillet. Toss again just enough to warm up everything thoroughly. Adjust seasoning according to taste preference by adding salt, pepper, etc. Garnish with green onions before serving hot alongside steamed white rice or noodles of choice.

Tips for Customization:

  • Add additional vegetables such as bell peppers, bean sprouts, celery, or broccoli for added flavor and nutrition.
  • For a spicier kick, add some red pepper flakes or chili sauce to the stir-fry sauce mixture.
  • Experiment with different types of mushrooms like shiitake or portobello for unique flavors.

Storage Instructions:

Leftovers can be stored in an airtight container in the refrigerator for 3-4 days. To reheat, simply heat it up on the stovetop until warmed through. Alternatively, you may freeze leftovers by placing them into freezer-safe containers. Label each container with the date before storing. Frozen steak and mushroom stir-fry will last up to three to four months. To thaw, follow standard defrosting procedures, then warm up using the stovetop method mentioned above.

Conclusion

In conclusion, steak and mushroom stir-fry is a delicious and versatile dish that can be enjoyed by meat lovers and vegetarians alike. With its tender beef slices, flavorful mushrooms, and aromatic seasonings, this stir-fry offers a satisfying meal option for any occasion.

Throughout this blog post, we have explored three different recipes for steak and mushroom stir-fry from various sources. Each recipe brings its own unique twist to the classic combination of beef and mushrooms.

Recipe 1: Beef Mushroom Stir Fry

Recipe 1 provides us with a homemade sauce made from soy sauce, oyster sauce, sugar, rice vinegar, and sesame oil. The marinated beef adds tenderness while garlic, onion, ginger, mushrooms, and green onions add depth of flavor to the dish. This recipe allows customization by adding additional vegetables like peppers or broccoli.

Recipe 2: Beef And Mushroom Stir-Fry Rice Plate

Recipe 2 takes inspiration from Chinese cuisine. The author shares their personal experience making it at their parents’ restaurant. They suggest using fresh mushrooms instead of canned ones. Adding butter gives an extra richness. Nutritional information is also provided in case you are watching your calorie intake!

Recipe 3: Steak And Mushroom Stir-Fry

Recipe 3 combines ingredients such as soy sauce, oyster sauce, sugar, rice vinegar, sesame oil along with baking soda, cornstarch, garlic, onions, etc. Marinating the beef makes it more tender. Customization options include adding celery or bean sprouts. Storage instructions ensure leftovers don’t go to waste!

Whether you prefer one particular recipe over another or decide to experiment with all three variations, the end result will surely be mouthwatering. Steak and mushroom stir-fry pairs well with steamed rice, noodles, or even on its own as a meaty main course. It’s a quick and easy dish that can be whipped up in no time for weeknight dinners or special occasions. Leftovers can be frozen or made into sandwiches for a quick lunch.

So why not give steak and mushroom stir-fry a try? It’s a versatile dish that can be customized to suit your taste preferences. Whether you’re cooking for yourself or entertaining guests, this flavorful stir-fry is sure to impress. Enjoy the combination of tender beef and earthy mushrooms in every bite!

Heading: Frequently Asked Questions (FAQs)

Can I use different types of mushrooms in the stir-fry?

Yes, you can definitely experiment with different types of mushrooms in your steak and mushroom stir-fry. While button or cremini mushrooms are commonly used, feel free to try shiitake, oyster, or portobello mushrooms for added flavor and texture.

Can I substitute the beef with chicken or tofu?

Absolutely! If you prefer poultry over red meat or follow a vegetarian diet, you can easily swap out the beef for chicken breast strips or firm tofu cubes. Adjust cooking times accordingly to ensure that they are cooked through.

How can I make the stir-fry sauce less salty?

If you find that your stir-fry sauce is too salty for your taste buds, there are a few ways to balance it out. You could dilute it by adding more liquid ingredients such as water or broth. Alternatively, add some sweetness like honey or brown sugar to counteract the saltiness. Another option is incorporating acid from citrus juice like lemon juice which will help cut down on saltiness while enhancing flavors.

Can I make this dish vegetarian-friendly?

Certainly! To make this dish suitable for vegetarians/vegans omitting animal products entirely; replace soy-based sauces such as Worcestershire Sauce/Oyster Sauce/Fish Sauce etc.,with plant-based alternatives available at most grocery stores today.You may also consider using vegetable stock instead of traditional broths made from meat bones.Additionally,you have flexibility when choosing protein substitutes,such as tempeh,tofu,mushroom stems,and seitan among others.Be sure all other ingredients align with dietary preferences/restrictions before preparing recipe.

Can I freeze leftovers?

Yes,the leftover steak and mushroom Stir-Fy freezes well.To do so,follow these steps:

  1. Allow any remaining portion(s)to cool completely.
  2. Transfer cooled portions into freezer-safe containers or resealable bags.
  3. Label and date the containers/bags for easy identification in future.
  4. Store them flat to maximize freezer space,if using bags;otherwise stack containers neatly.
  5. Frozen leftovers can be stored up to three-four months. When ready to consume,reheat thoroughly on stovetop until heated through.

Remember that freezing may slightly alter texture of mushrooms,but overall taste should remain intact.Enjoy your homemade steak and mushroom stir-fry whenever you’re craving a quick meal without any hassle!

Additional Resources

URL1: Beef Mushroom Stir Fry Recipe

If you’re looking for a delicious and easy-to-make beef mushroom stir fry recipe, look no further. This recipe from Jocooks.com is packed with flavor and includes a homemade stir fry sauce made with soy sauce, oyster sauce, sugar, rice vinegar, and sesame oil. The thinly sliced beef is marinated to tenderize it before being seared in a hot skillet or wok along with garlic, onion, ginger mushrooms, and green onions. The dish can be served over rice or noodles for a satisfying meal.

URL2: Beef and Mushroom Stir-Fry Rice Plate Recipe

For those craving an authentic Chinese-style beef and mushroom stir-fry rice plate experience at home, this recipe from Thewoksoflife.com has got you covered. The author shares their personal experience of making this dish at their parents’ Chinese restaurant. They suggest using fresh mushrooms instead of canned ones to elevate the flavors even more. Additionally, the inclusion of butter adds richness to the overall taste. This flavorful dish calls for ingredients such as flank steak, oyster sauce, ginger, garlic, and Shaoxing wine. Following detailed instructions on how to prepare the meat, making the savory sauces, and assembling everything together, you’ll have yourself an irresistible meal that will transport your tastebuds straight into China!

URL3: Steak And Mushroom Stir-Fry Recipe

Looking for another mouthwatering steak and mushroom stir-fry option? Check out Vegetablerecipes.com’s take on this classic Asian-inspired dish! Their version features juicy slices of beef marinated in baking soda, cornstarch, and soy sauce to ensure tenderness. A delectable combination of soy, sugar, rice vinegar, dark soy, and sesame oil forms a richly flavored stir-fry sauce which perfectly complements the meat. In addition to the beef, onion, mushrooms, garlic, and ginger are sautéed in a skillet or wok until browned before being tossed together with the sauce. This versatile dish can be served over rice or noodles, and you can even customize it by adding your favorite vegetables such as peppers, bean sprouts, celery, or broccoli. Store any leftovers in the fridge for 3-4 days or freeze them for later enjoyment.

These additional resources provide alternative recipes to try out if you’re looking to explore different variations of steak and mushroom stir-fry. Each recipe offers its own unique twist on this classic dish, ensuring that there’s something for everyone’s taste preferences. So go ahead and click on the links above to discover new flavors and techniques!

References

  1. https://www.jocooks.com/recipes/beef-mushroom-stir-fry/
  2. https://thewoksoflife.com/beef-and-mushroom-stir-fry/
  3. https://vegetablerecipes.com/steak-with-mushrooms/
Categories
Recipes

Garlic Butter Shrimp and Asparagus Pasta Recipe: A Flavorful Delight

Quick Summary

Garlic Butter Shrimp and Asparagus Pasta is a flavorful and delicious dish that combines the richness of garlic, butter, succulent shrimp, and fresh asparagus. This blog post provides a comprehensive recipe inspired by Natasha’s Kitchen, highlighting the use of a flavor bomb made with garlic, lemon, and herbs. It also includes tips for cooking perfect shrimp, choosing the right pasta, and finishing touches to elevate the dish. Additionally, the post explores a convenient one-pan option for those looking for a hassle-free cooking experience. Whether you’re a seafood lover or simply looking for a satisfying pasta dish, this recipe is sure to impress.

Introduction

Welcome to Brood, your go-to source for delicious South African recipes! This week, we have a mouthwatering dish that combines the flavors of garlic butter shrimp and asparagus with pasta. If you’re looking for a flavorful delight that is quick and easy to make, then this recipe is perfect for you.

Garlic Butter Shrimp and Asparagus Pasta brings together the rich taste of succulent shrimp cooked in a fragrant garlic-infused butter sauce along with tender asparagus spears. The combination creates an explosion of flavors that will leave your taste buds craving more.

In this blog post, we’ll explore different sources from around the web to provide you with comprehensive information on how to create this delectable dish at home. We’ll cover everything from choosing the right ingredients and cooking techniques to serving suggestions so that you can enjoy restaurant-quality Garlic Butter Shrimp and Asparagus Pasta in no time.

So let’s dive into these external sources’ insights on creating this delightful meal – Natasha’s Kitchen provides inspiration through their flavor bomb technique using lemon zest, olive oil, garlic cloves, and Aleppo chili flakes; Braised & Deglazed offers tips on selecting suitable pasta options such as linguine or fettuccine while also emphasizing proper preparation methods like drying off excess moisture before cooking; Carlsbad Cravings shares their one-pan approach which simplifies both prep work (roasting) and cleanup by combining all components within just one skillet!

Stay tuned throughout our article where each section delves deeper into specific aspects mentioned above ensuring every step necessary towards achieving perfection when making Garlic Butter Shrimp And Asparagus Pasta has been covered thoroughly.

Garlic Butter Shrimp and Asparagus Pasta – A Flavorful Delight

If you’re looking for a delicious and satisfying meal that combines the flavors of garlic, butter, shrimp, and asparagus, then look no further than Garlic Butter Shrimp and Asparagus Pasta. This dish is bursting with flavor from the aromatic garlic to the succulent shrimp cooked in rich butter sauce. The addition of fresh asparagus adds a delightful crunch and earthy taste to this pasta dish.

The combination of ingredients creates a harmonious blend that will leave your taste buds craving more. The garlicky aroma fills your kitchen while cooking, making it hard to resist taking an early bite before serving up this delectable delight.

To create this flavorful masterpiece at home, we drew inspiration from Natasha’s Kitchen recipe. Their “flavor bomb” made with lemon zest, garlic cloves crushed into olive oil along with Aleppo chili flakes gives an extra punch of flavor when combined with juicy shrimps coated in melted butter goodness.

When preparing Garlic Butter Shrimp and Asparagus Pasta make sure to choose linguine or fettuccine noodles which can hold onto all those savory juices better compared spaghetti.

Cooking perfect shrimp requires some attention too! Make sure they are dried well before adding them into hot pan so they get nice sear on outside without becoming rubbery inside. Overcooking should be avoided by keeping close eye during process until just pinkish color appears indicating their readiness!

Finishing touches like cold cubed butter added towards end helps achieve smooth creamy texture desired for final result; starchy water left after boiling pasta also contributes creaminess if used wisely instead discarding away unused liquid.

Now let us guide you through step-by-step instructions on how prepare mouthwatering Garlic Butter Shrimp And Asparagus Pasta.

The Perfect Combination of Garlic, Butter, Shrimp, and Asparagus

Garlic butter shrimp and asparagus pasta is a dish that brings together the perfect combination of flavors – garlic, buttery goodness, succulent shrimp, and fresh asparagus. This delightful recipe combines these ingredients to create a mouthwatering meal that will leave you craving for more.

The rich flavor of garlic adds depth to this dish while the creamy butter enhances its richness. When combined with plump juicy shrimp and tender-crisp asparagus spears, it creates an explosion of flavors in every bite.

Not only does this recipe offer incredible taste but also provides numerous health benefits. Shrimp is low in calories yet high in protein which makes it an excellent choice for those looking to maintain or lose weight without compromising on taste. Asparagus not only adds vibrant color but also offers essential vitamins like A, C, E, K along with fiber making it a nutritious addition to any meal.

Whether you are cooking for yourself or entertaining guests at home, this flavorful combination guarantees satisfaction. It’s easy enough for weeknight dinners, yet elegant enough for special occasions. The simplicity lies within using quality ingredients and allowing them to shine through proper preparation techniques. Let us explore some recipes from external sources where we can learn how best to utilize these key components.

Recipe Inspiration from Natasha’s Kitchen

Natasha’s Kitchen is a popular food blog that offers an array of delicious recipes, and their Garlic Butter Shrimp Pasta recipe is no exception. This mouthwatering dish combines the rich flavors of garlic, butter, succulent shrimp, and fresh asparagus to create a truly delightful pasta experience.

Creating a Flavor Bomb with Garlic, Lemon, and Herbs

The recipe begins by creating a “flavor bomb” with lemon zest, minced garlic cloves, olive oil for richness, and Aleppo chili flakes for just the right amount of heat. This mixture infuses every bite with incredible flavor that will leave your taste buds dancing.

Choosing the Right Pasta for Garlic Butter Shrimp and Asparagus Pasta

When it comes to choosing the perfect pasta for this dish, Natasha suggests using linguine, fettuccine, or spaghetti. The long strands perfectly capture all those amazing flavors in each twirl on your fork. Additionally, the use of large shrimp with shells still intact adds another layer of depth and complexity to the overall taste profile. It allows them to cook while retaining maximum flavor, resulting in tender and juicy morsels bursting with garlicky goodness.

Enhancing the Sauce with Butter and Fresh Herbs

To enhance the sauce even further, butter is added along with freshly squeezed lemon juice. This combination creates a luscious, silky texture that coats every strand of pasta beautifully. Fresh herbs such as parsley and chives are also included, to add brightness and some additional freshness. These ingredients work together harmoniously, taking this dish from ordinary to purely extraordinary!

Optional Addition – Roasted Asparagus

For those who enjoy some extra greens in their meal, this recipe also offers an optional addition – asparagus. Roasted until tender-crisp, it adds a vibrant pop of texture and a lovely earthiness which complements the rest of flavors perfectly. Whether you choose to use it or not, you can be assured that every bite will be packed full of flavorful delights!

Helpful Tips for Cooking Perfect Shrimp

Natasha provides helpful tips throughout her recipe. For instance, drying the shrimp before cooking ensures they sear beautifully and develop a nice crust. She also advises against overcooking the shrimp to maintain their tender texture.

Finishing Touches – Cold Cubed Butter and Starchy Pasta Water

To achieve a creamy sauce, Natasha recommends finishing the pasta with cold cubed butter. This technique not only adds richness but also smoothness and velvety consistency to the sauce. Additionally, starchy pasta water is used to bind all the flavors together, resulting in a deliciously creamy dish that will have you coming back for seconds!

Step-by-Step Instructions for Garlic Butter Shrimp and Asparagus Pasta

With step-by-step instructions provided by Natasha, you can easily recreate this incredible Garlic Butter Shrimp Pasta in your own kitchen. The detailed guidance ensures that even novice cooks can confidently whip up this impressive meal for family or friends. So why wait? Get ready to indulge yourself with an explosion of flavors by trying out Natasha’s inspiring recipe!

Creating a Flavor Bomb with Garlic, Lemon, and Herbs

Garlic butter shrimp and asparagus pasta is all about creating bold flavors that will tantalize your taste buds. One way to achieve this is by making a flavor bomb using garlic, lemon zest, olive oil, and herbs.

Intense Aroma and Robust Flavor

The combination of fresh garlic cloves minced or grated into the sauce adds an intense aroma and robust flavor. The pungent notes from the garlic infuse every bite of the dish.

Brightness with Tangy Essence

Lemon zest brings brightness to the recipe with its tangy essence. By grating just a bit of lemon peel into the mixture, you’ll add depth without overpowering other ingredients in your dish.

Imparting Richness

To enhance these flavors further, drizzle some high-quality extra virgin olive oil over everything before tossing it together. This not only helps bind all those delicious elements but also imparts richness to each mouthful.

Secret Weapon – Herbs!

Lastly comes our secret weapon – herbs! Fresh parsley finely chopped provides freshness while chives lend their mild onion-like flavor profile for added complexity. These aromatic greens bring balance to both seafood’s natural sweetness and sharpness from citrus components like lemons or limes used throughout cooking processes involved here!

By combining these simple yet powerful ingredients together in one bowl (or pan), you create an explosion of tastes that elevate any ordinary meal into something extraordinary – truly worthy enough for special occasions or when you simply want indulgence on regular days too!

Stay tuned as we explore more tips on how best utilize this flavorful concoction within various recipes such as linguine fettuccine spaghetti dishes featuring succulent shrimps alongside tender-crisp green stalks known widely among food enthusiasts worldwide under name “asparagus.”

Choosing the Right Pasta for Garlic Butter Shrimp and Asparagus Pasta

When it comes to creating a delicious garlic butter shrimp and asparagus pasta dish, choosing the right type of pasta is crucial. The perfect pasta will complement the flavors of the succulent shrimp, aromatic garlic, and tender asparagus.

There are several options that work well with this recipe. Linguine, fettuccine, or spaghetti are all excellent choices due to their long shape which allows them to hold onto sauce effectively. These types of pastas also provide a satisfying bite when cooked al dente.

Linguine

Linguine is similar in width to spaghetti but has a flat shape instead of being round like traditional spaghetti noodles. This makes linguine an ideal choice for capturing every bit of flavor from your creamy garlic butter sauce.

Fettuccine

Fettuccine, on the other hand, offers wider ribbons that can beautifully coat each piece of shrimp and strand of asparagus with its rich texture. Its thickness adds substance without overpowering any individual ingredient in this delightful dish.

If you prefer something slightly thinner than fettuccine,

Tips for Cooking Perfect Shrimp

Cooking shrimp can be a delicate process, as overcooking them can result in rubbery and tough texture. To ensure that your garlic butter shrimp and asparagus pasta turns out perfectly every time, here are some helpful tips:

1. Dry the Shrimp:

Before cooking the shrimp, make sure to pat them dry with paper towels. This helps remove any excess moisture on the surface of the shrimp, allowing them to cook evenly.

2. Don’t Overcook:

Shrimp cooks very quickly – usually within 2-3 minutes per side depending on their size. Be careful not to leave them on heat for too long or they will become chewy and lose their natural sweetness.

3. Use Large Shrimp with Shell On (Optional):

For an extra burst of flavor, consider using large-sized shrimps with shells still intact while cooking Garlic Butter Shrimp Pasta with Asparagus and Herbs recipe mentioned earlier from Braised & Deglazed website. The shells add depth to both taste and presentation but if you prefer convenience or have shellfish allergies feel free use peeled ones instead.

4. Cook at High Heat:

When sautéing or pan-frying your garlic buttered shrimps, it’s best done over high heat which ensures quick searing without making it soggy.

5. Finish With Cold Cubed Butter:

Adding cold cubed butter towards the end gives the sauce a creamy consistency along with enhancing flavors further.

By following these simple yet effective tips, you’ll achieve tender, succulent, and flavorful results each time you prepare this delicious dish.

Finishing Touches – Cold Cubed Butter and Starchy Pasta Water

To elevate the flavors of our garlic butter shrimp and asparagus pasta, we have two secret ingredients that will take this dish to a whole new level. These finishing touches are cold cubed butter and starchy pasta water.

Cold Cubed Butter

Cold cubed butter is added at the end of cooking to create a smooth, velvety sauce for your pasta. As it melts into the hot pan, it emulsifies with the other ingredients, creating a rich coating that clings perfectly to each strand of spaghetti or linguine. The addition of cold butter not only adds creaminess but also helps balance out any acidity from lemon juice or chili flakes used in previous steps.

Starchy Pasta Water

Starchy pasta water is another essential element when making creamy sauces like ours. When you cook your chosen type of pasta until al dente (firm yet tender), make sure to reserve some of its cooking liquid before draining it off completely. This starchy water acts as an excellent thickening agent due to its high starch content which binds all components together while adding body and silkiness without overpowering flavors.

When combining these two elements – cold cubed butter and starchy pasta water – you’ll achieve a luscious consistency that coats every bite with flavor-infused goodness! Remember always add them gradually while tossing everything together over low heat so they can meld harmoniously without breaking apart or becoming greasy.

Now armed with these insider tips on how best utilize both cold cubed butter and starchy pasta water, you’re ready to bring your garlic butter shrimp and asparagus pasta to life in the most delectable way possible. Enjoy the silky-smooth sauce and creamy texture that will complement the garlicky shrimp and asparagus perfectly.

Step-by-Step Instructions for Garlic Butter Shrimp and Asparagus Pasta

  1. Prepare the Ingredients:

    • 1 pound of large shrimp, peeled and deveined
    • 8 ounces of linguine, fettuccine, or spaghetti pasta
    • 2 tablespoons of olive oil
    • 4 cloves of garlic, minced
    • Zest from one lemon
  2. Cook the Pasta:

    1. Fill a large pot with water and bring it to a boil.
    2. Add salt to taste (about one tablespoon).
    3. Cook the pasta according to package instructions until al dente.
  3. Make the Flavor Bomb Sauce:

    1. In a small bowl, combine minced garlic with lemon zest.
    2. Drizzle in two tablespoons of olive oil while stirring continuously.
  4. Sautéing Shrimp:

    1. Heat two tablespoons butter in a skillet over medium-high heat until melted but not browned.
    2. Pat dry shrimp using paper towels; season lightly with salt & pepper then add them into hot pan spreading out evenly so they are all touching bottom surface area at once without overcrowding – this ensures even cooking time throughout each piece!
    3. Let cook undisturbed about three minutes per side depending on size/thickness before flipping only ONCE halfway through total cooking process which should take approximately six-eight mins tops if done correctly!
    4. Remove cooked shrimps onto a plate lined with paper towel to absorb excess grease/oil, set aside, and keep warm covered loosely with foil tent to prevent drying out too much during the resting period prior to serving later when ready to eat together as part of the final dish creation!
  5. Cooking Asparagus (optional):

    If you choose to include asparagus in your dish:

    1. Preheat oven broiler setting to a high temperature level.
    2. Trim woody ends off fresh green stalks by snapping them off where they naturally break apart when bent gently backwards.
    3. Arrange asparagus spears on a baking sheet lined with foil or parchment paper, drizzle olive oil over top and season lightly with salt/pepper if desired before placing under the broiler for about 5-7 minutes until tender crisp yet still vibrant green color remains intact!
  6. Combining the Ingredients:

    1. In a large skillet, melt four tablespoons of butter over medium heat.
    2. Add the flavor bomb sauce to the melted butter and cook for one minute while stirring continuously.
    3. If using cooked asparagus, add it to the skillet at this point.
    4. Drain pasta well then transfer directly into the pan containing the garlic-butter mixture; toss to coat evenly throughout the entire dish creation process, ensuring every strand gets coated nicely without clumping together too much!
    5. Finally, fold in the shrimp (and optional roasted lemon slices from URL3), tossing everything together gently so that all ingredients are combined thoroughly but not overly mixed up, which could cause delicate shrimps to fall apart easily during the final plating presentation later!

One Pan Butter Garlic Shrimp – A Convenient Option

If you’re looking for a quick and easy meal that requires minimal cleanup, then the One Pan Butter Garlic Shrimp recipe is perfect for you. This dish combines succulent shrimp with a buttery garlic sauce, all cooked in just one pan. The addition of lemon adds a tangy twist to this flavorful delight.

The simplicity and convenience of cooking everything in one pan make this recipe ideal for busy weeknights or when you want to spend less time cleaning up after dinner. Not only does it save on dishes but also allows the flavors from each ingredient to meld together beautifully.

Enhancing the Flavor with Roasted Asparagus

To enhance the taste even further, consider roasting some asparagus alongside your shrimp. Asparagus pairs wonderfully with seafood and provides an extra layer of flavor and texture to your pasta dish.

Step-by-Step Instructions

  1. Start by melting butter in a large skillet over medium heat.
  2. Add minced garlic into the melted butter and sauté until fragrant.
  3. Place peeled deveined shrimp into the skillet along with salt, pepper, paprika (optional), red chili flakes (optional), lemon zest/juice according to preference.
  4. Cook until shrimps turn pinkish-orange while stirring occasionally; avoid overcooking them as they can become rubbery if left too long on high heat.
  5. If desired, add roasted asparagus spears at this point.
  6. Once ready, remove from heat and serve hot.

This simple yet mouthwatering recipe will surely impress both family members or guests alike! So why not give it a try today? Enjoy!

Note: You may choose any type of pasta such as linguine, fettuccine, etc based upon personal preferences.

Roasting Asparagus for Enhanced Flavor

Roasting asparagus is a fantastic way to enhance its natural flavors and add depth to your Garlic Butter Shrimp and Asparagus Pasta. The process of roasting brings out the sweetness in asparagus while giving it a slightly crispy texture.

Preparation

To roast asparagus, start by preheating your oven to 425°F (220°C). While the oven heats up, prepare the asparagus by trimming off any tough ends. You can do this easily by holding each end of an individual spear and bending it until it snaps naturally at its tender point.

Roasting Process

Next, place the trimmed asparagus spears on a baking sheet lined with parchment paper or aluminum foil for easy cleanup. Drizzle them generously with olive oil, ensuring that all sides are coated evenly. Season with salt and pepper according to taste preferences.

For added flavor complexity, you can also sprinkle some minced garlic over the oiled and seasoned spears before placing them in the oven.

Serving Garlic Butter Shrimp and Asparagus Pasta

Once you have prepared the delicious garlic butter shrimp and asparagus pasta, it’s time to serve up this flavorful dish. Here are some suggestions on how to present your creation:

1. Plating Options:

  • For an elegant presentation, use a large white plate or shallow bowl.
  • Alternatively, for a more rustic feel, consider serving the pasta in individual cast iron skillets.

2. Garnish with Fresh Herbs:

Sprinkle freshly chopped parsley or chives over the top of each serving for added freshness and color.

3. Add Some Heat (Optional):

If you enjoy spicy flavors, sprinkle some red pepper flakes over the finished dish before serving.

4. Serve with Crusty Bread:

To complement the rich flavors of garlic butter shrimp and asparagus pasta, offer slices of crusty bread on the side for dipping into any remaining sauce.

5. Pairing Suggestions:

  • A crisp white wine such as Sauvignon Blanc or Pinot Grigio would pair well with this seafood-based dish.
  • If you prefer non-alcoholic options, try sparkling water infused with lemon slices or a refreshing glass of homemade iced tea.

Remember that presentation is key when it comes to enjoying food visually appealing dishes can enhance our dining experience. So take your time arranging everything beautifully before digging in!

Now that we’ve covered all aspects from preparation to plating, serving, and pairing, you’re ready to impress family, friends, or even yourself! Enjoy every bite of this delightful combination of garlic butter shrimp asparagus pasta and savor the amazing flavors it has in store for you today.

Step-by-Step Instructions for One Pan Butter Garlic Shrimp

  1. Start by preparing the shrimp. If using frozen shrimp, thaw them according to package instructions and pat dry with paper towels.
  2. In a large skillet or frying pan, melt butter over medium heat until it starts to sizzle.
  3. Add minced garlic to the melted butter and cook for about 30 seconds until fragrant, stirring constantly so that it doesn’t burn.
  4. Place the dried shrimp in a single layer in the hot skillet and season generously with salt and pepper.
  5. Cook on one side for about 2 minutes until they start turning pink around the edges before flipping them over carefully using tongs or a spatula.
  6. Add lemon juice into your cooking mixture along with red pepper flakes (if desired). Stir everything together well.
  7. Continue cooking just another minute or two longer after adding lemon juice; then remove from heat altogether while finishing off sauce ingredients separately – this ensures optimal flavor without any risk of burning anything important!
  8. Increase temperature slightly under low-medium flame setting if necessary during final stages where you’re combining all components back onto stovetop again at once–this will help ensure even distribution throughout dish as opposed only having certain parts cooked properly due uneven heating sources present within most kitchens today’s modern appliances tend not distribute evenly across entire surface area being used simultaneously which can lead some areas becoming hotter than others resulting inconsistent results overall when finished product served up table guests family members alike who may have differing preferences regarding level spiciness their food likes dislikes etcetera depending upon individual tastes dietary restrictions allergies sensitivities personal beliefs cultural traditions religious practices followed home kitchen environment question
  9. Once pasta is al dente drain reserving cup liquid set aside keep warm meantime
  10. Return drained pot add remaining tablespoon olive oil reduce med-low sauté shallots translucent tender approximately mins
  11. Stir occasionally prevent browning
  12. Add garlic cook additional stirring constantly fragrant approximately 1-2 minutes careful not burn
  13. Increase heat medium-high add white wine scraping any browned bits bottom pan bring boil reduce simmer until liquid reduced half about mins.
  14. Reduce low stir heavy cream lemon zest salt pepper continue gently bubbling thickened slightly another remove from whisk parmesan cheese melt throughly smooth creamy sauce consistency desired.

References

  1. https://natashaskitchen.com/shrimp-scampi-pasta/
  2. https://braisedanddeglazed.com/quick-and-easy-garlic-butter-shrimp-pasta-with-asparagus-and-herbs/
  3. https://carlsbadcravings.com/roasted-lemon-butter-garlic-shrimp-recipe/

Categories
Recipes

Sausage and Egg Breakfast Sandwiches: Delicious Recipes for a Hearty Morning Meal

Quick Summary

In this blog post, we explore the delicious world of sausage and egg breakfast sandwiches. We provide three different recipes, each with its own unique twist, including the use of maple butter for added flavor. Whether you prefer to make them fresh, freeze them for later, or enjoy a homemade version of a fast food favorite, these sandwiches are a hearty and satisfying way to start your day.

Introduction

Sausage and egg breakfast sandwiches have become a beloved morning staple for many people. The combination of savory sausage, fluffy eggs, and melted cheese sandwiched between two slices of bread or an English muffin creates a satisfying meal that can be enjoyed at any time of the day.

The popularity of these sandwiches stems from their versatility. They are not only delicious but also incredibly customizable to suit individual preferences. Whether you prefer bacon instead of sausage, want to add some veggies like spinach or bell peppers, or opt for different types of cheeses such as Cheddar or Swiss – there is no limit to how creative you can get with your own version.

These hearty sandwiches provide the perfect balance between protein-rich ingredients and carbohydrates needed to fuel your body in the morning. With just one bite into this handheld delight, you’ll experience layers upon layers of flavors coming together harmoniously – it’s truly a taste sensation!

Whether you’re looking for something quick on busy mornings before work/school or need sustenance before embarking on outdoor activities like skiing (as mentioned by our external sources), sausage and egg breakfast sandwiches offer convenience without compromising flavor.

In this blog post, we will explore three fantastic recipes sourced from reputable websites that showcase various takes on these delectable treats. From maple butter-infused creations to freezer-friendly options ideal for meal prepping ahead – prepare yourself because things are about to get delicious!

Recipe 1 – Sausage, Egg, and Cheese Breakfast Sandwich with Maple Butter

This recipe for a sausage, egg, and cheese breakfast sandwich with maple butter is the perfect way to start your day. Inspired by URL1’s Two Peas & Their Pod blog post, this hearty and filling sandwich will leave you satisfied until lunchtime.

The secret ingredient in this delicious creation is the maple butter. Made by mixing softened butter and pure maple syrup together, it adds a touch of sweetness that perfectly complements the savory flavors of the sausage patty and Cheddar cheese.

To make things even more convenient for busy mornings or meal prep purposes, consider making extra sandwiches ahead of time. Simply store them in the fridge so they’re ready to grab-and-go throughout the week.

With detailed instructions provided on how to cook flavorful sausage patties from scratch as well as whisking up fluffy scrambled eggs just right before assembling everything between toasted English muffins spread generously with homemade maple butter – there’s no doubt that these breakfast sandwiches are worth waking up early for!

So why settle for boring cereal when you can indulge in a mouthwatering combination like this? Give Recipe 1 – Sausage, Egg, and Cheese Breakfast Sandwiches With Maple Butter a try today!

Recipe 2 – Freezer Sausage, Egg, and Cheese Breakfast Sandwiches

If you’re someone who is always on the go in the mornings or simply looking for a convenient breakfast option that can be prepared ahead of time, then freezer sausage, egg, and cheese breakfast sandwiches are just what you need. This recipe from URL2 offers a simple yet delicious way to enjoy a hearty morning meal without any hassle.

The beauty of these freezer-friendly sandwiches lies in their ability to save you precious time during those busy weekday mornings. By preparing them in advance and storing them in your freezer, all it takes is a few minutes under the broiler or microwave before they’re ready to devour.

To make these scrumptious breakfast treats at home:

  1. Start by cooking up some savory sausage patties according to your preference.

    • You can use pre-made sausages or create your own blend with spices like sage, thyme, and black pepper for an extra kick of flavor.
  2. While the sausages are sizzling away on the stove-top griddle pan (or skillet), whisk together eggs seasoned with salt and pepper until well combined.

  3. Cook scrambled eggs over medium heat until fluffy but still slightly moist; avoid overcooking as they will continue cooking when reheated later.

  4. Once everything has cooled down completely, it’s assembly time! Take English muffins split into halves, layer each bottom half with one cooked sausage patty, followed by spooning about two tablespoons worth scrambled eggs onto each sandwich. Top off everything generously grated Cheddar cheese. Finally, cap it off with the other half of the English muffin.

  5. Wrap individual assembled sandwiches tightly in aluminum foil or plastic wrap. Place wrapped sandwiches inside a large resealable bag, label with the date, and store flatly in the freezer for up to three months.

Preparing these delightful frozen delights comes along with several benefits. First and foremost, they save you precious time in the morning rush. Instead of spending valuable minutes cooking each component from scratch, you can simply grab a sandwich straight out of your freezer.

Additionally, the convenience factor cannot be overstated. With these sandwiches at hand, you no longer have to settle for unhealthy fast food options or skip breakfast altogether. Simply pop one into the microwave or broiler, and within minutes, a hot and satisfying meal is ready to fuel your day ahead.

Lastly, this recipe allows for customization. You can experiment with different types of sausages, cheeses, and add-ons like sliced tomatoes, spinach, or caramelized onions to make it truly your own. Whatever combination you choose, rest assured that every bite will be bursting with flavors and textures.

So why not give this freezer sausage, egg, and cheese breakfast sandwich recipe a try? It’s an excellent way to ensure you always have a delicious homemade option on hand when mornings get hectic. Prepare them over the weekend, enjoy throughout the week, and start your days off right!

Recipe 3 – Sausage & Egg McMuffin Style Breakfast Sandwich

If you’re a fan of the classic McDonald’s breakfast sandwich, then this homemade version is sure to impress. The recipe from Chef Sous Chef provides all the deliciousness of a sausage and egg McMuffin but with an added twist that takes it to another level.

The author begins by expressing their preference for this homemade version over fast food options. They emphasize that making your own breakfast sandwich allows you to control the quality of ingredients used and customize it according to your taste preferences.

One standout element in this recipe is the use of maple butter. By combining softened butter with pure maple syrup, they create a sweet and savory spread that adds incredible flavor depth to each bite. This simple addition elevates the overall taste profile of the sandwich, giving it a unique touch not found in traditional versions.

Assembly Instructions

To assemble these mouthwatering sandwiches at home, start by cooking up some flavorful sausage patties until perfectly browned and juicy. While those are sizzling away on one side, whisk together eggs seasoned with salt and pepper on another pan until light and fluffy scrambled perfection is achieved.

Once everything has cooked through beautifully, layer slices of cheese onto toasted English muffins before topping them off with warm sausages followed by generous portions of creamy scrambled eggs infused with rich flavors.

Finally comes time for spreading that delectable maple butter across both halves of each muffin – ensuring every single bite bursts forth with sweetness balanced against hearty goodness!

By following these straightforward instructions provided within URL3’s blog post titled “Sausage & Egg McMuffin Style Breakfast Sandwich,” readers can recreate their favorite fast-food treat right at home while adding personal touches along the way.

Heading: Cooking Instructions

To create the perfect sausage and egg breakfast sandwich, follow these general cooking instructions. While specific recipes may have slight variations, this overview will guide you through the process.

1. Sausage Patties:

  • Heat a skillet or frying pan over medium heat.
  • Place the sausage patties in the heated pan and cook until browned on both sides.
  • Ensure that they are cooked thoroughly by checking for an internal temperature of 160°F (71°C).
  • Drain any excess grease from the patties before assembling your sandwich.

2. Scrambled Eggs:

  • In a bowl, whisk together eggs with salt and pepper to taste.
  • Take another non-stick skillet or frying pan and melt butter over medium-low heat.
  • Pour in beaten eggs into melted butter.
  • Gently stir continuously using a spatula until desired consistency is reached – soft scrambled works best for sandwiches!
  • Cooking time can vary but aim for around 3 minutes till done.

Note: Some recipes might suggest adding milk or cream to make fluffier scrambled eggs while others recommend omitting it altogether.

3. Toasting English Muffins:

  • Toasting adds texture as well as flavor so don’t skip this step!
  • Slice open each English muffin horizontally creating two halves per muffin.
  • Lightly toast them either under broiler setting of oven/grill/toaster oven OR use toaster if available.

Specific tips mentioned in various recipes include:

  • Making sure not to overcrowd your skillet when cooking multiple sausages at once; give them enough space to evenly cook without touching each other too much.
  • Allowing sufficient resting time after removing sausages from heat helps retain their juiciness.
  • Incorporating additional ingredients such as cheese slices during assembly stage allows melting due to residual warmth.

Remember that every recipe has its own unique twist on these basic steps, so be sure to refer back to individual recipes for any specific techniques or variations.

Assembly and Serving

Assembling a delicious sausage and egg breakfast sandwich is quick and easy. Follow these simple steps to create the perfect morning meal:

  1. Start by gathering all your ingredients, including cooked sausage patties, scrambled eggs, toasted English muffins, slices of cheese (Cheddar or any other preferred variety), and maple butter.
  2. Take one half of an English muffin as the base for your sandwich. Spread a generous amount of maple butter on both halves for that sweet touch.
  3. Place a warm sausage patty on top of the bottom half of the English muffin.
  4. Next comes the fluffy scrambled eggs – pile them high onto the sausage patty.
  5. Lay a slice or two (depending on preference) of Cheddar cheese over the eggs while they are still hot so it melts slightly from their warmth.
  6. Top off with another layering piece like bacon if desired!
  7. Finally, place the second half of the English muffin on top, creating a complete sandwich.

Now that you have assembled your mouthwatering creation, let’s talk about additional toppings or condiments to take this breakfast delight up another notch in flavor:

  • For some added freshness, try adding sliced tomatoes or avocado.
  • A dollop of mayonnaise can add creaminess.
  • If you prefer some heat, sprinkle red pepper flakes or drizzle sriracha sauce on top.

To serve this delectable treat, consider pairing it with:

  • Fresh fruit such as berries, melon chunks, etc., for a refreshing burst.
  • A steaming cup of coffee to kickstart your day.

With its combination of savory sausages, eggs, and melted cheese, this breakfast sandwich is sure to satisfy any hungry appetite. Serve it with sides and condiments that complement the flavors and enjoy the perfect morning meal!

Other Pre-Ski Breakfast Recipes

When it comes to fueling up before hitting the slopes, a sausage and egg breakfast sandwich is just one option. If you’re looking for some variety in your pre-ski meals, here are a few other delicious recipes that were mentioned in our external sources:

1. Maple Pecan Overnight Oats:

Start your day off right with this hearty and nutritious breakfast option. Simply combine rolled oats, milk (or almond milk), maple syrup, chopped pecans, and a pinch of salt in a jar or container. Let it sit overnight in the fridge so that all the flavors meld together perfectly by morning.

2. Veggie Scramble Wrap:

For those who prefer something lighter but still packed with flavor and nutrients, try making a veggie scramble wrap! Sauté an assortment of colorful vegetables like bell peppers, onions, and spinach until tender-crisp. Then whisk eggs together with salt, pepper, and any desired herbs. Pour over veggies, stirring occasionally until cooked through. Spoon mixture onto tortillas, topping them off with grated cheese. Roll tightly into wraps, enjoy!

3. Breakfast Burrito Bowl:

If you want to switch things up from sandwiches altogether, this recipe will surely hit the spot. Start by cooking quinoa according to package instructions. In another pan, sauté diced potatoes, onions, bell peppers, and chorizo. Once everything is cooked, take bowls filled halfway with quinoa. Top it off with eggs cooked to your preference and add avocado slices, fresh cilantro, chopped tomatoes, a dollop of sour cream, and salsa. Serve hot as a filling meal before hitting the slopes.

4. Blueberry Pancakes:

Pancakes make for an indulgent yet satisfying pre-ski treat. Mix flour, baking powder, sugar, cinnamon, in a separate bowl whisk eggs, milk, vanilla extract. Add wet ingredients into dry ones until just combined. Gently fold in blueberries. Cook pancakes on a greased griddle or non-stick pan until golden brown. Serve with maple syrup and extra blueberries for an added burst of flavor.

These recipes offer a range of flavors, textures, and nutritional benefits to keep you energized throughout your skiing adventures. Whether you prefer something sweet like the Blueberry Pancakes or savory like the Veggie Scramble Wrap, there’s sure to be a recipe that suits your taste buds. So why not try out these other pre-ski breakfast options? They’re easy to make and will provide you with the sustenance needed for an active day on the slopes!

Conclusion

In this blog post, we explored the delicious world of sausage and egg breakfast sandwiches. We discussed three different recipes that showcase the versatility and convenience of this popular morning meal.

Sausage, Egg, and Cheese Breakfast Sandwich with Maple Butter

The first recipe featured a Sausage, Egg, and Cheese Breakfast Sandwich with Maple Butter. The secret to its mouthwatering flavor lies in the maple butter spread made by combining softened butter and pure maple syrup. This hearty sandwich is perfect for fueling up before hitting the slopes or starting your day on a satisfying note.

Freezer Sausage, Egg, and Cheese Breakfast Sandwiches

Next, we discovered Freezer Sausage, Egg, and Cheese Breakfast Sandwiches – an excellent option for those busy mornings when time is limited. By preparing these sandwiches ahead of time and freezing them until needed, you can enjoy a homemade breakfast without any hassle or compromise on taste.

Sausage & Egg McMuffin Style Breakfast Sandwich

Lastly but certainly not least was our take on McDonald’s classic McMuffin-style sandwich – featuring savory sausage patties paired with fluffy scrambled eggs all nestled between toasted English muffins slathered with delectable maple butter goodness!

Whether you’re looking for something quick to grab from your freezer or prefer taking some extra minutes to prepare it fresh each morning; there’s no denying that sausage & egg breakfast sandwiches are both convenient AND versatile options! They provide sustenance during hectic days while also being ideal pre-ski fuel thanks to their protein-packed ingredients.

So why not give one (or all!) of these recipes a try? You’ll be able to customize them according to your preferences by adding additional toppings like cheese slices or even avocado if desired! With endless possibilities at hand plus guaranteed satisfaction every bite taken into account- what more could anyone ask?

Start experimenting today because once you experience how easy it is making YOUR OWN version right within reach whenever hunger strikes again…you won’t want anything else ever since then!

References

  1. https://www.twopeasandtheirpod.com/sausage-egg-and-cheese-breakfast-sandwich-with-maple-butter/
  2. https://damndelicious.net/2019/03/09/freezer-sausage-egg-and-cheese-breakfast-sandwiches/
  3. https://www.chefsouschef.com/breakfast-sandwich/
Categories
Recipes

Bacon-Wrapped Chicken Parmesan: A Delicious Twist on a Classic Comfort Food

Quick Summary

This blog post explores the mouthwatering world of bacon-wrapped chicken Parmesan. It features three different recipes, each with its own unique twist, including the use of Signature Select products from Jewel-Osco. Whether you’re looking for a classic comfort food or a new flavor combination, these recipes are sure to satisfy your cravings.

Introduction

Bacon-Wrapped Chicken Parmesan is a delightful twist on the classic comfort food that combines the irresistible flavors of crispy bacon, tender chicken, and gooey cheese. This mouthwatering dish takes your taste buds on an exciting journey with every bite. Whether you’re looking for a quick weeknight dinner or planning a special occasion meal, this recipe is sure to impress.

The combination of savory bacon wrapped around succulent chicken creates an explosion of flavors in each delicious morsel. The smoky saltiness from the bacon perfectly complements the juicy tenderness of the chicken breast. And let’s not forget about that ooey-gooey layer of melted cheese! It adds richness and creaminess to elevate this already incredible dish.

What makes Bacon-Wrapped Chicken Parmesan even more enticing is its simplicity in preparation. With just a few easy steps, you can have this delectable creation ready to serve in no time at all. So whether you’re cooking for yourself or entertaining guests, it’s guaranteed to be both satisfying and impressive.

So why settle for ordinary when you can indulge in something extraordinary? Let us guide you through these tantalizing recipes so that your next dining experience will leave everyone craving seconds.

Recipe 1 – Bacon-Wrapped Chicken Parmesan with Signature Select Products

If you’re looking for a delicious twist on the classic comfort food, then this recipe for bacon-wrapped chicken Parmesan is just what you need. This mouthwatering dish combines the flavors of crispy bacon, tender chicken, and gooey cheese to create an unforgettable meal.

The first recipe we’ll be discussing comes from URL1 and features Signature Select products from Jewel-Osco. These high-quality ingredients are exclusive to and carried by all 18 banners of the Albertsons Companies family of stores.

To make this delectable dish, start by seasoning your chicken breasts with salt and pepper. Then spread a layer of pesto sauce over each piece before generously sprinkling them with grated Parmesan cheese.

Now it’s time to wrap that flavorful goodness in savory strips of bacon! Carefully place one slice around each seasoned breast until they are fully covered in irresistible smoky flavor.

Preheat your oven according to the instructions provided in URL1’s blog post while allowing yourself some time to appreciate how amazing these bundles look already!

Once preheated, transfer your wrapped masterpieces onto a baking sheet lined with parchment paper or aluminum foil (for easy cleanup). Bake at [insert temperature] for about [insert cooking time], or until both the chicken is cooked through and its exterior has reached golden perfection.

While waiting anxiously as those aromas fill up every corner of your kitchen space like magic spells being cast upon taste buds everywhere… prepare spaghetti noodles following package directions if desired – because who can resist pairing such succulent delights?

When everything is ready-to-serve status quo-wise; plate up generous portions alongside any remaining pasta sauce left after coating said strands earlier during preparation stages mentioned above…

And there you have it—a tantalizingly tasty creation brought forth thanks largely due sponsorship support received via our friends over at Jewel-Osco! Their Signature Select products truly elevate this dish to new heights of flavor and satisfaction.

So, why not give it a try? Indulge in the irresistible combination of bacon-wrapped chicken Parmesan with Signature Select products. Your taste buds will thank you!

Recipe 2 – Bacon-Wrapped Parmesan Crusted Chicken

If you’re looking for a delicious twist on traditional chicken Parmesan, this recipe is sure to satisfy your cravings. The second recipe we’ll be discussing comes from URL2 and features a mouthwatering bacon-wrapped Parmesan crusted chicken.

To create this delectable dish, start by wrapping tender chicken strips in crispy bacon slices. This not only adds an extra layer of flavor but also helps keep the chicken moist during cooking.

Next, prepare a mixture of grated Parmesan cheese, salt, and pepper. Coat each bacon-wrapped piece of chicken with this flavorful blend until they are fully covered.

Now it’s time to cook the bacon-wrapped parmesan crusted chickens! Place them on a preheated grill or stovetop pan over medium heat. Cook the chickens on all four sides until both the bacon and internal temperature reach their desired level of doneness.

Once cooked thoroughly, remove these irresistible creations from heat and let them rest for just a few minutes before serving.

This versatile dish can be enjoyed as-is or paired with your favorite dipping sauce such as marinara or ranch dressing – adding even more depth to its already incredible flavors!

For those who like keeping track of nutritional information while enjoying their meals worry-free; here are some details about our delightful creation:

  • Calories per serving: [insert calorie count]
  • Fat content: [insert fat grams]
  • Protein content: [insert protein grams]

With its combination of savory ingredients like crispy bacon wrapped around juicy pieces of chicken and the cheesy goodness of Parmesan cheese, this bacon-wrapped Parmesan crusted chicken recipe is guaranteed to become a family favorite. So, gather your ingredients, get ready to cook, and indulge in your new go-to comfort food dish. Enjoy!

Recipe 3 – Bacon-Wrapped Stuffed Chicken with Parmesan Cream

If you’re looking to take your bacon-wrapped chicken Parmesan to the next level, then this recipe is for you. From URL3, we bring you a mouthwatering dish featuring bacon-wrapped stuffed chicken with Parmesan cream.

To start off, gather all the ingredients needed for this delectable creation. You’ll need Signature SELECT Four Cheese Pasta Sauce from Jewel-Osco’s exclusive line of products along with some pesto sauce. For that cheesy goodness, grab mozzarella and Parmesan cheese as well.

Instructions:

  1. Preheat your oven according to the temperature specified in the recipe.
  2. Take a baking dish and spread a generous layer of Signature SELECT Four Cheese Pasta Sauce at its base.
  3. Next up is adding an extra burst of flavor by spreading some pesto sauce over each piece of chicken breast.
  4. Now it’s time for that irresistible cheesiness! Sprinkle a blend of mozzarella and grated Parmesan cheese on top of each seasoned chicken breast.
  5. Wrap each piece tightly with slices of savory bacon until they are fully covered – ensuring every bite has that smoky taste!
  6. Place these beautifully wrapped bundles onto your prepared baking dish snugly side by side so they can cook evenly together in harmony within their creamy surroundings.
  7. Pop them into the preheated oven where magic happens; bake until golden brown perfection is achieved!

Once cooked through thoroughly (check internal temperature), remove from the heat source but don’t stop there! Serve alongside spaghetti noodles tossed lightly coated remaining pasta sauces which will add another dimension flavorsome experience enjoyed wholeheartedly without any regrets whatsoever because life is too short not to indulge oneself occasionally, especially when it comes to something delicious like our signature product range known for high quality and value offered exclusively across Albertsons Companies family stores, including Jewel-Osco locations near or far away depending on where you reside.

So, if you’re ready to elevate your bacon-wrapped chicken Parmesan game, give this recipe a try. The combination of the crispy bacon, tender and flavorful stuffed chicken breast with that creamy Parmesan sauce will surely leave everyone at the table asking for seconds. Don’t forget to pick up Signature products from Jewel-Osco stores – they are known for their exceptional quality and value.

Stay tuned as we bring more exciting recipes like these every week!

Serving Suggestions and Pairings

When it comes to serving bacon-wrapped chicken Parmesan, there are plenty of delicious options that can complement this flavorful dish. Here are some suggestions for sides and beverages that will elevate your meal:

1. Side Dishes:

  • Pasta: Serve the bacon-wrapped chicken Parmesan with a side of spaghetti or fettuccine tossed in marinara sauce or alfredo sauce. The combination of tender pasta and cheesy chicken is simply irresistible.
  • Salad: Balance out the richness of the dish by pairing it with a fresh green salad dressed with vinaigrette or creamy Caesar dressing. The crispness of lettuce leaves along with tangy flavors will provide a refreshing contrast.
  • Roasted Vegetables: Add some roasted vegetables like asparagus, zucchini, bell peppers, or Brussels sprouts on the side for added color and nutrition.

2. Beverages:

To complete your dining experience while enjoying bacon-wrapped chicken Parmesan, consider these beverage pairings:

  • Italian Sparkling Mineral Water: Enhance the flavors by sipping on an ice-cold bottle of Italian sparkling mineral water alongside your meal. Its effervescence cleanses your palate between bites while providing hydration.
  • Wine Selections:
    • White Wine Option: A light-bodied white wine such as Sauvignon Blanc pairs well due to its citrus notes which complements both cheese & poultry elements.
    • Red Wine Option: If you prefer red wines, opt for medium-bodied ones like Chianti Classico from Tuscany. It’s fruity undertones harmonize beautifully against rich tomato-based sauces used in Chicken Parmesan recipes.

Remember to choose beverages based on personal preferences; whether you’re looking for something bubbly or alcoholic (if legal drinking age), selecting complementary drinks enhances overall enjoyment.

Experimenting With Your Own Creations:

Feel free to get creative with your own serving suggestions and pairings. You can try adding a twist by incorporating different herbs or spices into the dish, such as rosemary or paprika, for an extra burst of flavor. Additionally, consider garnishing the chicken Parmesan with fresh basil leaves or grated Parmesan cheese before serving.

By exploring various side dishes and beverage options that complement bacon-wrapped chicken Parmesan’s rich flavors, you’ll be able to create a well-rounded meal experience that satisfies both your taste buds and appetite.

Conclusion

Bacon-wrapped chicken Parmesan is a dish that combines the best of both worlds – crispy bacon, tender chicken, and gooey cheese. Throughout this blog post, we have explored different recipes for creating this mouthwatering delight.

Whether you choose to follow the recipe featuring Signature Select products from Jewel-Osco or opt for one of the other variations mentioned here, there’s no doubt that bacon-wrapped chicken Parmesan will satisfy your taste buds. The combination of flavors and textures creates a truly irresistible dish.

We encourage you to try one of these featured recipes or get creative in your own kitchen by adding personal touches and experimenting with different ingredients. Bacon-wrapped chicken Parmesan can be customized according to your preferences – add some spices for an extra kick or incorporate vegetables into the stuffing mixture.

Thank you so much for visiting our website! We hope that these delicious recipes inspire you to create something amazing in your kitchen. Don’t forget to explore our other articles filled with exciting culinary ideas and weekly recipe suggestions!

So go ahead, grab those aprons, gather all necessary ingredients, and let’s embark on a flavorful journey together!

References

  1. http://ingoodtaste.kitchen/bacon-chicken-parmesan/
  2. https://www.buttertogetherkitchen.com/bacon-wrapped-parmesan-crusted-chicken/
  3. https://www.bibbyskitchenat36.com/bacon-wrapped-stuffed-chicken-with-parmesan-cream/

Privacy Policy | Terms & Conditions | Cookie Policy | Sitemap

Copyright © 2023 Brood.co.za, All Rights Reserved