Categories
Recipes

Romerige Knoffel-Hoenderpasta – Maklike 30-Minute Aandete

Romerige Knoffel-Hoenderpasta – Maklike 30-Minute Aandete

Vinnige Opsomming

Hierdie romerige knoffel-hoenderpasta is ‘n maklike weeksaandete gemaak met sagte hoender, knoffel, room, pasta en kaas. Dit is ryk, romerig en vertroostend en kan binne ongeveer 30 minute op die tafel wees – perfek vir daardie aande wanneer jy wonder wat om vanaand te eet.
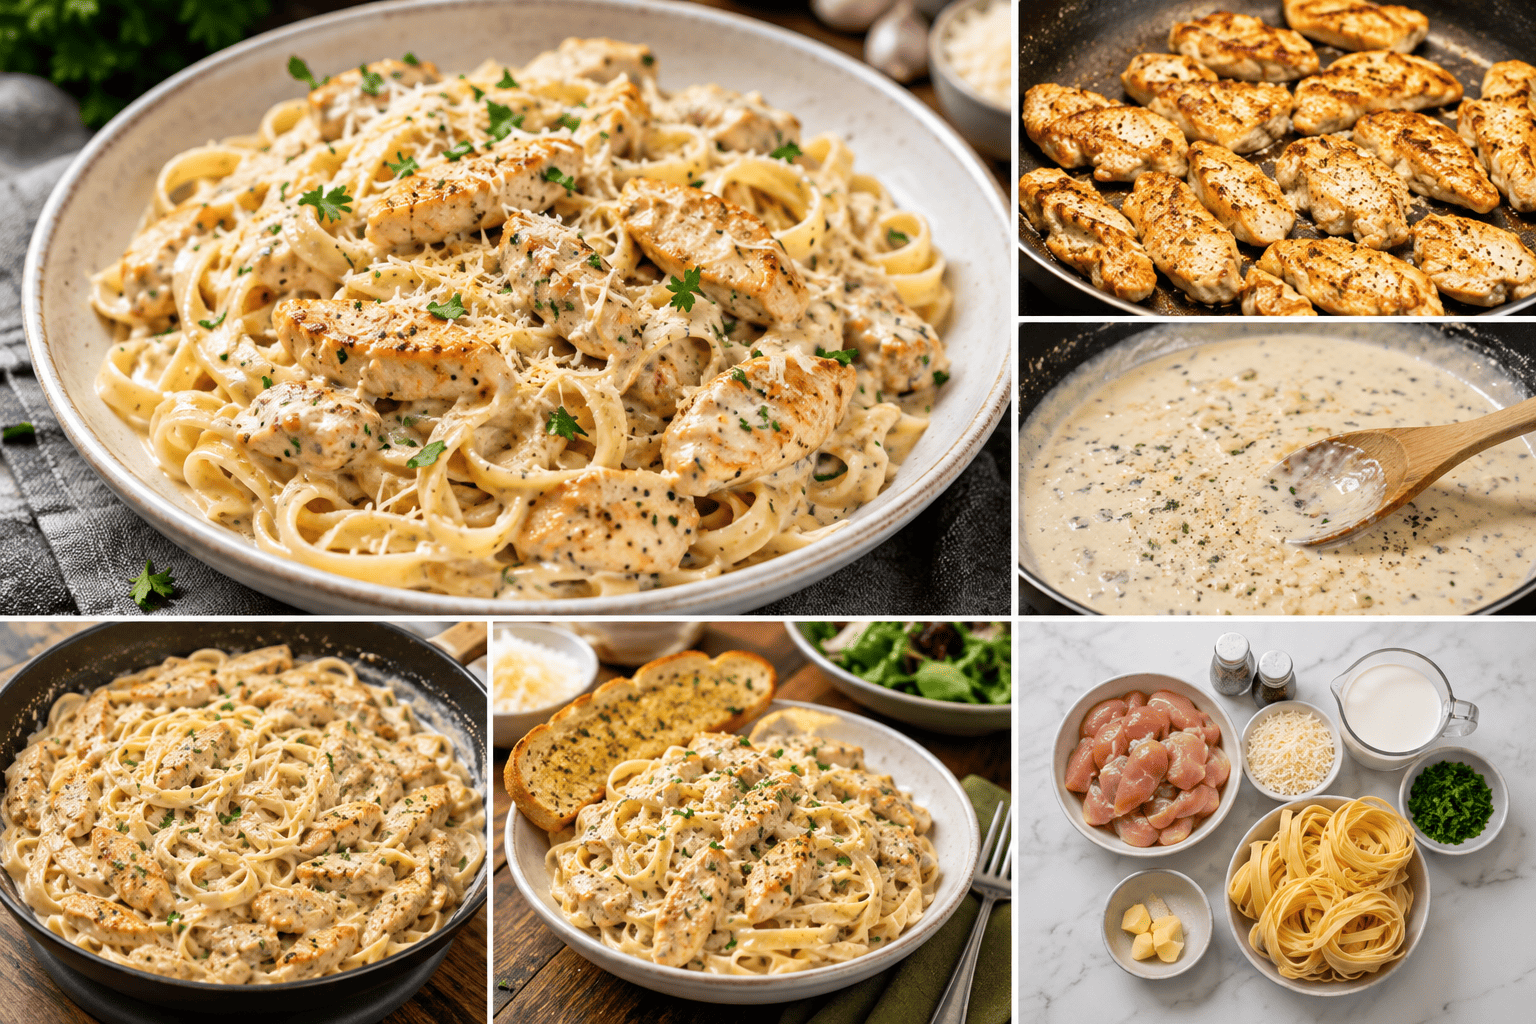
Romerige knoffel-hoenderpasta met goudbruin hoender, parmesaankaas en vars pietersielie

Party aande wil jy net iets lekker, vullend en vertroostend eet sonder om ure in die kombuis deur te bring.

Hierdie romerige knoffel-hoenderpasta is presies daardie soort ete.

Sagte stukkies gegeurde hoender word gebraai tot goudbruin en dan gekombineer met ‘n ryk knoffel-en-roomsous en pasta. Voeg ‘n bietjie parmesaan- of cheddarkaas by en jy het ‘n maklike familie-ete wat smaak asof dit baie meer moeite geverg het.

Die beste deel? Jy kan alles binne ongeveer 30 minute op die tafel hê.

Romerige Knoffel-Hoenderpasta Resep

Bedien: 2–3 mense
Voorbereidingstyd: 10 minute
Gaarmaaktyd: 20 minute
Totale tyd: Ongeveer 30 minute
Moeilikheidsgraad: Maklik

Bestanddele

  • 250 g pasta – penne, fusilli, spaghetti of tagliatelle
  • 2 hoenderborsies, in happiegrootte stukkies gesny
  • 1 eetlepel kookolie
  • 2 eetlepels botter
  • 3 knoffelhuisies, fyngekap of fyngedruk
  • 250 ml vars room
  • ½ koppie gerasperde parmesaan- of cheddarkaas
  • 1 teelepel paprika
  • ½ teelepel gedroogde gemengde kruie of Italiaanse kruie
  • Sout, na smaak
  • Vars gemaalde swartpeper, na smaak
  • ½ koppie pasta-kookwater, indien nodig
  • Vars pietersielie, gekap – opsioneel
  • Ekstra gerasperde kaas vir bediening – opsioneel

Hoe om Romerige Knoffel-Hoenderpasta te Maak

  1. Kook die pasta.
    Bring ‘n groot pot soutwater tot kookpunt. Voeg die pasta by en kook volgens die instruksies op die verpakking totdat dit al dente is. Hou ongeveer ½ koppie van die pasta-kookwater eenkant voordat jy die pasta dreineer.
  2. Geur die hoender.
    Plaas die gesnyde hoender in ‘n bak en geur met paprika, sout, swartpeper en gedroogde kruie. Meng goed sodat al die hoender liggies met die geurmiddels bedek is.
  3. Braai die hoender.
    Verhit die kookolie in ‘n groot braaipan oor medium-hoë hitte. Voeg die hoender by en braai totdat dit goudbruin aan die buitekant en heeltemal gaar is. Haal die hoender uit die pan en hou eenkant.
  4. Braai die knoffel.
    Verlaag die hitte effens en voeg die botter by dieselfde pan. Sodra dit gesmelt het, voeg die knoffel by en braai vir ongeveer 30 sekondes tot 1 minuut terwyl jy aanhoudend roer. Moenie die knoffel laat brand nie.
  5. Maak die romerige sous.
    Gooi die room in die pan en roer goed. Skraap enige geurige stukkies wat van die hoender onder in die pan agtergebly het, los. Laat die sous vir ongeveer 2–3 minute liggies prut.
  6. Voeg die kaas by.
    Roer die gerasperde kaas by die roomsous en hou aan roer totdat die kaas gesmelt en die sous glad en romerig is.
  7. Voeg die hoender terug.
    Plaas die gaar hoender terug in die pan en roer totdat al die stukkies met die romerige knoffelsous bedek is.
  8. Voeg die pasta by.
    Voeg die gedreineerde pasta by en meng alles goed saam. As die sous te dik is, voeg ‘n klein bietjie van die pasta-kookwater op ‘n slag by totdat die sous die regte dikte het.
  9. Proe en geur.
    Proe die pasta en voeg nog sout, swartpeper of kaas by indien nodig.
  10. Bedien.
    Bedien dadelik met gekapte pietersielie, ekstra gerasperde kaas en vars gemaalde swartpeper.

Brood se Wenk: Hou altyd ‘n bietjie van die pasta-kookwater eenkant voordat jy die pasta dreineer. Die styselrige water is ideaal om die roomsous dunner en gladder te maak sonder om dit waterig te maak.
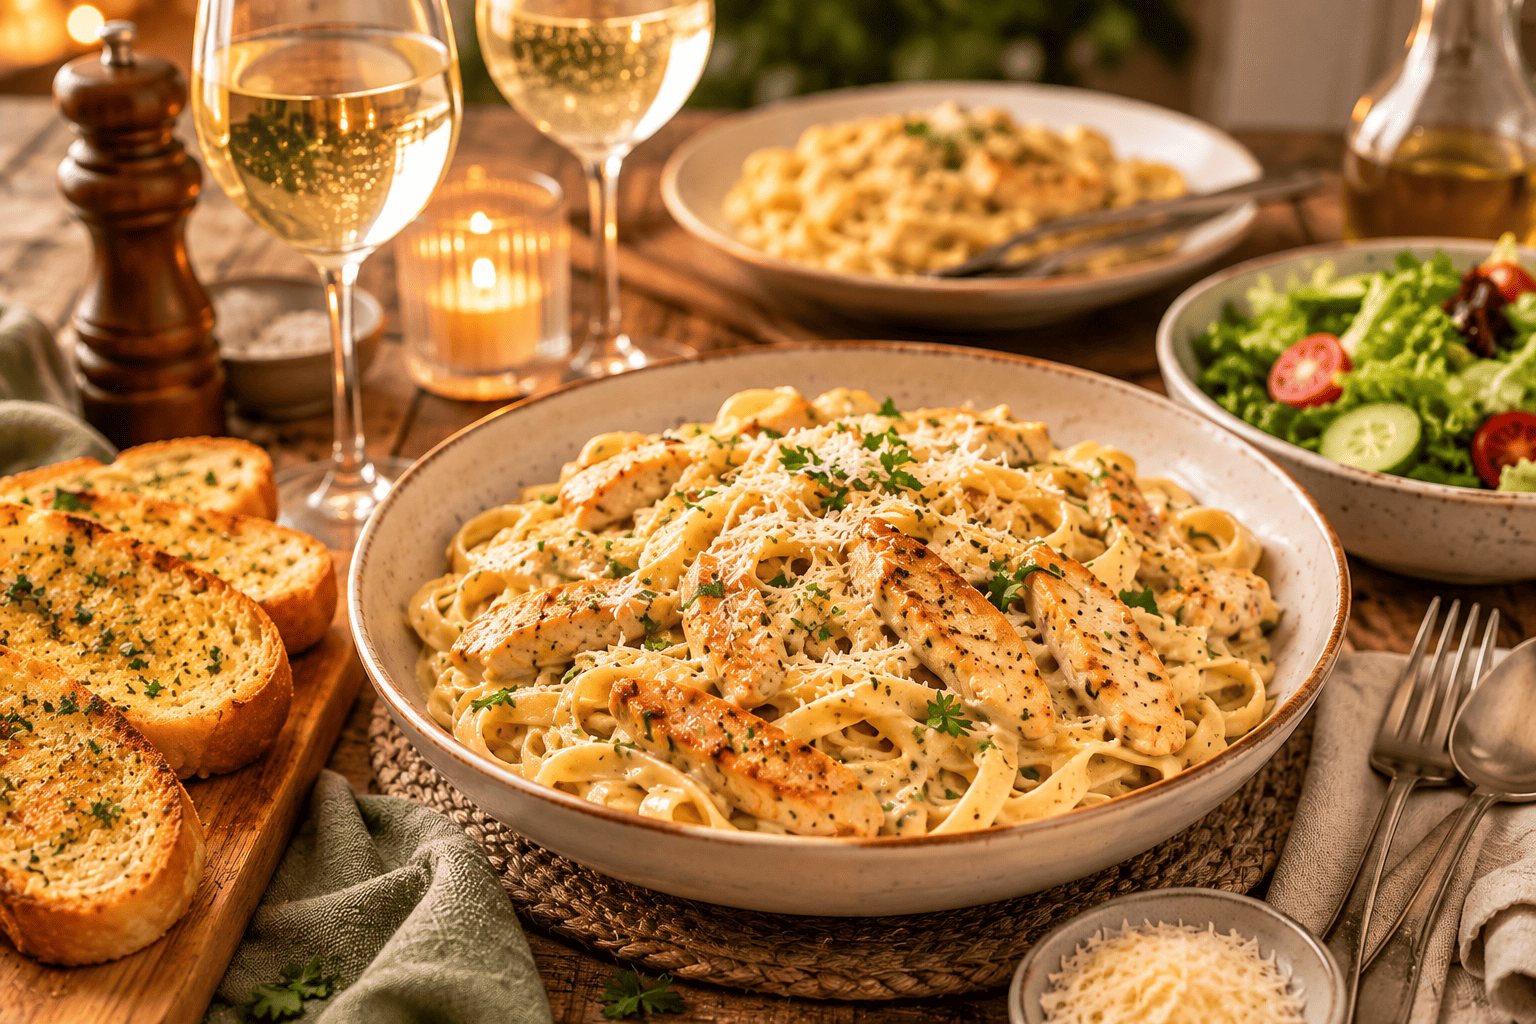
Romerige knoffel-hoenderpasta met parmesaankaas en vars kruie

Hoekom is Hierdie So ‘n Lekker Weeksaandete?

Daar is ‘n rede waarom romerige hoenderpasta so ‘n betroubare aandete is.

Die resep gebruik bestanddele wat maklik bekombaar is, vereis geen ingewikkelde kooktegnieke nie en kan maklik aangepas word volgens wat jy reeds in jou yskas of koskas het.

Die hoender gee lekker geur en maak die ete vullend, terwyl die romerige knoffelsous ‘n eenvoudige bord pasta in behoorlike trooskos verander.

Die resep kan ook maklik verdubbel word wanneer jy vir ‘n groter familie kook.

Watter Pasta Werk die Beste?

Jy kan byna enige pasta gebruik wat jy beskikbaar het.

Goeie opsies sluit in:

  • Penne
  • Fusilli
  • Fettuccine
  • Tagliatelle
  • Spaghetti
  • Linguine

Penne en fusilli werk besonder goed omdat die romerige sous maklik aan die pasta vasklou en tussen die vorms vasgevang word.

Kan Ek Sampioene Byvoeg?

Beslis.

Sampioene is een van die maklikste en lekkerste toevoegings tot hierdie resep.

Sny ongeveer 200 g sampioene en braai dit in dieselfde pan nadat jy die hoender uitgehaal het. Braai totdat die sampioene mooi goudbruin is voordat jy die botter en knoffel byvoeg.

Gaan daarna soos normaalweg met die resep voort.

Ander Bestanddele wat Jy Kan Byvoeg

Hierdie resep is baie maklik om volgens jou eie smaak aan te pas.

Probeer gerus:

  • Sampioene
  • Babaspinasie
  • Gaar spek
  • Sondroogtamaties
  • Broccoli
  • Ertjies
  • Fyngekapte brandrissie
  • Rooi soetrissie

Jy hoef nie baie ekstra bestanddele by te voeg nie. Selfs een toevoeging kan die smaak van die gereg heeltemal verander.
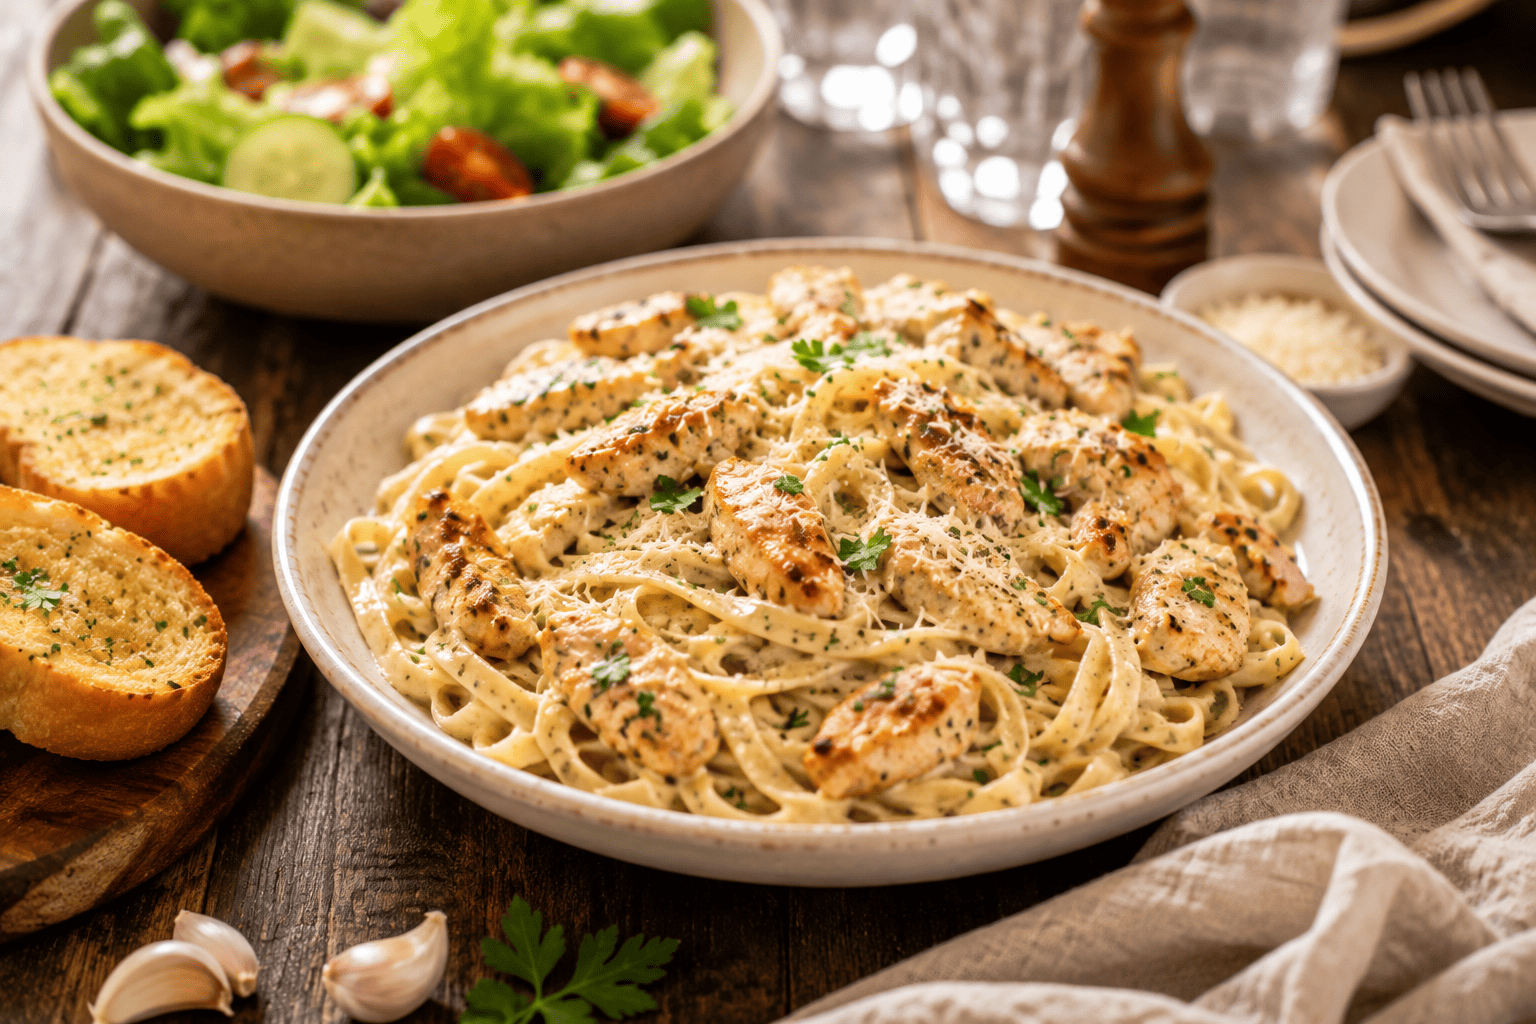
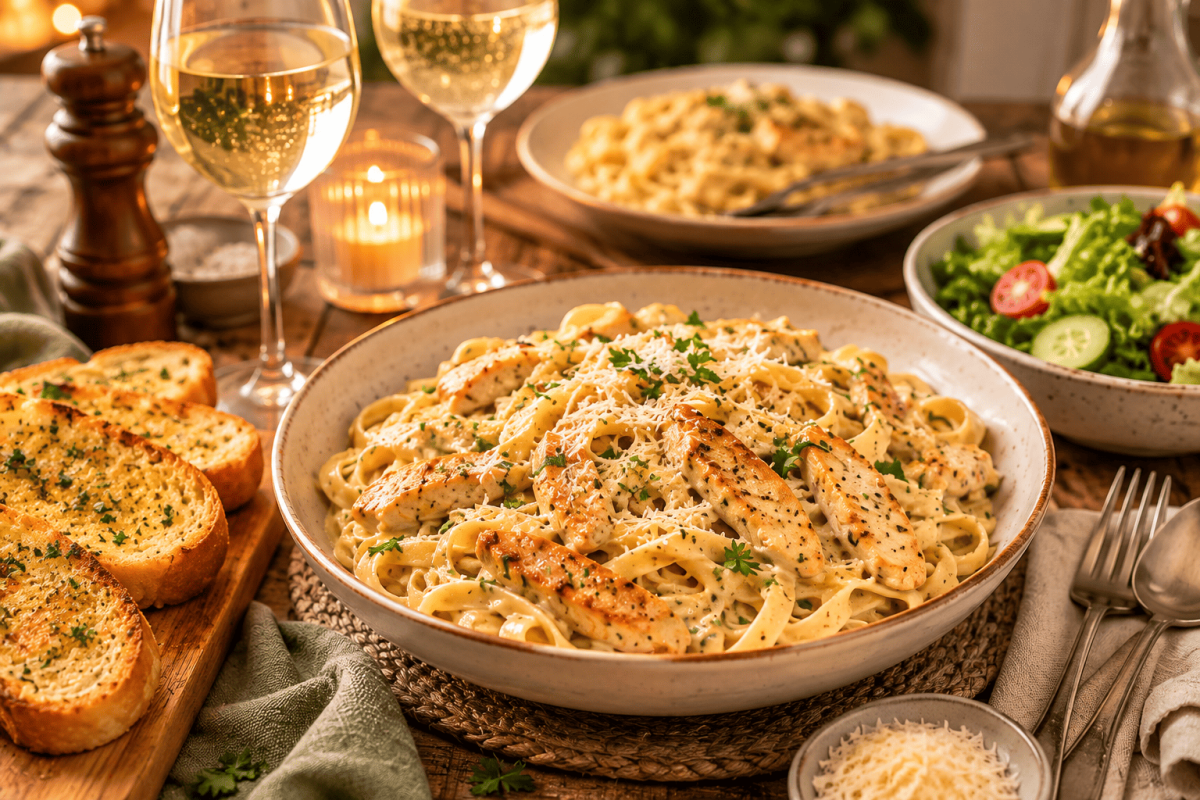
Romerige knoffel-hoenderpasta bedien as 'n maklike familie-aandete met knoffelbrood en vars slaai

Hoe Maak Mens die Sous Ekstra Romerig?

Die geheim is om die hitte redelik laag te hou nadat die room bygevoeg is.

Moenie die room vinnig laat kook nie.

Laat dit eerder liggies prut voordat jy die kaas byvoeg. Die kaas help om die sous dikker te maak en gee dit ‘n heerlike gladde en romerige tekstuur.

As die sous te dik word, voeg een of twee eetlepels pasta-kookwater op ‘n slag by.

Kan Ek Cheddarkaas in Plaas van Parmesaan Gebruik?

Ja.

Parmesaankaas gee die sous ‘n effens skerper en meer tradisionele pastasmaak, maar gewone cheddarkaas werk ook baie goed.

Cheddar is dikwels goedkoper en iets wat baie Suid-Afrikaanse huishoudings reeds in die yskas het.

Jy kan ook ‘n kombinasie van cheddar en parmesaan gebruik.

Wat Bedien Mens Saam met Romerige Knoffel-Hoenderpasta?

Hierdie pasta is vullend genoeg om op sy eie as ‘n volledige ete bedien te word, maar dit werk ook baie lekker saam met ‘n eenvoudige bygereg.

Probeer dit saam met:

  • Knoffelbrood
  • ‘n Vars groen slaai
  • Geroosterde groente
  • Gestoomde broccoli
  • Tamatie-en-uieslaai
  • Vars korserige brood

‘n Vars slaai werk besonder goed omdat die varsheid en krakerigheid daarvan die ryk roomsous mooi balanseer.

Hoe Maak Ek die Pasta ‘n Bietjie Sterker?

As jy van ‘n bietjie hitte hou, kan jy maklik ekstra skop byvoeg.

Probeer:

  • ½ teelepel rissievlokkies
  • Vars gekapte brandrissie
  • ‘n Klein bietjie rissiesous
  • Ekstra paprika of gerookte paprika

Voeg die brandrissie saam met die knoffel by sodat die geur deur die hele sous versprei.

Kan Ek Oorskiet-Hoender Gebruik?

Ja.

As jy gaar hoender van ‘n vorige ete oor het, kan jy dit eenvoudig in kleiner stukkies sny of uitmekaar trek en by die sous voeg nadat die room en kaas gemeng is.

Omdat die hoender reeds gaar is, hoef jy dit net saam met die sous warm te maak.

Dit maak hierdie resep selfs vinniger en is ‘n handige manier om oorskiet-hoender te gebruik.

Hoe om Oorskiet te Bêre

Laat enige oorskiet-pasta effens afkoel voordat jy dit in ‘n verseëlde houer plaas.

Hou dit in die yskas en verhit dit weer versigtig voordat jy dit bedien.

Roomsouse word natuurlik dikker wanneer hulle koud word. Voeg daarom ‘n klein skeut melk of room by wanneer jy die pasta weer warm maak om die sous losser en romeriger te maak.

Gereelde Vrae oor Romerige Hoenderpasta

Kan ek romerige hoenderpasta sonder room maak?

Ja. Jy kan volroommelk saam met ‘n bietjie roomkaas gebruik, of ‘n eenvoudige witsous met botter, meel en melk maak. Die smaak en tekstuur sal effens anders wees, maar steeds heerlik.

Kan ek hoenderdye gebruik?

Ja. Ontbeende hoenderdye werk baie goed in hierdie resep en bly gewoonlik besonder sappig.

Kan ek hierdie resep vooraf maak?

Ja, hoewel romerige pasta die lekkerste is wanneer dit vars gemaak en dadelik bedien word. Hou ‘n bietjie ekstra room of melk byderhand wanneer jy dit weer warm maak.

Watter kaas moet ek gebruik?

Parmesaankaas is ideaal, maar cheddar, pecorino of ‘n mengsel van verskillende kase kan ook gebruik word.

Kan ek groente byvoeg?

Beslis. Sampioene, spinasie, broccoli, ertjies en soetrissies werk almal baie goed saam met die romerige knoffelsous.

Hoe keer ek dat die sous te dik word?

Hou ‘n bietjie pasta-kookwater eenkant en voeg dit geleidelik by totdat die sous die tekstuur het waarvan jy hou.

Wonder Jy Wat om Vanaand te Eet?

As jy in die kombuis staan en wonder wat moet ek vanaand eet?, is hierdie presies die soort resep om byderhand te hou.

Dit is vinnig genoeg vir ‘n besige weeksaand, lekker vertroostend op ‘n koue aand en maklik genoeg om aan te pas volgens wat jy reeds in die huis het.

Hoender, pasta, knoffel, room en kaas – soms hoef ‘n lekker aandete glad nie ingewikkeld te wees nie.

Brood se Laaste Wenk: Maak ‘n bietjie meer as wat jy dink jy nodig het. Romerige knoffel-hoenderpasta het ‘n manier om baie vinnig te verdwyn.

Wat sal jy by joune voeg? Sampioene, spek, spinasie of brandrissie? Vertel ons in die kommentaar.


Categories
Recipes

Creamy Garlic Chicken Pasta – Easy 30-Minute Dinner

Creamy Garlic Chicken Pasta – Easy 30-Minute Dinner

Quick Summary

This creamy garlic chicken pasta is an easy weeknight dinner made with tender chicken, garlic, cream, pasta and cheese. It is rich, comforting and ready in about 30 minutes, making it perfect for those evenings when you are wondering what to eat tonight.

Creamy garlic chicken pasta with golden chicken pieces, parmesan cheese and fresh parsley

Some evenings you want something comforting, filling and delicious without spending hours in the kitchen.

This creamy garlic chicken pasta is exactly that kind of meal.

Tender pieces of seasoned chicken are cooked until golden, then combined with a rich garlic cream sauce and pasta. Add a little parmesan or cheddar cheese and you have an easy family dinner that tastes far more complicated than it actually is.

The best part? You can have everything on the table in around 30 minutes.

Creamy Garlic Chicken Pasta Recipe

Serves: 2–3 people
Preparation time: 10 minutes
Cooking time: 20 minutes
Total time: About 30 minutes
Difficulty: Easy

Ingredients

  • 250 g pasta – penne, fusilli, spaghetti or tagliatelle
  • 2 chicken breasts, sliced into bite-sized pieces
  • 1 tablespoon cooking oil
  • 2 tablespoons butter
  • 3 cloves garlic, finely chopped or crushed
  • 250 ml fresh cream
  • ½ cup grated parmesan or cheddar cheese
  • 1 teaspoon paprika
  • ½ teaspoon dried mixed herbs or Italian herbs
  • Salt, to taste
  • Freshly ground black pepper, to taste
  • ½ cup pasta cooking water, if needed
  • Fresh parsley, chopped – optional
  • Extra grated cheese for serving – optional

How to Make Creamy Garlic Chicken Pasta

  1. Cook the pasta.
    Bring a large pot of salted water to the boil. Add the pasta and cook according to the packet instructions until al dente. Before draining, keep about ½ cup of the pasta cooking water.
  2. Season the chicken.
    Place the sliced chicken in a bowl and season with paprika, salt, black pepper and dried herbs. Mix well so that all the chicken is lightly coated.
  3. Cook the chicken.
    Heat the cooking oil in a large frying pan over medium-high heat. Add the chicken and cook until golden on the outside and completely cooked through. Remove the chicken from the pan and set aside.
  4. Cook the garlic.
    Reduce the heat slightly and add the butter to the same pan. Once melted, add the garlic and cook for about 30 seconds to 1 minute, stirring continuously. Do not allow the garlic to burn.
  5. Make the creamy sauce.
    Pour the cream into the pan and stir well, scraping up any flavour left behind from cooking the chicken. Allow the sauce to simmer gently for 2–3 minutes.
  6. Add the cheese.
    Stir the grated cheese into the cream sauce and continue stirring until melted and smooth.
  7. Return the chicken.
    Add the cooked chicken back to the pan and stir until it is coated in the creamy garlic sauce.
  8. Add the pasta.
    Add the drained pasta and toss everything together until the pasta is evenly coated. If the sauce is too thick, add a little of the reserved pasta water until you reach the consistency you prefer.
  9. Taste and season.
    Taste the pasta and add more salt, black pepper or cheese if required.
  10. Serve.
    Serve immediately with chopped parsley, extra grated cheese and freshly ground black pepper.

Brood’s Tip: Keep some of your pasta cooking water before draining the pasta. The starchy water is perfect for loosening the cream sauce without making it watery.

Close-up of creamy garlic chicken pasta with parmesan cheese and fresh herbs

Why This Is Such a Good Weeknight Dinner

There is a reason creamy chicken pasta is such a reliable dinner option.

It uses ingredients that are easy to find, does not require complicated cooking techniques and can be adapted depending on what you already have in the fridge.

The chicken provides plenty of flavour and protein, while the creamy garlic sauce turns a simple bowl of pasta into proper comfort food.

It is also easy to make more of the recipe if you are feeding a larger family.

What Pasta Works Best?

You can use almost any pasta you have available.

Good options include:

  • Penne
  • Fusilli
  • Fettuccine
  • Tagliatelle
  • Spaghetti
  • Linguine

Penne and fusilli are particularly good because the creamy sauce gets caught in the pasta, giving you plenty of sauce in every bite.

Can I Add Mushrooms?

Absolutely.

Mushrooms are one of the easiest additions to this recipe.

Slice approximately 200 g of mushrooms and fry them in the pan after removing the chicken. Cook them until golden before adding the butter and garlic.

You can then continue with the recipe as normal.

Other Ingredients You Can Add

This recipe is very easy to customise.

Try adding:

  • Mushrooms
  • Baby spinach
  • Cooked bacon
  • Sun-dried tomatoes
  • Broccoli
  • Peas
  • Chopped chilli
  • Red pepper

You do not need many extra ingredients. Even one addition can completely change the dish.

Creamy garlic chicken pasta served as an easy family dinner with garlic bread and fresh salad

How to Make the Sauce Extra Creamy

The secret is to keep the heat relatively low once the cream has been added.

Do not vigorously boil the cream.

Allow it to simmer gently before adding the cheese. The cheese will help thicken the sauce and give it a rich, silky texture.

If your sauce becomes too thick, add one or two tablespoons of pasta water at a time.

Can I Use Cheddar Instead of Parmesan?

Yes.

Parmesan gives the sauce a slightly sharper and more traditional flavour, but ordinary cheddar works perfectly well and is often more affordable and easier to find.

You can also use a combination of cheddar and parmesan.

What to Serve with Creamy Garlic Chicken Pasta

This pasta is filling enough to serve on its own, but it also works beautifully with a simple side dish.

Try it with:

  • Garlic bread
  • Green salad
  • Roasted vegetables
  • Steamed broccoli
  • Tomato and onion salad
  • Crusty bread

A fresh salad works particularly well because the acidity and crunch balance the richness of the cream sauce.

How to Make It Spicy

If you like a little heat, add:

  • ½ teaspoon chilli flakes
  • Fresh chopped chilli
  • A small spoonful of chilli sauce
  • Extra paprika or smoked paprika

Add the chilli together with the garlic so that its flavour spreads throughout the sauce.

Can I Use Leftover Chicken?

Yes.

If you have cooked chicken left over from another meal, simply shred or chop it and add it to the sauce once the cream and cheese have been combined.

Because the chicken is already cooked, you only need to heat it through.

This makes the recipe even quicker.

How to Store Leftovers

Allow leftover pasta to cool before transferring it to a sealed container.

Keep it refrigerated and reheat gently before serving.

Cream sauces naturally thicken once chilled, so add a splash of milk or cream while reheating to loosen the sauce again.

Frequently Asked Questions About Creamy Chicken Pasta

Can I make creamy chicken pasta without cream?

Yes. You can use full-cream milk with a little cream cheese, or make a simple white sauce using butter, flour and milk. The flavour and texture will be slightly different but still delicious.

Can I use chicken thighs?

Yes. Boneless chicken thighs work very well and tend to stay particularly juicy.

Can I make this recipe ahead of time?

You can, although creamy pasta is best served freshly made. If preparing it ahead, keep a little extra cream or milk available when reheating.

What cheese should I use?

Parmesan is ideal, but cheddar, pecorino or a mixture of cheeses can also be used.

Can I add vegetables?

Definitely. Mushrooms, spinach, broccoli, peas and peppers are all excellent additions.

How do I stop the sauce becoming too thick?

Keep some pasta cooking water and add it gradually until the sauce reaches the consistency you want.

An Easy Answer to “What Should I Eat Tonight?”

When you are standing in the kitchen wondering what should I eat tonight?, this is exactly the type of recipe worth keeping nearby.

It is quick enough for a weekday, comforting enough for a cold evening and flexible enough to use whatever extras you already have in the fridge.

Chicken, pasta, garlic, cream and cheese – sometimes dinner really does not need to be more complicated than that.

Brood’s Last Tip: Make a little more than you think you need. Creamy garlic chicken pasta has a habit of disappearing quickly.

What would you add to yours? Mushrooms, bacon, spinach or chilli? Tell us in the comments.

Categories
Recipes

Drieboontjieslaai – Maklike Suid-Afrikaanse Braaislaai

Drieboontjieslaai – Maklike Suid-Afrikaanse Braaislaai

Vinnige Opsomming

Hierdie maklike drieboontjieslaai is ‘n Suid-Afrikaanse braai-gunsteling gemaak met gebakte bone, botterbone en groenbone in ‘n heerlike soet-en-suur sous. Dit is vinnig om voor te berei, kan vooraf gemaak word en is perfek saam met boerewors, tjops, hoender, steak en ander braai-gunstelinge.

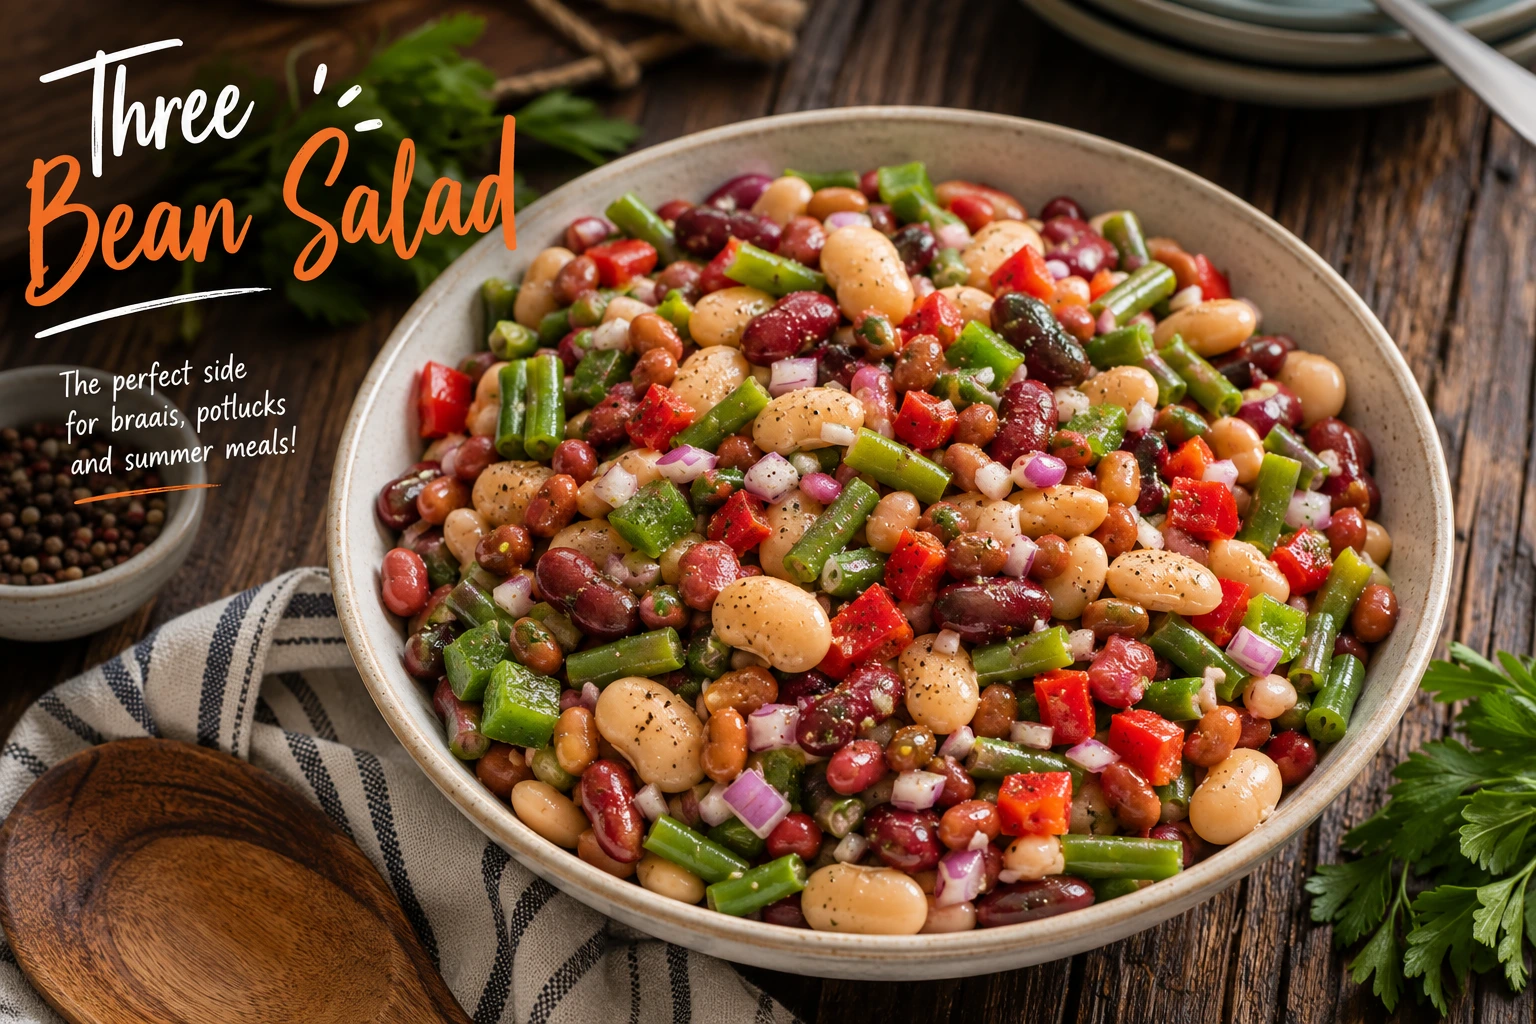
Suid-Afrikaanse drieboontjieslaai met gemengde bone, groenbone, soetrissie en ui

Daar is min bykosse wat so lekker langs ‘n Suid-Afrikaanse braai pas soos ‘n goeie drieboontjieslaai.

Soet, suur en propvol verskillende teksture – hierdie eenvoudige slaai werk uitstekend saam met braaivleis, boerewors, hoender, skaaptjops of steak. Dit is ook een van daardie handige resepte wat jy vooraf kan maak, wat dit ideaal maak vir familiebyeenkomste, someretes, Kerstafels en rustige naweke rondom die braaivuur.

Daar is baie verskillende maniere om drieboontjieslaai te maak, maar Brood se weergawe hou dinge bekend en eg Suid-Afrikaans met gebakte bone, botterbone, groenbone, ui, groen soetrissie en ‘n blatjang-en-asynsous.

Die beste deel? Daar is geen ingewikkelde kookwerk nie. Meng alles saam, sit dit in die yskas en gee die geure tyd om hulle werk te doen.

Suid-Afrikaanse Drieboontjieslaai Resep

Bedien: 6–8 mense as ‘n bykos
Voorbereidingstyd: 10–15 minute
Gaarmaaktyd: Geen
Verkoelingstyd: Minstens 2 uur
Moeilikheidsgraad: Maklik

Bestanddele

  • 1 x 410 g-blikkie gebakte bone in tamatiesous
  • 1 x 400 g-blikkie botterbone, gedreineer en afgespoel
  • 1 x 400 g-blikkie Franse-styl of gesnyde groenbone, gedreineer
  • 1 klein groen soetrissie, fyngekap
  • 1 klein rooi ui, fyngekap
  • ½ koppie bruin asyn
  • ½ koppie vrugteblatjang
  • ⅓ koppie sagte bruinsuiker, of tot ½ koppie as jy ‘n soeter slaai verkies
  • 1 eetlepel olyfolie
  • Sout, na smaak
  • Vars gemaalde swartpeper, na smaak
  • 2 eetlepels vars gekapte pietersielie – opsioneel

Hoe om Drieboontjieslaai te Maak

  1. Berei die bone voor.
    Dreineer en spoel die botterbone af. Dreineer die groenbone deeglik. Moenie die gebakte bone afspoel nie – hou hulle saam met die tamatiesous, aangesien die sous deel vorm van die geur en tekstuur van die slaai.
  2. Berei die groente voor.
    Kap die groen soetrissie en rooi ui fyn. Kleiner stukkies werk besonder goed omdat jy ‘n bietjie ui en soetrissie in elke happie kry sonder dat een van die twee die slaai oorheers.
  3. Meng die bone.
    Plaas die gebakte bone, botterbone en groenbone in ‘n groot mengbak. Voeg die gekapte groen soetrissie en rooi ui by.
  4. Maak die sous.
    Meng die bruin asyn, vrugteblatjang, bruinsuiker en olyfolie in ‘n aparte bak of beker. Roer goed totdat die suiker grotendeels opgelos is en alles deeglik gemeng is.
  5. Proe die sous.
    Hier kan jy die resep volgens jou eie smaak aanpas. As jy van ‘n soeter drieboontjieslaai hou, voeg ‘n bietjie meer bruinsuiker of blatjang by. As jy ‘n skerper, suurder slaai verkies, voeg ‘n klein bietjie ekstra asyn by.
  6. Voeg die sous by.
    Gooi die sous oor die bone, ui en groen soetrissie. Vou alles versigtig saam totdat die bone eweredig met die sous bedek is. Moenie te hard roer nie, want botterbone kan maklik breek.
  7. Geur.
    Voeg sout en vars gemaalde swartpeper na smaak by. As jy vars pietersielie gebruik, vou dit liggies deur die slaai.
  8. Verkoel.
    Bedek die bak en plaas die slaai vir minstens 2 uur in die yskas voordat jy dit bedien. As jy tyd het, maak dit die vorige aand. Die ekstra rustyd gee die bone en groente kans om meer van die soet-en-suur sous te absorbeer.
  9. Bedien.
    Roer die slaai weer liggies voordat jy dit bedien. Proe een laaste keer en pas die geurmiddels aan indien nodig. Bedien koud of koel saam met jou gunsteling braaikos.

Brood se Wenk: Drieboontjieslaai is een van daardie geregte wat dikwels die volgende dag nóg lekkerder smaak. Maak dit die aand voor jou braai en laat dit oornag, goed bedek, in die yskas staan.

Hoekom Werk Drieboontjieslaai so Goed by ‘n Braai?

‘n Suid-Afrikaanse braaitafel is gewoonlik propvol ryk, rokerige en hartige geure van vleis wat oor die vuur gebraai is. Drieboontjieslaai bring iets heeltemal anders na die bord.

Die asyn gee suurheid, die blatjang en bruinsuiker bring soetigheid, die ui en groen soetrissie sorg vir ‘n lekker vars krakerigheid, terwyl die verskillende bone die slaai vullend genoeg maak om sy plek langs die vleis vol te staan.

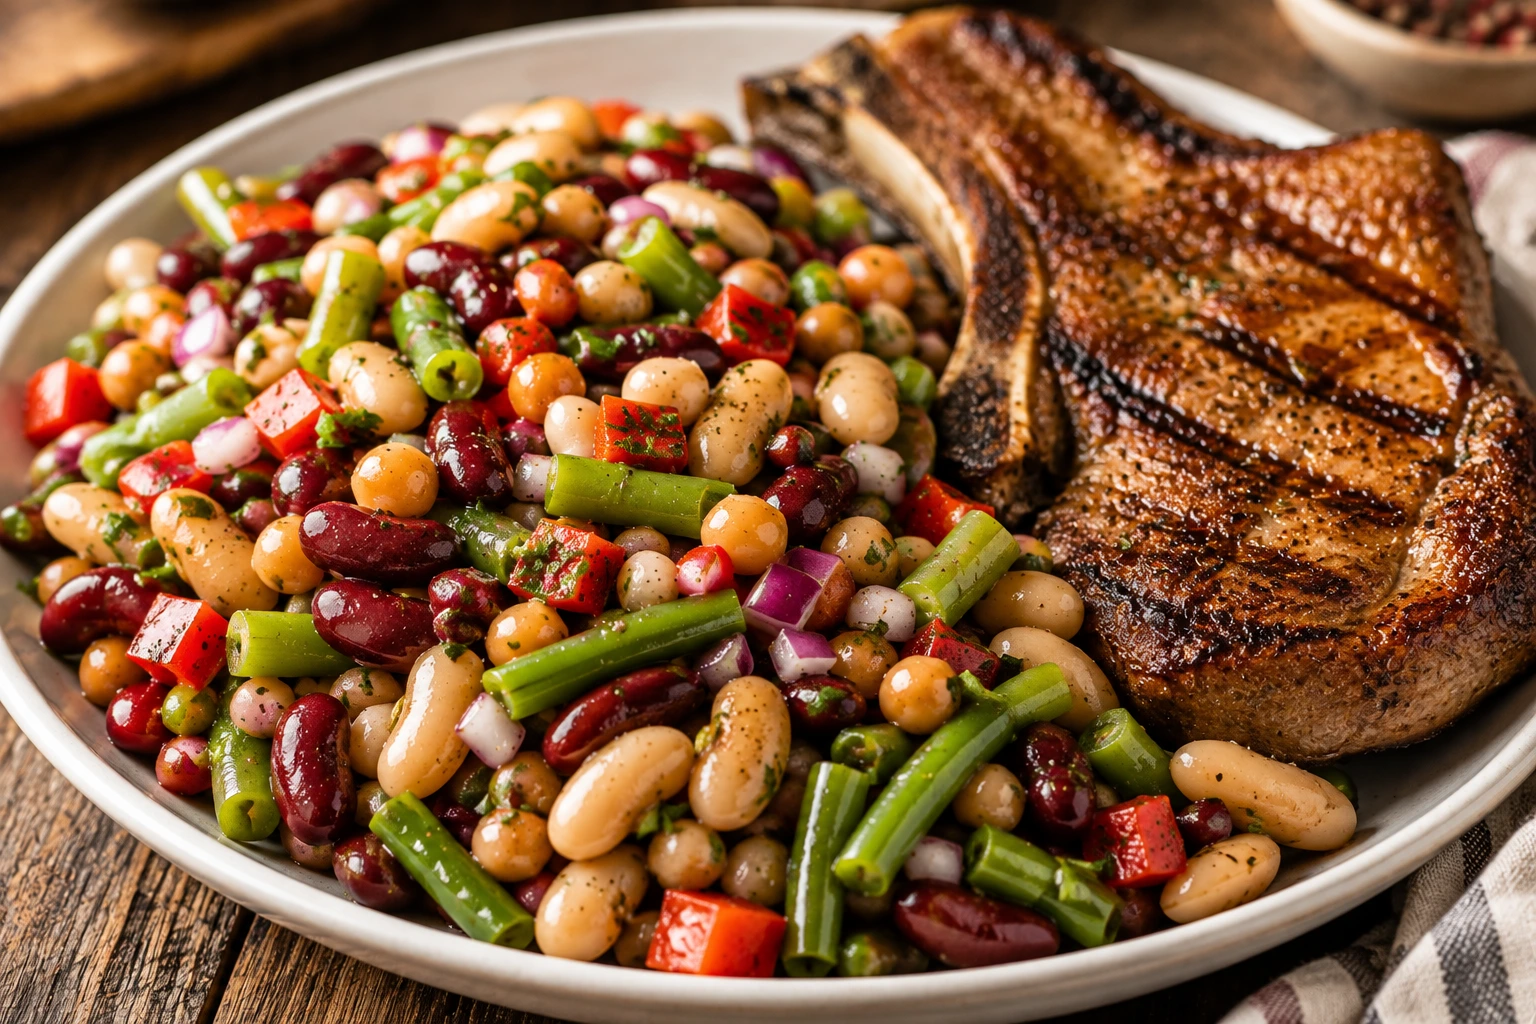
Drieboontjieslaai bedien saam met 'n braaide tjop as 'n Suid-Afrikaanse braaibykos

Daar is ook geen laaste-minuut-kookwerk nodig nie. Jy kan die slaai maak voordat die vuur eers aangesteek word, dit in die yskas sit en dan jou volle aandag aan die braai gee.

Watter Drie Bone Gebruik Mens in Drieboontjieslaai?

Daar is nie net een korrekte kombinasie nie.

Vir ‘n bekende Suid-Afrikaanse drieboontjieslaai gebruik ons graag:

  • Gebakte bone in tamatiesous
  • Botterbone
  • Groenbone

Elke soort boontjie bring iets anders na die slaai.

Gebakte Bone

Gebakte bone gee ‘n sagte tekstuur en ‘n ryk tamatiebasis wat baie lekker saam met die blatjang-en-asynsous werk.

Botterbone

Botterbone is groter en romeriger. Hulle maak die slaai meer vullend en gee ‘n lekker kontras teen die fermer groenbone.

Groenbone

Groenbone gee kleur en ‘n fermer tekstuur. Franse-styl groenbone is besonder gerieflik vir hierdie resep.

Kan Ek Ander Bone Gebruik?

Beslis. Drieboontjieslaai is baie maklik om aan te pas.

Jy kan die volgende gebruik of byvoeg:

  • Nierbone
  • Cannellini-bone
  • Kekerertjies
  • Swartbone
  • Swartoogbone

As jy die bone verander, sal die eindresultaat natuurlik anders smaak as die tradisionele gebakte-boontjie-weergawe – maar dit is deel van die lekkerte van hierdie resep.

Vars, Bevrore of Geblikte Groenbone?

Geblikte Franse-styl groenbone is baie gerieflik en werk goed in die tradisionele Suid-Afrikaanse weergawe.

As jy verkies dat jou groenbone ‘n bietjie meer byt het, kan jy vars of bevrore groenbone gebruik.

Blansjeer hulle kortliks in kookwater totdat hulle net-net sag is, koel hulle vinnig in koue water af en dreineer deeglik voordat jy dit by die slaai voeg.

Kan Ek Drieboontjieslaai die Vorige Aand Maak?

Ja – en ons beveel dit eintlik aan.

Drieboontjieslaai is ‘n uitstekende braaibykos om vooraf te maak omdat die geure ontwikkel terwyl die slaai rus.

Terwyl dit in die yskas staan, absorbeer die bone, ui en groen soetrissie van die heerlike soet-en-suur sous.

Maak dit die aand voor jou braai, bedek dit behoorlik en hou dit verkoel. Roer dit die volgende dag liggies voordat jy dit bedien.

Hoe om die Soetigheid aan te Pas

Suid-Afrikaanse drieboontjieslaai kan redelik soet wees, veral wanneer beide vrugteblatjang en bruinsuiker gebruik word.

Ons stel voor dat jy met ongeveer ⅓ koppie bruinsuiker begin. Proe die sous voordat jy dit oor die bone gooi.

As jou familie van die soeter tradisionele weergawe hou, kan jy die hoeveelheid geleidelik tot ongeveer ½ koppie verhoog.

As jy ‘n suurder slaai verkies, gebruik minder suiker en laat die asyn ‘n groter rol speel.

Moenie bang wees om die sous volgens jou eie smaak aan te pas nie.

Drieboontjieslaai Variasies

Sodra jy die basiese resep onder die knie het, is daar baie maniere om jou eie weergawe te maak.

Voeg Nierbone By

Vervang die botterbone met nierbone, of verander die gereg in ‘n vierboontjieslaai deur nierbone ook by te voeg.

Voeg Kekerertjies By

Kekerertjies het ‘n fermer tekstuur en is ‘n uitstekende toevoeging as jy ‘n meer vullende slaai wil maak.

Voeg Vars Kruie By

Vars pietersielie werk besonder goed. Koljander kan ook gebruik word as jy van sy sterker geur hou.

Voeg Vars Tamatie By

Gehalveerde kersie- of rosa-tamaties gee ekstra varsheid en kleur, veral as jy die slaai dieselfde dag gaan bedien.

Gebruik Meer Soetrissies

Meng groen, rooi en geel soetrissies vir ‘n nog meer kleurvolle slaai.

Voeg Mosterd By

‘n Teelepel Dijon- of volgraanmosterd gee die sous ‘n ekstra hartige element.

Gee Dit ‘n Bietjie Skop

Voeg fyngekapte vars brandrissie of ‘n klein knippie rissievlokkies by as jou familie van ‘n bietjie hitte hou.

‘n Varser Drieboontjieslaai Variasie

Nie almal hou van die soeter gebakte-boontjie-weergawe nie. As jy ‘n ligter en varser drieboontjieslaai verkies, kan jy ‘n ander kombinasie probeer.

Gebruik:

  • Nierbone
  • Cannellini-bone
  • Kekerertjies
  • Vars of geblansjeerde groenbone
  • Rooi ui
  • Rooi of geel soetrissie
  • Vars pietersielie

In plaas van die blatjangsous kan jy olyfolie met suurlemoensap of asyn, Dijon-mosterd, knoffel, ‘n klein bietjie heuning, sout en vars gemaalde swartpeper meng.

Hierdie weergawe gee jou ‘n ligter en minder soet slaai, maar behou steeds die kleur, tekstuur en gerief wat boontjieslaai so gewild maak.

Wat Bedien Mens Saam met Drieboontjieslaai?

Drieboontjieslaai werk besonder goed saam met kos wat oor die vuur gebraai word.

Probeer dit saam met:

  • Boerewors
  • Skaaptjops
  • Varktjops
  • Braaide hoender
  • Steak
  • Ribbetjies
  • Sosaties
  • Burgers
  • Gebraaide hoender
  • Koue vleise

Vir ‘n groter braaitafel kan jy aartappelslaai, knoffelbrood, pap en sous, chakalaka, koolslaai, braaibroodjies of ‘n vars groen slaai byvoeg.

Drieboontjieslaai met Skaaptjops

Een van ons gunstelingmaniere om hierdie slaai te bedien, is saam met ‘n varsgebraaide skaaptjop.

Die ryk, rokerige smaak van die lam werk uitstekend saam met die suur en soet geure van die boontjieslaai. Dit gee jou ook ‘n koue bykos wat lank voor die tjops op die rooster gaan, reeds gereed kan wees.

Voeg knoffelbrood of ‘n eenvoudige groen slaai by en jy het ‘n maklike Suid-Afrikaanse braaimaaltyd.

Drieboontjieslaai vir Kersfees

Hoewel ons drieboontjieslaai natuurlik met braais assosieer, is dit ook ‘n uitstekende toevoeging tot ‘n Suid-Afrikaanse Kerstafel.

Kersfees val in die middel van ons somer, so koue slaaie wat vooraf voorberei kan word, is besonder handig wanneer jy vir baie mense kosmaak.

Bedien drieboontjieslaai saam met gammon, gebraaide hoender, koue vleise, lam of wat ook al op die Kersbraai beland.

Drieboontjieslaai vir ‘n Groot Groep

Hierdie resep is baie maklik om groter te maak wanneer jy mense onthaal.

Vir ‘n groter braai kan jy eenvoudig die hoeveelhede verdubbel en ‘n groot opdienbak gebruik.

As jy die resep baie groter maak, voeg die sous geleidelik by eerder as om alles op een slag oor die bone te gooi. Jy kan altyd nog sous byvoeg, maar dit is moeilik om te veel sous weer uit die slaai te haal.

Hoe Lank Hou Drieboontjieslaai?

Hou drieboontjieslaai bedek in die yskas en sit enige oorskiet so gou moontlik ná bediening terug in die yskas.

Omdat die geure aanhou ontwikkel terwyl die slaai rus, kan die oorskiet die volgende dag besonder lekker wees.

Gebruik altyd skoon eetgerei wanneer jy die slaai bedien en gooi dit weg indien jy enige ongewone reuk, voorkoms of tekstuur opmerk.

Kan Mens Drieboontjieslaai Vries?

Ons sal nie aanbeveel dat jy hierdie weergawe vries nie.

Vries en ontdooi kan die tekstuur van die bone, ui en groen soetrissie verander. Omdat die resep vinnig is om voor te berei en goed in die yskas hou, is dit beter om dit vars te maak.

Wenke vir die Beste Drieboontjieslaai

  • Dreineer die bone behoorlik: Te veel ekstra vloeistof kan jou sous waterig maak.
  • Moenie die gebakte bone afspoel nie: Die tamatiesous vorm deel van die geur van hierdie spesifieke resep.
  • Kap die ui fyn: Jy wil die geur en krakerigheid hê sonder dat groot stukke rou ui die slaai oorheers.
  • Proe jou sous: Pas die balans tussen asyn, blatjang en suiker aan voordat jy dit oor die bone gooi.
  • Meng versigtig: Botterbone is sag en kan uitmekaar breek as jy te hard roer.
  • Gee dit tyd: Die smaak verbeter nadat die slaai vir ‘n paar uur in die yskas gestaan het.
  • Maak dit vooraf: As jy dit die vorige aand maak, is daar een minder ding om oor bekommerd te wees op braaidag.
  • Roer voor bediening: Van die sous sal natuurlik onder in die bak gaan lê.

Gereelde Vrae oor Drieboontjieslaai

Watter drie bone gebruik mens in ‘n tradisionele Suid-Afrikaanse drieboontjieslaai?

‘n Gewilde Suid-Afrikaanse kombinasie is gebakte bone in tamatiesous, botterbone en groenbone. Resepte verskil egter van familie tot familie en ander weergawes gebruik nierbone, cannellini-bone of kekerertjies.

Moet mens gebakte bone afspoel vir drieboontjieslaai?

Nie vir hierdie resep nie. Hou die gebakte bone in hulle tamatiesous, aangesien die sous bydra tot die geur en tekstuur van die slaai.

Moet ek botterbone afspoel?

Ja. Dreineer en spoel geblikte botterbone af voordat jy hulle by die slaai voeg.

Kan ek vars groenbone gebruik?

Ja. Blansjeer vars groenbone kortliks totdat hulle net sag is, koel hulle af en dreineer deeglik voordat jy hulle by die slaai voeg.

Kan ek drieboontjieslaai sonder suiker maak?

Ja. Jy kan die bruinsuiker verminder of heeltemal uitlaat. Die slaai sal minder soet wees en die asyngeur sal sterker deurkom. Jy kan ook ‘n klein bietjie heuning gebruik indien jy dit verkies.

Kan ek drieboontjieslaai sonder blatjang maak?

Ja. Dit sal nie presies dieselfde Suid-Afrikaanse soet-en-suur karakter hê nie, maar jy kan eerder ‘n vinaigrette met asyn of suurlemoensap, olyfolie, mosterd en ‘n klein bietjie soetigheid maak.

Word drieboontjieslaai warm of koud bedien?

Drieboontjieslaai word gewoonlik koud of koel bedien, wat dit ideaal maak vir braais, pieknieks en somerbyeenkomste.

Hoe lank vooraf kan ek drieboontjieslaai maak?

Dit werk uitstekend om die slaai die aand voor jy dit wil bedien, te maak. Hou dit behoorlik bedek en verkoel.

Kan ek hierdie resep verdubbel?

Beslis. Verdubbel die bone en groente en pas die hoeveelheid sous dienooreenkomstig aan. Voeg die sous geleidelik by en proe soos jy aangaan.

Is drieboontjieslaai net vir braais?

Glad nie. Bedien dit saam met gebraaide hoender, koue vleise, toebroodjies, Kersmiddagete of as deel van ‘n groter slaaitafel.

‘n Suid-Afrikaanse Braai-Klassieker

‘n Goeie drieboontjieslaai bewys dat ‘n lekker braaibykos nie ingewikkeld hoef te wees nie.

Met ‘n paar blikkies uit die koskas, ‘n bietjie ui en groen soetrissie en ‘n heerlike soet-en-suur sous kan jy ‘n kleurvolle slaai maak wat saam met byna enigiets van die braaivuur af werk.

Dit is bekostigbaar, maklik om voor te berei, maklik om aan te pas en – dalk die belangrikste op braaidag – kan lank voor die tyd gemaak word.

Dit voel amper asof elke Suid-Afrikaanse familie hulle eie weergawe het. Party hou daarvan soeter, ander gebruik meer asyn, sommige voeg nierbone by en ander het ‘n geheime bestanddeel wat hulle eenvoudig nie wil verklap nie.

En dit is presies hoe ‘n goeie familieresep behoort te wees.

Brood se Laaste Wenk

As jy hierdie slaai vir môre se braai maak, moenie tot môreoggend wag nie.

Maak dit vanaand, bedek dit behoorlik en sit dit in die yskas. Teen die tyd dat die vuur môre brand en die eerste tjops op die rooster beland, is jou drieboontjieslaai reeds klaar – en die geur behoort selfs beter te wees.

Maak julle drieboontjieslaai anders in jou familie? Vertel ons in die kommentaar watter bone, sous of geheime bestanddeel julle gebruik. Ons hoor graag hoe Brood-lesers hierdie Suid-Afrikaanse gunsteling maak.

Verwysings & Verdere Inspirasie

Daar is baie verskillende maniere om drieboontjieslaai te maak. Vir verdere inspirasie en alternatiewe weergawes kan jy die oorspronklike resepbronne hieronder besoek:

  1. Three Bean Salad – Anina’s Recipes
  2. Three Bean Salad – Immaculate Bites
  3. Classic Three Bean Salad – Budget Bytes
Categories
Recipes

Pastorie Hoender – Maklike Suid-Afrikaanse Hoender-en-Rys Resep

Pastorie Hoender – Maklike Suid-Afrikaanse Hoender-en-Rys Resep

Daar is min dinge so lekker soos ‘n warm bak Pastorie Hoender wat pas uit die oond kom. Sappige, goed gegeurde hoenderstukke word saam met rys, tamatie, ui en ‘n geurige sous gebak vir ‘n maklike Suid-Afrikaanse familie-ete.

Dit is egte trooskos – eenvoudig genoeg vir ‘n aandete deur die week, maar lekker genoeg vir ‘n rustige Sondagmiddagete saam met die familie.

Die beste van alles is dat die meeste van die gaarmaakwerk in een oondbak gebeur. Terwyl die hoender bak, absorbeer die rys die hoenderaftreksel, tamatie, ui, speserye en al die heerlike sappe van die hoender.

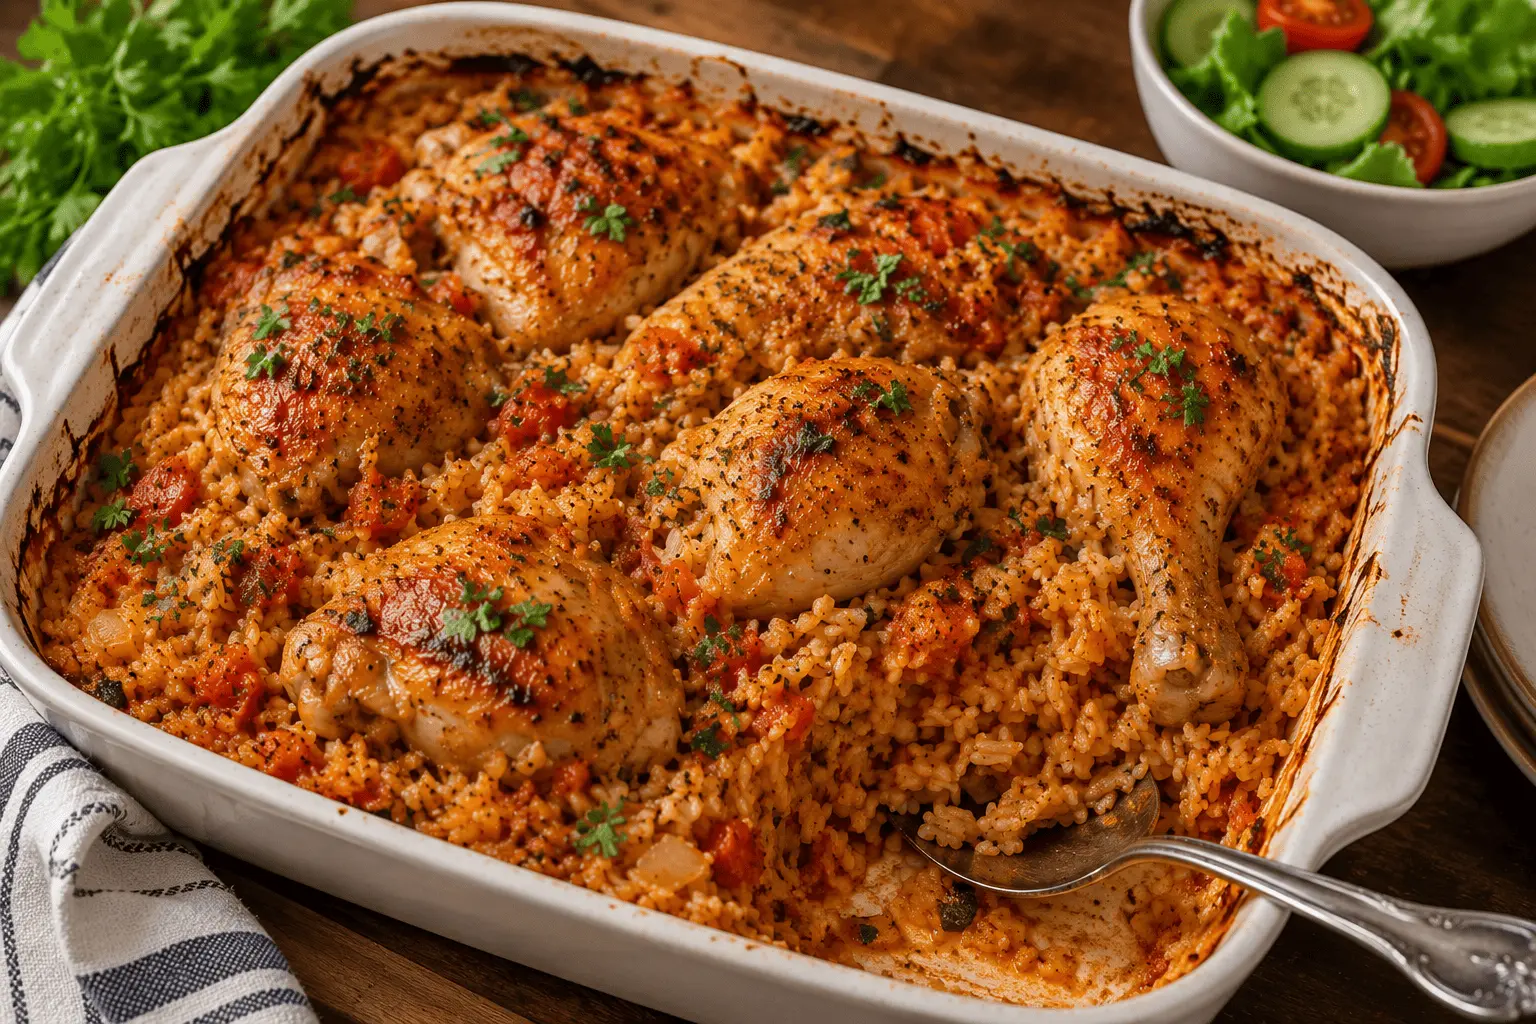
Lekker Suid-Afrikaanse Pastorie Hoender met rys, tamatie en ui

Wat is Pastorie Hoender?

Pastorie Hoender is ‘n heerlike Suid-Afrikaanse hoender-en-rysgereg wat stadig in die oond gebak word.

Soos met baie tradisionele familieresepte is daar verskillende maniere om dit te maak. Die basiese idee is egter eenvoudig: gegeurde hoender, rou rys en ‘n lekker tamatie-en-uiemengsel word saam gebak totdat die hoender sag en goudbruin is en die rys al die heerlike geure geabsorbeer het.

Dit is vullend, maklik om aan te pas en ideaal wanneer jy vir die hele familie kosmaak. Dit is ook een van daardie resepte waarvan elke familie uiteindelik hulle eie weergawe ontwikkel.

Pastorie Hoender Resep

Bedien: 4–6 mense
Voorbereidingstyd: Ongeveer 20 minute
Baktyd: Ongeveer 75–90 minute
Oondtemperatuur: 180°C

Bestanddele

  • 6 hoenderstukke – dye en boudjies werk besonder goed
  • 1 koppie langkorrel witrys, afgespoel en gedreineer
  • 1 groot ui, fyngekap
  • 2 groot ryp tamaties, in blokkies gesny
  • 2 eetlepels kookolie
  • 2 teelepels paprika
  • 1 teelepel knoffelpoeier
  • 1 teelepel uiepoeier
  • ½ teelepel gemengde kruie
  • Sout na smaak
  • Vars gemaalde swartpeper na smaak
  • 4 eetlepels bruin-uie- of hoendersoppoeier
  • 2 koppies warm hoenderaftreksel
  • Vars pietersielie vir garnering

Hoe om Pastorie Hoender te Maak

  1. Voorverhit die oond.
    Voorverhit jou oond tot 180°C. Smeer ‘n groot oondvaste bak liggies met kookolie of kleefwerende kooksproei.
  2. Geur die hoender.
    Meng die paprika, knoffelpoeier, uiepoeier, gemengde kruie, sout en vars gemaalde swartpeper. Vryf die speserymengsel goed oor al die kante van die hoenderstukke.
  3. Maak die tamatie-en-uiesous.
    Verhit die olie in ‘n pan oor matige hitte. Voeg die gekapte ui by en braai totdat dit sag en deurskynend is. Voeg die tamaties by en kook vir ongeveer 5–7 minute totdat die tamaties begin afbreek en ‘n lekker sous vorm.
  4. Berei die rys voor.
    Spoel die rys onder koue lopende water af totdat die water redelik helder loop. Dreineer dit goed en versprei die rou rys eweredig oor die bodem van die voorbereide oondbak.
  5. Voeg die tamatie-en-uiemengsel by.
    Skep die gaar tamatie-en-uiemengsel eweredig oor die rys.
  6. Voeg die aftreksel by.
    Meng die soppoeier met die warm hoenderaftreksel totdat dit glad en sonder klonte is. Gooi die mengsel stadig en eweredig oor die rys.
  7. Pak die hoender bo-op.
    Pak die gegeurde hoenderstukke bo-op die rys. Druk hulle effens in die mengsel, maar hou die grootste gedeelte van die bokant van die hoender blootgestel.
  8. Bedek en bak.
    Bedek die oondbak styf met foelie. Plaas dit in die voorverhitte oond en bak vir ongeveer 60 minute.
  9. Maak die hoender goudbruin.
    Verwyder die foelie en bak vir nog ongeveer 20–30 minute, of totdat die hoender mooi goudbruin en heeltemal gaar is en die rys sag is.
  10. Laat rus en bedien.
    Haal die Pastorie Hoender uit die oond en laat dit vir ongeveer 5–10 minute rus voordat jy opskep. Garneer met vars gekapte pietersielie.

Brood se Wenk: As die rys teen die einde van die baktyd nog effens hard of droog lyk, voeg ‘n klein bietjie warm hoenderaftreksel by, bedek die bak weer en bak vir nog 10–15 minute.

Pastorie Hoender bedien met geurige tamatie-rys en vars slaai

Hoekom is Pastorie Hoender so Lekker?

Die geheim lê daarin dat alles saam in dieselfde oondbak gaar word.

Terwyl die hoender bak, absorbeer die rys die hoenderaftreksel, tamatie, ui, speserye en die natuurlike sappe wat uit die hoender kom. In plaas daarvan om gewone rys apart gaar te maak, kook die rys sommer direk in al die geure van die gereg.

Wanneer die Pastorie Hoender uit die oond kom, het jy sagte, geurige rys onder sappige goudbruin hoender – met daardie onweerstaanbare effens geroosterde stukkies rondom die kante van die oondbak.

Die Geheim tot Perfekte Pastorie Hoender

Gebruik Hoender met die Been in

Hoenderdye en boudjies is uitstekende keuses vir hierdie resep. Hulle hanteer die langer baktyd baie goed en bly gewoonlik sappiger as hoenderborsies.

Moenie die Rys Vooraf Kook Nie

Die rys gaan rou in die oondbak. Dit is belangrik, want jy wil hê die rys moet die aftreksel en al die geure van die hoender, tamatie, ui en speserye absorbeer terwyl dit gaar word.

Bedek die Oondbak Behoorlik

Hou die oondbak gedurende die eerste gedeelte van die baktyd styf met foelie bedek. Die stoom wat binne-in die bak vasgevang word, help die rys om egalig gaar te word en voorkom dat te veel vloeistof verdamp voordat die rys sag is.

Gee die Hoender Kans om Bruin te Word

Wanneer jy die foelie vir die laaste 20–30 minute verwyder, kry die hoender kans om ‘n mooi goudbruin kleur te ontwikkel terwyl die bokant en kante van die rys effens begin rooster.

Laat Dit Rus Voordat Jy Opskep

Moenie die gereg onmiddellik opskep wanneer dit uit die oond kom nie. Laat dit vir ongeveer 5–10 minute rus. Dit gee die rys kans om enige oorblywende sous te absorbeer en laat die geure mooi saamkom.

Watter Hoenderstukke Werk die Beste?

Hoenderdye en boudjies is ons eerste keuse vir Pastorie Hoender. Jy kan net dye, net boudjies of ‘n kombinasie van die twee gebruik.

Hoenderstukke met die been in gee baie geur en bly gewoonlik lekker sappig gedurende die langer baktyd.

Jy kan hoenderborsies gebruik as jy dit verkies, maar hou die gaarmaaktyd mooi dop. Borsvleis bevat minder vet en kan makliker uitdroog.

Watter Rys Moet Ek Gebruik?

Gewone langkorrel witrys werk uitstekend omdat dit die geurige vloeistof mooi absorbeer sonder om te swaar te word.

Spoel die rys af voordat jy dit in die oondbak sit. Dit verwyder van die oortollige stysel aan die buitekant van die korrels en help om ‘n lekker tekstuur te gee wanneer die rys gaar is.

Vermy kitsrys vir hierdie resep, aangesien die langer baktyd die tekstuur daarvan kan beïnvloed.

Pastorie Hoender Variasies

Een van die lekkerste dinge van Pastorie Hoender is hoe maklik jy die resep kan aanpas volgens wat jy reeds in die kombuis het.

Pastorie Hoender met Aartappels

Voeg klein blokkies aartappel by die rys voordat jy die hoender bo-op pak. Hou die blokkies redelik klein sodat hulle genoeg tyd het om sag te word.

Voeg Wortels By

Gesnyde of gekapte wortels gee ekstra kleur en tekstuur, asook ‘n lekker natuurlike soetigheid.

Voeg Mielies By

‘n Handvol mieliepitte gee ekstra kleur en is ‘n maklike manier om nog groente by die ete te voeg.

Voeg Sampioene By

Gesnyde sampioene pas besonder lekker by die hoender, tamatie en ui en gee die sous nog ‘n ekstra hartige geur.

Maak Dit Bietjie Sterker

As jy van ‘n bietjie hitte hou, voeg ‘n knippie rissiepoeier, rooipeper of ‘n fyngekapte vars brandrissie by die tamatie-en-uiesous.

Gee Dit Meer Tamatiegeur

Voeg ongeveer een eetlepel tamatiepasta by terwyl jy die uie en tamaties braai vir ‘n ryker, dieper tamatiegeur.

Maak Dit Romeriger

Vir ‘n ryker weergawe kan jy ‘n klein skeutjie room by die sous voeg voordat die gereg in die oond gaan.

Wat Kan Ek Nog by Pastorie Hoender Voeg?

  • Aartappelblokkies
  • Wortels
  • Mielies
  • Ertjies
  • Sampioene
  • Rooi of geel soetrissie
  • Vars brandrissie
  • Ekstra knoffel
  • Tamatiepasta
  • Vars kruie

Probeer net om nie die oondbak met te veel ekstra bestanddele te oorlaai nie. Die rys het steeds genoeg vloeistof en ruimte nodig om behoorlik gaar te word.

Wat Bedien Mens Saam met Pastorie Hoender?

Omdat Pastorie Hoender reeds hoender en rys bevat, kan dit maklik as ‘n volledige maaltyd bedien word. As jy iets daarby wil bedien, werk vars en ligter bykosse besonder goed.

Vars Groen Slaai

‘n Eenvoudige slaai met blaarslaai, komkommer, tamatie, gerasperde wortel en soetrissie gee lekker varsheid en tekstuur. ‘n Ligte vinaigrette pas goed by die ryk hoender en rys.

Gestoomde Groente

Broccoli, blomkool, groenbone, suikerertjies en babamielies is almal goeie keuses. Hou die groente redelik eenvoudig en laat die Pastorie Hoender die hoofgereg bly.

Chakalaka

Vir nog ‘n Suid-Afrikaanse element kan jy ‘n klein porsie chakalaka saam met jou Pastorie Hoender bedien. Die kombinasie van groente, tamatie en speserye pas uitstekend by die geurige hoender en rys.

Vars Brood

En natuurlik is vars brood nooit ‘n slegte idee nie – veral as daar nog van daardie lekker sous onder in die oondbak oor is!

Wat Kan Mens Drink Saam met Pastorie Hoender?

Rooibostee

Suid-Afrikaanse rooibostee het ‘n natuurlike aardse geur en kan warm of koud saam met die ete geniet word.

Tuisgemaakte Limonade

‘n Vars tuisgemaakte limonade gee ‘n lekker vars kontras teen die hartige hoender en rys. Voeg vars kruisement, suurlemoenskywe of lemoenskywe by vir iets ekstra.

Suid-Afrikaanse Wyn

As jy wyn saam met die ete bedien, kan ‘n Suid-Afrikaanse rooiwyn soos Pinotage lekker werk saam met die hartige en effens geroosterde geure van die gereg.

Pastorie Hoender vir ‘n Groter Familie

Hierdie is ‘n uitstekende resep wanneer jy vir meer mense moet kosmaak.

Die hoeveelhede kan maklik vermeerder word. Gebruik ‘n groter oondbak en vermeerder die hoender, rys en vloeistof in dieselfde verhouding.

Vir ‘n baie groot familie-ete of kuier is dit dikwels beter om twee oondbakke te gebruik eerder as een baie diep bak. Dit help die hoender en rys om meer egalig gaar te word.

Kan Ek Pastorie Hoender Vooraf Voorberei?

Jy kan heelwat van die voorbereiding vooraf doen.

Kap die uie en tamaties, meng die speserye en geur die hoender. Hou alles behoorlik verkoel totdat jy gereed is om die gereg saam te stel.

Omdat jy met rou hoender werk, beveel ons aan dat jy die rys, vloeistof en hoender eers kort voordat die gereg oond toe gaan, saam in die oondbak sit.

Hoe Bêre Ek Oorskiet Pastorie Hoender?

Laat die oorskiet afkoel en plaas dit daarna in ‘n lugdigte houer in die yskas.

Wanneer jy die Pastorie Hoender weer warm maak, maak seker dat beide die hoender en rys regdeur goed warm is voordat jy dit bedien.

Voeg ‘n klein skeutjie water of hoenderaftreksel by voordat jy die gereg weer warm maak. Dit kan help om te keer dat die rys uitdroog.

Pastorie Hoender: Probleme en Maklike Oplossings

Hoekom is My Rys Nog Hard?

As die hoender gaar lyk maar die rys nog hard is, het die rys waarskynlik ‘n bietjie meer vloeistof en gaarmaaktyd nodig.

Voeg ‘n klein hoeveelheid warm hoenderaftreksel by, bedek die oondbak weer styf met foelie en plaas dit terug in die oond totdat die rys sag is.

Hoekom is Daar Nog Te Veel Vloeistof?

Verwyder die foelie en laat die gereg ‘n bietjie langer oop bak. Die ekstra vloeistof sal geleidelik verdamp terwyl die hoender verder verbruin.

My Hoender is Gaar maar Nie Goudbruin Nie

Die laaste gedeelte van die baktyd sonder foelie is belangrik. Verwyder die foelie en laat die hoender verder bak totdat dit ‘n mooi goudbruin kleur ontwikkel.

Hoekom is My Pastorie Hoender Droog?

Maak seker dat daar genoeg vloeistof vir die hoeveelheid rys is en dat die oondbak gedurende die eerste gedeelte van die baktyd behoorlik bedek is.

Oonde en oondbakke verskil, so kyk na die rys teen die einde van die baktyd en voeg ‘n klein bietjie ekstra warm aftreksel by indien nodig.

Hoekom Brand die Rys Onder in die Bak?

As jou oond baie warm bak, kan jy die temperatuur effens verlaag. Maak ook seker dat daar genoeg vloeistof in die oondbak is en dat die gereg nie te naby aan die onderste verwarmingselement geplaas word nie.

Gereelde Vrae oor Pastorie Hoender

Moet Ek die Hoender Eers Braai?

Nee. Die gegeurde rou hoender kan direk bo-op die rys gepak word.

As jy egter ‘n sterker geroosterde geur en ekstra kleur verkies, kan jy die hoender vinnig in ‘n warm pan verbruin voordat jy dit in die oondbak sit.

Moet Ek die Rys Vooraf Kook?

Nee. Gebruik rou, afgespoelde rys. Dit word direk in die hoenderaftreksel, tamatie, ui en hoendersappe gaar.

Kan Ek Bevrore Hoender Gebruik?

Ontdooi die hoender heeltemal voordat jy die resep voorberei. Dit help dat die hoender en rys teen ‘n meer voorspelbare tempo gaar word.

Kan Ek Groente Byvoeg?

Beslis. Aartappels, wortels, mielies, sampioene en soetrissie is almal lekker opsies.

Kan Ek Hoenderborsies Gebruik?

Ja, maar hou die gaarmaaktyd mooi dop. Hoenderborsies is maerder as dye en boudjies en kan dus makliker uitdroog.

Hoe Weet Ek Wanneer Pastorie Hoender Gaar Is?

Die rys moet sag wees, die meeste van die vloeistof moet geabsorbeer wees en die hoender moet heeltemal gaar wees. Die bokant van die hoender behoort ook mooi goudbruin te wees.

Kan Ek die Resep Verdubbel?

Ja. Vir ‘n groot familie-ete of kuier kan jy die hoeveelhede verdubbel. Ons beveel aan dat jy twee oondbakke gebruik eerder as een baie diep bak sodat alles meer egalig gaar word.

Kan Ek Pastorie Hoender Sonder Soppoeier Maak?

Ja. Die soppoeier help om die vloeistof te geur en effens te verdik, maar jy kan die gereg daarsonder maak. Gebruik ‘n lekker gegeurde hoenderaftreksel en pas die sout, kruie en speserye volgens smaak aan. Die sous kan net effens dunner wees.

‘n Egte Suid-Afrikaanse Familie-Gunsteling

Pastorie Hoender is een van daardie resepte wat bewys dat lekker kos nie ingewikkeld hoef te wees nie.

Met ‘n handvol alledaagse bestanddele kan jy ‘n warm, geurige maaltyd maak wat die hele familie kan geniet. Die hoender word sag en sappig, die rys absorbeer al die heerlike geure en die tamatie en ui bring alles mooi bymekaar.

Soos met baie goeie Suid-Afrikaanse familieresepte, het byna elke familie hulle eie manier om dit te maak. Een familie voeg dalk aartappels by, ‘n ander gebruik ekstra tamatie, terwyl iemand anders weer sweer by ‘n spesifieke soppoeier of geheime speserymengsel.

En dit is deel van wat Pastorie Hoender so lekker maak – daar hoef nie net een manier te wees om dit te maak nie.

Brood se Laaste Wenk

Moenie die laaste 20–30 minute nadat jy die foelie verwyder het, afjaag nie. Dit is wanneer die hoender sy mooi goudbruin kleur ontwikkel en die rys rondom die kante van die oondbak begin rooster.

Wanneer die gereg uit die oond kom, laat dit vir nog 5–10 minute rus voordat jy opskep. Dit gee die rys kans om die laaste van die heerlike sappe te absorbeer.

Dan is daar net een ding oor om te doen – skep op en geniet!

Het jy jou eie manier om Pastorie Hoender te maak? Voeg jy aartappels, groente, ekstra speserye of dalk ‘n geheime familiebestanddeel by? Vertel ons gerus in die kommentaar – ons hoor graag hoe Brood-lesers hierdie Suid-Afrikaanse gunsteling in hulle eie kombuise maak.

Verwysings

Vir verdere leeswerk en inspirasie rondom Pastorie Hoender en soortgelyke hoendergeregte:

  1. Pastorie Hoender-inspirasie op Pinterest
  2. Pastorie Hoender – Food Lovers Recipes
  3. Hoenderresep-inspirasie op Pinterest
Categories
Recipes

Spicy Sriracha Shrimp Stir-Fry: A Flavorful and Quick Recipe for Weeknight Meals

Quick Answer

Spicy Sriracha Shrimp Stir-Fry is a quick and flavorful meal option that can be prepared in just 20-30 minutes. This recipe features a delicious honey sriracha sauce that pairs perfectly with juicy shrimp and tender-crisp vegetables. With options for customization and serving suggestions, this stir-fry dish is a must-try for those craving a spicy and satisfying meal.

Introduction

Welcome to Brood, your go-to source for delicious South African recipes! This week, we are excited to share with you a mouthwatering dish that is sure to spice up your dinner routine – Spicy Sriracha Shrimp Stir-Fry. If you’re a fan of bold flavors and quick meals, this recipe is perfect for you.

In this blog post, we have gathered information from various external sources to provide you with a comprehensive guide on how to make the best spicy sriracha shrimp stir-fry at home. We will explore different variations of the recipe and offer tips on customization so that you can tailor it according to your taste preferences.

Whether it’s trying out new ingredients or experimenting with cooking techniques, our aim is always to inspire culinary creativity in our readers. So let’s dive into the world of fiery spices and succulent shrimp as we embark on an adventure through these tantalizing recipes!

Get ready for some sizzling sensations as we take inspiration from Tried and True Recipes’ Honey Sriracha Shrimp Stir-Fry; Baker by Nature’s 20-Minute Skinny Sriracha Shrimp and Broccoli; The Fitchen’s Honey Sriracha Shrimp Meal Prep – all guaranteed winners when it comes down satisfying those cravings while keeping things simple yet flavorful.

So grab your apron because things are about get hot in here! Let us show you how easy it can be whip up an unforgettable meal packed full flavor without spending hours slaving away over stove.

Spicy Sriracha Shrimp Stir-Fry: A Flavorful and Quick Meal Option

Are you in the mood for a delicious, spicy dish that can be prepared in no time? Look no further than our recipe for Spicy Sriracha Shrimp Stir-Fry. Bursting with flavor and packed with tender-crisp vegetables, this stir-fry is sure to satisfy your cravings.

Inspired by Tried and True Recipes

First up is Tried and True Recipes’ Honey Sriracha Shrimp Stir-Fry. This delightful recipe boasts a quick preparation time of just 30 minutes – perfect for those busy weeknights when you want something tasty but don’t have hours to spend in the kitchen. The star ingredient here is undoubtedly their incredible honey sriracha sauce which pairs perfectly with juicy shrimp and crisp veggies such as shiitake mushrooms, shredded carrots, baby bok choy or yu choy – take your pick! Don’t worry if seafood isn’t your thing; they’ve got suggestions on how to make it equally delectable using diced or shredded chicken instead.

Baker by Nature’s 20-Minute Skinny Sriracha Shrimp & Broccoli

Next up comes Baker by Nature’s 20-Minute Skinny Sriracha Shrimp & Broccoli stir-fry creation. If speediness is what you’re after without compromising taste then look no further! In under half an hour flat (yes really!), whip together their tantalizing brown sauce made from low-sodium soy sauce combined harmoniously with orange juice giving it that tangy kick alongside some light brown sugar adding sweetness while ginger adds depth followed closely behind garlic bringing out its aromatic qualities all rounded off with a touch of sesame oil and cornstarch for that perfect consistency. Once the sauce is ready, toss in your shrimp and broccoli into a hot skillet coated with some more sesame oil to cook until tender-crisp before adding the sauce – just one or two minutes longer! Serve this delightful stir-fry alongside rice or lo mein noodles for an unforgettable meal.

The Fitchen’s Honey Sriracha Shrimp Meal Prep

Lastly, we have The Fitchen’s Honey Sriracha Shrimp Meal Prep recipe which offers not only convenience but also versatility. With their detailed instructions on how to prepare everything from marinating the shrimp to cooking up fluffy rice while sautéing those veggies perfectly every time – you’ll be amazed at what can be achieved within 30 minutes flat! Their honey sriracha sauce takes center stage once again as it coats succulent shrimp along with various vegetables like shiitake mushrooms, shredded carrots, baby bok choy or yu choy depending on your preference. And if seafood isn’t quite hitting home today then fear not because they’ve got suggestions aplenty when it comes down choosing between chicken instead!

In conclusion, our Spicy Sriracha Shrimp Stir-Fry brings together all these fantastic elements from different recipes into one comprehensive guide so you can create something truly special right in your own kitchen. Whether you’re looking for speediness without compromising taste or want options galore when customizing flavors according to personal preferences – this dish has got it covered! So why wait? Give our recipe a try tonight and experience the explosion of flavor firsthand.

Recipe Inspiration from Tried and True Recipes

Are you in the mood for a spicy, flavorful stir-fry that can be prepared in just 30 minutes? Look no further than this recipe inspiration from Tried and True Recipes. Their Honey Sriracha Shrimp Stir-Fry is sure to satisfy your cravings with its incredible honey sriracha sauce and customizable vegetable options.

In their blog post, Tried and True Recipes provides a detailed recipe for this mouthwatering dish. The star of the show is undoubtedly the honey sriracha sauce – a perfect balance of sweet and spicy flavors that pairs beautifully with juicy shrimp. But what sets this recipe apart is the option to customize it by adding various vegetables such as sliced shiitake mushrooms, shredded carrots, baby bok choy, yu choy, diced eggplant, and shelled peas.

With just 30 minutes of preparation time required, you’ll have an impressive meal on your table without spending hours in the kitchen. The quick cooking process ensures that all ingredients retain their freshness while infusing each bite with bold flavors.

TriedandTrueRecipes.com encourages readers to rate their recipes after trying them out. So why not give this one a go? Share your feedback on how well you enjoyed making it or any modifications you made along the way. You may even want to pin this recipe for later reference so you can easily recreate it whenever those cravings surface again!

If seafood isn’t your preference, don’t worry! This versatile stir-fry allows for substitutions too. If shrimp isn’t available, you can make use of shredded or diced chicken instead. Whatever variation you choose, this Honey Sriracha shrimp stir-fry will surely become a favorite in no time at all. With its delicious flavors and simple preparation, it’s an ideal weeknight meal that will impress family and friends alike. Explore more amazing recipes like these by checking out the archives on TriedandTrueRecipes.com.

Baker by Nature’s 20-Minute Skinny Sriracha Shrimp and Broccoli

If you’re looking for a quick and flavorful meal option, look no further than the blog post from Baker by Nature titled “20-Minute Skinny Sriracha Shrimp and Broccoli.” This recipe is perfect for those busy weeknights when you want something delicious on the table in no time.

One of the standout features of this dish is its incredibly short cooking time. In just 20 minutes, you can have a mouthwatering stir-fry ready to enjoy. It’s an ideal choice for anyone who wants to whip up dinner quickly without sacrificing flavor.

The star of this recipe is undoubtedly the brown sauce that coats every bite with irresistible taste. Made with low-sodium soy sauce, orange juice, sriracha hot sauce, light brown sugar, ginger garlic paste or minced ginger-garlic cloves (or both), sesame oil, and cornstarch; it adds depth and complexity to each ingredient in your stir-fry.

Readers rave about how much they love this dish! Many have left positive reviews praising its explosion of flavors while appreciating how easy it was to make within such a short timeframe. Some readers even shared their own modifications – like adding extra orange juice or substituting pineapple juice instead – which added another layer of tanginess that complemented perfectly with shrimp and broccoli combination!

So if you’re craving some spicy goodness but don’t want to spend hours slaving away in the kitchen, Baker By Nature has got your back! Head over there now check out their amazing recipe for “20-Minute Skinny Sriracha Shrimp And Broccoli” and get ready indulge yourself into delightful experience tonight.

The Fitchen’s Honey Sriracha Shrimp Meal Prep

If you’re looking for a delicious and convenient meal option, look no further than The Fitchen’s recipe for Honey Sriracha Shrimp Meal Prep. This blog post provides a comprehensive guide on how to prepare this flavorful dish that can be enjoyed throughout the week.

One of the standout features of this recipe is its versatility. While it calls for shrimp as the main protein, there is also an option to use chicken instead if preferred. This allows you to tailor the dish according to your taste or dietary preferences.

The star of this meal prep is undoubtedly the incredible honey sriracha sauce. It adds just the right amount of heat and sweetness, perfectly complementing both seafood and poultry options alike. With each bite, you’ll experience a burst of flavors that will leave your taste buds craving more.

Enhancing Flavor and Nutrition with Vegetables

To enhance both texture and nutritional value in every serving, additional vegetables are suggested by The Fitchen team. From shiitake mushrooms with their earthy flavor profile to shredded carrots adding vibrant color and crunchiness – these ingredients take this stir-fry from ordinary to extraordinary! Other recommended veggies include baby bok choy, yu choy (Chinese greens), diced eggplant, and shelled peas – all contributing unique tastes while providing essential nutrients.

Detailed Instructions for a Foolproof Meal Prep

For those who like detailed instructions when cooking new recipes at home, the blog post includes step-by-step guidance on preparing not only the honey sriracha sauce but also marinating the shrimp. Additionally, detailed directions are provided for cooking the rice and sautéing the flavorful vegetables. The Fitchen team has taken care to ensure that you have all necessary information at your fingertips so that you can confidently recreate this dish in your own kitchen without any hiccups along the way!

Nutritional Information for Informed Choices

Furthermore, this recipe blog post also includes nutritional information. This allows readers to know exactly what they’re consuming and make informed choices about portion sizes and dietary needs. Whether you are counting calories, watching your carbohydrate intake, or simply curious about the nutritional breakdown of this dish, The Fitchen has got you covered.

Conclusion

In conclusion, the Honey Sriracha Shrimp Meal Prep recipe from The Fitchen is a must-try for anyone looking to add some excitement to their weekly meal plan. With its incredible honey sriracha sauce, customizable protein options, and suggested additional vegetables, this dish is sure to satisfy your cravings while providing a healthy dose of flavor and nutrition. Make sure to give it a try and let The Fitchen team know what you think!

How to Make Spicy Sriracha Shrimp Stir-Fry

Are you ready to spice up your dinner routine? This step-by-step guide will show you how to prepare a mouthwatering spicy sriracha shrimp stir-fry in no time. Gather the following key ingredients and get ready for a flavor-packed meal:

Ingredients:

  • 1 pound of large shrimp, peeled and deveined
  • 2 tablespoons vegetable oil
  • 3 cloves garlic, minced
  • 1 red bell pepper, thinly sliced
  • 1 yellow bell pepper, thinly sliced
  • 1 cup snap peas or snow peas
  • Optional vegetables such as shiitake mushrooms or baby bok choy (sliced)
  • Salt and black pepper to taste

For the sauce:

  • ⅓ cup soy sauce
  • ¼ cup honey
  • 2 tablespoons sriracha hot sauce
  • Juice from half a lime
  • Garnish with chopped green onions

Now that we have our ingredients sorted let’s dive into preparing this delicious dish.

Step by Step Guide:

Step #1: Prepare the Sauce

In a small bowl, whisk together all the ingredients for the sauce until well combined. Set it aside while we move on.

Step #2: Sauté Garlic and Vegetables

Heat one tablespoon of vegetable oil in a large skillet over medium-high heat. Add minced garlic and sauté until fragrant but not browned. Next add your choice of vegetables like red bell peppers, yellow bells, snap/snow peas, etc. Sauté them until they are tender-crisp. This should take about five minutes. Make sure not to cook them fully at this stage since they’ll be cooked further later. Add salt and black pepper to taste.

Step #3: Cook the Shrimp

In a separate skillet, heat another tablespoon of vegetable oil over medium-high heat. Add the shrimp in a single layer and cook for about 2-3 minutes per side until they turn pink and opaque. Note that cooking time may vary depending on the size of your shrimp. Once cooked, remove from the pan immediately so as not to overcook them.

Step #4: Combine Everything Together

Add the cooked shrimp into the skillet with sautéed vegetables. Pour in the prepared sauce, stirring well to coat everything evenly. Cook for an additional minute or two until heated through. This will allow all those delicious flavors to meld together perfectly!

Step #5: Serve & Garnish

Transfer your spicy sriracha shrimp stir-fry onto serving plates. Garnish it with chopped green onions, which adds freshness. Serve hot alongside steamed rice, noodles, or even enjoy it by itself! The choice is yours. Enjoy this flavorful dish bursting with spice, sweetness, and succulent shrimps!

Cooking Tips:

  1. To save time, you can prep your ingredients ahead of time – peel and devein the shrimp, mince garlic, slice bell peppers, etc., before starting cooking.
  2. Adjust spiciness according to personal preference by adding more or less sriracha hot sauce.
  3. Feel free to customize this recipe further by adding other favorite veggies like sliced mushrooms, baby bok choy, yu choy, diced eggplant, etc., to make it truly unique!

Now that you have mastered making Spicy Sriracha Shrimp Stir-Fry, get ready for compliments galore at the dinner table!

Serving Suggestions and Customizations

When it comes to serving the spicy sriracha shrimp stir-fry, there are plenty of options that can complement this flavorful dish. Here are some ideas to inspire you:

1. Rice:

Serve the stir-fry over a bed of steamed jasmine rice or brown rice for a classic pairing that will soak up all those delicious flavors.

2. Noodles:

For an Asian-inspired twist, try tossing the spicy sriracha shrimp with lo mein noodles or udon noodles. The combination of tender shrimp and saucy noodles is sure to be a hit.

3. Side Salad:

Balance out the heat from the sriracha sauce by serving your stir-fry alongside a refreshing side salad made with crisp lettuce, cucumber slices, cherry tomatoes, and drizzled with sesame ginger dressing.

4. Toppings & Garnishes:

  • Fresh Herbs: Sprinkle chopped cilantro or Thai basil on top for added freshness.
  • Crushed Peanuts or Cashews: Add some crunchiness by sprinkling crushed peanuts or cashews over each plate before serving.
  • Sliced Green Onions (Scallions): Finely chop green onions and sprinkle them as garnish just before enjoying your meal.

5. Customization Options:

If you want to customize this recipe based on personal preferences or dietary restrictions, here are a few suggestions:

Vegetarian/Vegan Option:

Replace the shrimp in this recipe with tofu cubes marinated in a soy sauce and cornstarch mixture, then pan fry until golden brown. Add these crispy tofu bites at the last step when adding back vegetables into the skillet along with the honey-sriracha sauce.

Gluten-Free Option:

Use Tamari Sauce instead of Soy Sauce, which is a gluten-free alternative available easily. Ensure other ingredients used like Sriracha hot sauce and cornstarch are also gluten-free.

Low-Carb Option:

Skip the rice or noodles and serve the spicy sriracha shrimp stir-fry over a bed of cauliflower rice. You can make your own by pulsing cauliflower florets in a food processor until they resemble grains of rice, then sauté them lightly before serving.

Remember, these suggestions are just starting points for you to get creative with this recipe. Feel free to experiment with different ingredients and flavors that suit your taste buds best!

Feedback and Conclusion

If you’re a fan of spicy flavors and quick meals, then the Spicy Sriracha Shrimp Stir-Fry is definitely worth trying. We encourage all our readers to give this recipe a go and share their feedback with us.

Both Tried and True Recipes as well as The Fitchen have provided detailed instructions on how to prepare this mouthwatering dish in just 30 minutes. From marinating the shrimp or chicken in the incredible honey sriracha sauce to sautéing an array of tender-crisp vegetables, every step promises bursts of flavor that will leave your taste buds dancing.

Don’t forget that both blogs offer options for customization – whether it’s adding sliced shiitake mushrooms, shredded carrots, baby bok choy or even diced eggplant; there are endless possibilities when it comes to making this stir-fry truly your own creation.

Once you’ve tried out these recipes from Tried and True Recipes or The Fitchen be sure to rate them on their respective blog posts! Your valuable feedback helps other home cooks decide which dishes they should try next. Additionally, don’t hesitate to leave comments sharing any modifications you made or tips for fellow readers who might want some inspiration!

In conclusion, we can confidently say that the Spicy Sriracha Shrimp Stir-Fry is not only versatile but also incredibly delicious. Whether served over rice noodles or accompanied by a side salad – its vibrant colors combined with bold flavors make it an absolute winner at any dinner table.

So why wait? Get cooking today!

References

  1. https://www.triedandtruerecipe.com/honey-sriracha-shrimp-stir-fry/
  2. https://bakerbynature.com/20-minute-skinny-sriracha-shrimp-and-broccoli/
  3. https://thefitchen.com/honey-sriracha-shrimp-veggie-stir-fry/
Categories
Recipes

Grilled Pineapple and Black Bean Salsa Recipe: Bursting with Freshness and Flavor

Quick Answer

Grilled pineapple and black bean salsa is a healthy and flavorful dish bursting with freshness, sweetness, color, and texture. It can be served as a side dish or as an accompaniment to tacos or pineapple chicken. The recipe is adjustable based on personal preferences and includes ingredients like grilled pineapple, black beans, bell pepper, jalapeño peppers, tomatoes, cilantro, lime juice, onions, and honey.

Introduction

Grilled pineapple and black bean salsa is a delightful combination of flavors that brings together the sweetness of grilled pineapple with the earthiness of black beans. This vibrant and refreshing dish has gained popularity as both a side dish or an accompaniment to other dishes.

The beauty of this salsa lies in its freshness, bursting with juicy chunks of grilled pineapple, crisp bell peppers, spicy jalapeño peppers, tangy tomatoes, fragrant cilantro leaves, zesty lime juice, and aromatic onions. The contrasting textures create a symphony in every bite – from the tender pineapples to the creamy black beans.

Not only does this colorful medley add visual appeal to any table spread but it also offers numerous health benefits. Pineapple is rich in vitamin C and bromelain which aids digestion while providing anti-inflammatory properties. Black beans are packed with fiber and protein making them not just delicious but nutritious too!

Whether you’re hosting a summer barbecue or simply looking for something light yet satisfying for dinner tonight, this grilled pineapple and black bean salsa will surely impress your taste buds! So let’s dive into these tantalizing recipes sourced from African Bites, Marta Stewart, and Salsas.com where each recipe adds their own unique twist on this delectable creation.

Recipe from African Bites

If you’re looking for a healthy and flavorful salsa to add some excitement to your meals, look no further than the Grilled Pineapple and Black Bean Salsa recipe from African Bites. Bursting with freshness, sweetness, color, and texture, this salsa is sure to be a hit at any gathering or as an accompaniment to your favorite dishes.

Key Ingredients

The key ingredients in this delicious recipe include:

  • Grilled pineapple slices that bring out their natural sweetness when cooked on the grill.
  • Black beans for added protein and fiber.
  • Bell pepper for crunchiness.
  • Jalapeño peppers for heat (adjust according to personal preference).
  • Tomatoes bursting with juiciness.
  • Cilantro adding its fresh herbal notes.
  • Lime juice providing tangy acidity.
  • Onions lending their sharpness.
  • Honey balancing all these flavors together.

One of the best things about this recipe is how easily it can be customized based on individual preferences. Adjust the amount of jalapeños depending on desired spiciness level or play around with different types of onions if you prefer milder or stronger flavor profiles. Additionally, the overall taste will depend upon how sweet your pineapples are, so feel free to adjust other seasonings accordingly!

Serving Suggestions

This versatile salsa can be served as a side dish alongside grilled meats or fish, toasted tortilla chips, or even used as a topping over tacos, pineapple chicken, and more! The possibilities are endless!

Instructions and Nutritional Information

African Bites provides detailed instructions along every step, making it easy-to-follow even if you’re new in the kitchen. The post also includes nutritional information, allowing health-conscious individuals to keep track while enjoying each bite guilt-free.

So why not give this Grilled Pineapple and Black Bean Salsa recipe a try? It’s packed full of vibrant flavors that will leave everyone asking for seconds!

Recipe from Martha Stewart

If you’re looking for a simple yet delicious appetizer with a sweet-and-spicy kick, look no further than this recipe from Martha Stewart. This Pineapple and Black Bean Salsa is sure to impress your guests and tantalize their taste buds.

To make this salsa, you’ll need the following ingredients:

  • Black beans
  • Chopped pineapple
  • Jalapeno pepper
  • Red onion
  • Cilantro
  • Lime juice
  • Coarse salt

The combination of black beans and juicy pineapple creates an irresistible flavor profile that will leave everyone wanting more. The jalapeno adds just the right amount of heat, while the red onion provides a subtle crunch. Fresh cilantro brings in its vibrant aroma, enhancing every bite.

What makes this recipe even better is how easy it is to prepare. Simply combine all the ingredients in a medium bowl and season with coarse salt according to your preference. Give everything a good mix until well combined, allowing all those flavors to meld together beautifully.

This Pineapple and Black Bean Salsa can be served as an appetizer at parties or gatherings but also works wonderfully as part of any Mexican-inspired meal or alongside grilled meats like chicken or fish. Its versatility allows you to get creative – try using it as topping on tacos or quesadillas for added freshness!

So why not give Martha Stewart’s Pineapple and Black Bean Salsa recipe a try? It’s quick, flavorful, and guaranteed to be a hit!

Recipe from Salsas.com

If you’re looking for a healthy, flavorful, and easy dish to add some excitement to your meals, look no further than the Grilled Pineapple Black Bean Salsa recipe from Salsas.com. This salsa is bursting with freshness and combines the sweetness of grilled pineapple with the earthiness of black beans for a delightful flavor combination.

To make this delicious salsa, you will need ingredients such as juicy grilled pineapple chunks, hearty black beans, vibrant bell pepper slices, spicy jalapeño peppers (adjust according to your preferred level of heat), ripe tomatoes diced into small pieces that burst with juiciness when bitten into. The addition of fresh cilantro adds an aromatic touch while lime juice provides a tangy kick. Finally, chopped onions bring depth in flavors along with honey which balances out all other elements perfectly.

One great thing about this recipe is its adjustability – feel free to tweak it based on personal preferences! If you like things spicier or milder just increase or decrease the amount of jalapeños accordingly.

This versatile salsa can be served in various ways depending on how creative you want to get! It makes an excellent side dish alongside any main course meal but also pairs wonderfully well as topping over tacos or even complementing dishes like pineapple chicken where it brings out those tropical vibes!

The instructions provided by salsas.com include grilling tips specifically for pineapples so that they are caramelized beautifully without losing their natural juices during the cooking process. Trust us; these little extra steps go a long way in making sure every bite bursts forth maximum flavors possible.

Another tip mentioned within the instruction section suggests letting the prepared salsa sit overnight before serving because doing so allows time for all those amazing flavors to mingle together, creating something truly magical – trust me, it tastes even better the next day!

For health-conscious individuals who keep track of their nutritional intake, salsas.com provides the necessary information to make informed choices about this delicious salsa.

Conclusion

Grilled pineapple and black bean salsa is a delicious and nutritious dish that combines the sweetness of grilled pineapple with the earthiness of black beans. In this blog post, we explored three different recipes for this flavorful salsa from various sources.

African Bites Recipe

From African Bites, we learned about their recipe which includes ingredients like bell pepper, jalapeño peppers, tomatoes, cilantro, lime juice, onions, and honey. The adjustability of flavors based on personal preferences makes it even more appealing. This versatile salsa can be served as a side dish or paired with tacos or pineapple chicken to enhance your mealtime experience.

Martha Stewart’s Recipe

Martha Stewart’s simple yet tasty recipe caught our attention too! With just black beans, chopped pineapples, jalapeno red onion, cilantro, lime juice, and coarse salt, you can create an appetizer bursting with sweet-and-spicy goodness in no time!

Salsas.com Recipe

Lastly, Salsas.com provided us another fantastic option where they suggested grilling the pineapples before combining them with other ingredients such as bell pepper, jalapeños, tomatoes, onions, honey, cilantro, and lime juice. Their recommendation to let the flavors meld overnight ensures maximum taste satisfaction when enjoying this delightful creation either alone or alongside your favorite Mexican dishes.

We encourage you to try these recipes yourself and experiment by adding your own twist. You could add extra heat by increasing jalapeños if you prefer spicier salsas. Or perhaps play around with additional herbs and spices according to your liking. Whatever variations you choose, the combination of smoky-sweet grilled pineapple along with protein-packed black beans will surely make for a winning flavor profile every single time!

Once you’ve tried these mouthwatering recipes, don’t forget to share your experiences and photos with us. We’d love hearing about how you made it yours. And if grilled pineapple and black bean isn’t enough for your palate, we can recommend other exciting salsa recipes that you can explore.

So, what are you waiting for? Get grilling and start enjoying this deliciously healthy dish!

References

  1. https://www.africanbites.com/grill-pineapple-black-bean-salsa/
  2. https://www.marthastewart.com/340394/pineapple-and-black-bean-salsa
  3. https://www.salsas.com/recipe/black-bean-grilled-pineapple-cucumber-salad
Categories
Recipes

Raspberry Almond Chia Jam: Healthy and Delicious Recipes to Try

Quick Answer

Raspberry Almond Chia Jam is a healthy and delicious alternative to store-bought jams. Made with fresh or frozen raspberries, chia seeds, and other natural ingredients, this jam is vegan, dairy-free, gluten-free, and raw. It can be enjoyed on toast, scones, pancakes, or mixed into oatmeal, providing a nutritious and flavorful addition to any meal.

Introduction

Raspberry Almond Chia Jam has gained popularity as a delicious and healthy alternative to store-bought jams. This delightful jam is not only bursting with the sweet-tart flavor of raspberries but also packed with the nutritional benefits of chia seeds.

Chia seeds, known for their high fiber content and omega-3 fatty acids, are an excellent addition to this homemade jam. They act as natural thickeners, giving the jam its perfect consistency without any artificial additives or preservatives.

One of the best things about Raspberry Almond Chia Jam is its versatility in terms of serving options. Whether you prefer spreading it on toast for a quick breakfast or adding it to scones during afternoon tea time, this flavorful creation will surely satisfy your taste buds. You can even mix it into oatmeal for added sweetness and texture.

So why settle for store-bought jams that often contain unhealthy ingredients when you can easily make your own Raspberry Almond Chia Jam at home? Let’s dive into some amazing recipes that showcase just how versatile and delectable this fruity spread can be!

Recipe 1 – Raspberry Chia Seed Jam on Almond Butter Toast

This recipe for Raspberry Chia Seed Jam on Almond Butter Toast is a delightful and healthy way to start your day. Made with fresh or frozen raspberries, strawberries, chia seeds, and honey, this jam is not only delicious but also packed with nutritional benefits.

To make the jam, you will need:

  • 2 cups of fresh or frozen raspberries
  • ½ cup of sliced strawberries (optional)
  • 3 tablespoons of chia seeds
  • 2 tablespoons of honey (or maple syrup for a vegan option)

The process begins by combining the raspberries and optional strawberries in a saucepan over medium heat. Allow them to cook down until they become soft and juicy. This usually takes about five minutes.

Once cooked down into a thick mixture resembling traditional jam consistency, remove from heat and stir in the chia seeds. The addition of these tiny powerhouses adds extra fiber while helping thicken up the texture naturally without any artificial additives.

Next comes sweetening our raspberry goodness! Stir in two tablespoons of honey (or maple syrup if you prefer) until well combined. Adjust sweetness according to taste preference – some may like it sweeter than others!

Allowing time for cooling allows flavors meld together beautifully before transferring your homemade raspberry almond butter toast spread into an air-tight container such as mason jars that can be stored conveniently within reach whenever cravings strike!

One fantastic aspect worth mentioning about this recipe is its versatility; besides enjoying it slathered onto warm toasted bread topped off generously dollop creamy almond butter layer underneath creating perfect harmony between tartness natural fruit sugars nutty richness almonds provide making every bite truly satisfying experience morning routine never felt so good knowing what goes inside body nourishing wholesome ingredients free dairy gluten raw suitable dietary preferences vegans alike.

In conclusion, try out this amazing Raspberry Chia Seed Jam on Almond Butter Toast recipe and enjoy a healthy, delicious start to your day.

Recipe 2 – Raspberry Chia Seed Jam Oat Crumble Squares

This recipe from URL2 combines the deliciousness of raspberry chia seed jam with a delightful oat crumble topping. The squares are vegan and gluten-free, making them suitable for those with dietary restrictions.

Ingredients:

For the jam:

  • Frozen or fresh raspberries
  • Pure maple syrup
  • Chia seeds
  • Vanilla extract

For the oat crumble squares:

  • Chia seeds
  • Water
  • Coconut oil
  • Pure maple syrup
  • Brown rice syrup
  • Vanilla extract
  • Gluten-free rolled oats
  • Oat flour
  • Almond flour
  • Baking soda
  • Fine sea salt

Making the Jam:

  1. In a saucepan over medium heat, combine frozen or fresh raspberries, pure maple syrup, chia seeds, and vanilla extract.
  2. Cook until berries break down and mixture thickens slightly (around 10 minutes), stirring occasionally to prevent sticking.
  3. Remove from heat and let it cool while preparing the oat crumble square base.

Preparing Oat Crumb Topping:

  1. In a small bowl mix together water & chia seeds. Let sit for about five minutes till gel forms. Add coconut oil, pure maple syrup, brown sugar, vanilla extract. Stir well to combine all ingredients thoroughly. Set aside.
  2. Preheat oven at 350°F (175°C). Line an 8×8-inch baking dish with parchment paper for easy removal later on.
  3. In a large mixing bowl, stir together gluten-free rolled oats, oat flour, and almond flour until well combined.
  4. Mix in the chia mixture from step 4 and stir thoroughly to coat all of the dry ingredients. The dough should be crumbly but stick together when pressed between your fingers. If it’s too dry, add a little more coconut oil or water.
  5. Press about two-thirds of the dough into the prepared baking dish, making sure to compress it firmly and evenly.
  6. Spread the prepared raspberry chia seed jam evenly over the oat base.
  7. Crumble the remaining oat dough over the top of the jam layer, breaking up any larger pieces with your fingers. Press down gently to ensure even coverage.

Bake and Serve:

  1. Place in preheated oven and bake for 25-30 minutes or until the topping is semi-firm.
  2. Remove from oven and let cool completely before slicing into squares.
  3. Once cooled, store these delicious Raspberry Chia Seed Jam Oat Crumble Squares in an airtight container in the fridge for up to one week or freeze them for up to six weeks.

Enjoy this delightful treat as a snack or dessert! The combination of sweet raspberry chia seed jam with crunchy oat crumbles will surely satisfy your taste buds.

Recipe 3 – Raspberry Chia Jam Bars

Summary: This recipe from URL3 provides a delicious and healthy way to enjoy raspberry chia jam. Made with fresh or frozen raspberries, strawberries, chia seeds, and honey, this jam is packed with flavor and nutrients. The process of making the jam is simple and can be completed in about 15-20 minutes. Once prepared, you can store the jam in an airtight container for future use.

Ingredients:

  • Fresh or frozen raspberries
  • Strawberries
  • Chia seeds
  • Honey (or alternative sweetener)

Instructions:

  1. In a saucepan over medium heat, combine the raspberries and strawberries.
  2. Cook until they start to break down into a thick mixture.
  3. Mash them using a fork or potato masher until desired consistency is reached.
  4. Add chia seeds gradually while stirring continuously to prevent clumping.
  5. Continue cooking for another few minutes until the mixture has thickened further due to the absorption of liquid by chia seeds.
  6. Remove from heat once it reaches your preferred thickness; keep in mind that it will thicken more as it cools down.
  7. Store cooled raspberry almond chai seed bars refrigerated inside an air-tight jar.

Storing Instructions:

Once cooked, allow your homemade raspberry almond chai seed bars to cool completely before transferring them into an air-tight container such as glass jars. This ensures maximum freshness and longevity of the jam. You can store it in the fridge for up to a week, enabling you to enjoy this deliciousness whenever the craving strikes. If you want to extend the storage period, you can even freeze the jam bars for three to six weeks. Just make sure to defrost them properly before using again!

With its vibrant color, tangy taste, and nutritional benefits, this raspberry almond chai jam is a perfect addition to your breakfast table or anytime you need a sweet and healthy treat. Enjoy it on your toast, swirled into your oatmeal, smeared on pancakes or scones, and get creative by incorporating it in other recipes as you please.

Conclusion

Raspberry Almond Chia Jam is a delicious and healthy alternative to store-bought jams. With its numerous benefits, it’s no wonder that this jam has gained popularity among health-conscious individuals.

One of the main advantages of Raspberry Almond Chia Jam is its healthiness. By using chia seeds as a thickening agent, you not only achieve a perfect consistency but also add an extra dose of fiber to your diet. This can help improve digestion and promote overall gut health.

Furthermore, Raspberry Almond Chia Jam offers versatility in terms of how it can be enjoyed. Whether spread on toast for breakfast or mixed into oatmeal for added flavor and texture, this jam adds a burst of fruity goodness to any dish.

We encourage you to try one or more recipes provided above! The first recipe from URL1 combines the sweetness of raspberries with almond butter toast – creating the ultimate guilt-free indulgence packed with nutrients like antioxidants and omega-3 fatty acids.

If you’re looking for something heartier, give Recipe 2 from URL2 a go! These raspberry chia seed jam oat crumble squares are vegan-friendly and gluten-free – making them suitable for those following specific dietary restrictions while still satisfying their sweet tooth cravings!

For those who prefer quick treats without baking involved; check out Recipe 3 from URL3 which provides instructions on preparing easy-to-make raspberry chia bars that will surely become your new favorite snack option!

Once you’ve tried these recipes or come up with variations yourself don’t forget to share your experiences on social media platforms such as Instagram or Facebook using #BroodRecipes hashtag so others can see what creative twists they could incorporate too!

In conclusion, Raspberry Almond Chia Jam brings together taste & nutrition effortlessly. Its simplicity makes it accessible even if cooking isn’t really “your thing”. So why wait? Get started today by trying one (or all!) of our recipes and let your taste buds experience the delightful flavors of Raspberry Almond Chia Jam.

References

  1. http://mariereginato.com/home/the-best-raspberry-chia-seed-jam-on-almond-butter-toast-vegan-dairy-free-gluten-free-raw
  2. https://ohsheglows.com/raspberry-chia-seed-jam-oat-crumble-squares-vegan-gluten-free/
  3. https://rachlmansfield.com/no-bake-raspberry-chia-jam-bars/
Categories
Recipes

Pesto Zucchini Ribbon Salad Recipe: Fresh and Flavorful Delight

Quick Answer

This article provides a comprehensive guide to making a delicious pesto zucchini ribbon salad. It includes a recipe overview, detailed instructions for making the pesto vinaigrette and preparing the zucchini ribbons, tips for assembling the salad, and suggestions for serving and storing. With its fresh flavors and simple preparation, this salad is a perfect choice for a healthy and refreshing meal.

Introduction

A pesto zucchini ribbon salad is a delightful and refreshing dish that combines the vibrant flavors of fresh zucchini with the aromatic goodness of homemade pesto. This salad has gained immense popularity in recent years, thanks to its versatility and ability to be enjoyed as a light lunch or side dish.

Zucchinis are not only delicious but also packed with essential nutrients. They are low in calories, high in fiber, and rich in vitamins A and C. Incorporating this versatile vegetable into your diet can contribute to improved digestion, weight management, and overall well-being.

The star ingredient of this recipe is undoubtedly the homemade pesto vinaigrette. Made from an exquisite blend of basil leaves, garlic cloves, walnuts for added crunchiness, and olive oil for richness, the resulting sauce bursts with freshness on every bite. Its fragrant aroma adds depth while enhancing all other ingredients present within our flavorful creation.

Whether you’re looking for a healthy option during summer months or simply want something quick yet satisfying, this colorful medley will surely impress both family members at home gatherings or guests at dinner parties. The combination of crisp zucchini ribbons coated in luscious pesto vinaigrette will leave everyone craving more!

So let’s dive right into creating this delectable masterpiece – a perfect harmony between healthfulness and indulgence!

Recipe Overview

Are you looking for a refreshing and healthy salad option? Look no further than our zucchini ribbon salad with pesto vinaigrette. This recipe is not only delicious but also vegetarian and gluten-free, making it suitable for various dietary preferences.

With this recipe, you can expect to yield 4 to 6 servings of the zucchini ribbon salad. It’s perfect as a side dish or even as a light main course on those warm summer days when you crave something fresh and vibrant.

One of the best things about this recipe is its simplicity. You don’t need any fancy cooking techniques or complicated ingredients; just some basic kitchen tools will do the trick! Even if you’re new to cooking, rest assured that this salad won’t require hours in the kitchen – it’s quick and easy!

The star ingredient here is undoubtedly the zucchini ribbons themselves. By using a simple vegetable peeler, we transform ordinary zucchinis into delicate ribbons that add both texture and visual appeal to your plate.

To elevate these beautiful ribbons even more, we prepare an irresistible homemade pesto vinaigrette bursting with flavors from fresh basil leaves, mint leaves, walnuts garlic cloves lemon zest & juice salt pepper olive oil all blended together until smooth perfection achieved by food processor. The dressing adds depth while complementing every bite of crispness from arugula baby greens mixed throughout.

So whether you’re hosting friends for brunch or simply want to enjoy a nutritious meal at home, give our Zucchini Ribbon Salad with Pesto Vinaigrette a try today!

Ingredients

To make this delicious and refreshing pesto zucchini ribbon salad, you will need the following ingredients:

  • 4 medium-sized zucchinis
  • 2 cups of baby arugula
  • A handful of fresh basil leaves
  • A few sprigs of fresh mint leaves (optional)
  • 1/3 cup walnuts, roughly chopped
  • 2 cloves garlic, minced
  • Zest and juice from one lemon
  • Salt and pepper to taste
  • Extra virgin olive oil for dressing

For garnish:

  • Crumbled goat cheese

These simple yet flavorful ingredients come together beautifully to create a vibrant dish that is perfect for any occasion. The combination of zucchini ribbons with the aromatic flavors in the homemade pesto vinaigrette makes this salad truly irresistible.

Feel free to customize your recipe by adding or substituting certain ingredients based on your preferences. For example, if you’re not a fan of arugula, you can use spinach instead. Additionally, pine nuts or almonds can be used as alternatives to walnuts if desired.

One ingredient worth highlighting is fresh basil – it adds an incredible depth of flavor that complements both the zucchini ribbons and other components perfectly. And let’s not forget about crumbled goat cheese! Its creamy texture provides a delightful contrast against the crispness of the vegetables while enhancing their natural flavors.

Now that we have our list ready let’s move on to creating our own mouthwatering pesto-zucchini ribbon salad!

Pesto Vinaigrette

Making your own homemade pesto vinaigrette is a simple and delicious way to elevate the flavors of your zucchini ribbon salad. This vibrant dressing adds a burst of freshness and herbaceousness that perfectly complements the crisp zucchini ribbons.

To make the pesto vinaigrette, you will need:

  • 1 cup baby arugula
  • ½ cup fresh basil leaves
  • ¼ cup fresh mint leaves
  • ⅓ cup walnuts (you can also use pine nuts or almonds)
  • 2 cloves garlic, minced
  • Zest and juice from one lemon
  • Salt and pepper to taste
  • Olive oil

Here’s how you can prepare this flavorful dressing in just a few easy steps:

Step 1:

In a food processor, combine the baby arugula, fresh basil leaves, mint leaves, walnuts (or other preferred nuts), minced garlic cloves, lemon zest, and lemon juice.

Step 2:

Season with salt and pepper according to your taste preferences.

Step 3:

Start blending all the ingredients together while slowly drizzling olive oil into the food processor until a smooth consistency is achieved. You may need about ½ cup of olive oil, but adjust accordingly until desired consistency is reached.

Once prepared, you can store any unused pesto vinaigrette in the refrigerator for up to three days. This way, you’ll always have it on hand whenever cravings for salad strike!

The homemade pesto vinaigrette will add an extra layer of flavor and sophistication to your zucchini ribbon salad. Its bright green color will also enhance the visual appeal of this dish. Making such a delicious dressing from scratch allows you to tailor it to your preferences by adjusting the salt, the amount of garlic, or even experimenting with different herbs and nuts.

So, give it a try! Prepare this pesto vinaigrette, and watch your zucchini ribbon salad come to life with flavorful goodness.

Preparing the Zucchini Ribbons

To create beautiful zucchini ribbons for your pesto zucchini ribbon salad, follow these simple steps:

  1. Start by selecting fresh and firm zucchinis. The quality of the vegetable plays a crucial role in achieving perfect ribbons.

  2. Wash the zucchinis thoroughly under running water to remove any dirt or impurities from their skin.

  3. Trim off both ends of each zucchini using a sharp knife.

  4. Take a vegetable peeler and hold it firmly against one end of the first trimmed zucchini, applying gentle pressure as you move downwards along its length.

    • Tip: For thin and even ribbons, try to maintain consistent pressure while peeling.

  5. Continue peeling until you reach near the other end of the same side; then flip over your hand holding the peeled part towards yourself so that now unpeeled portion is facing upwards again peel down till this new edge repeat flipping process after every few strokes.

    • Tip: If desired thickness isn’t achieved with a single stroke, continue making multiple passes on different parts.

  6. Repeat this process with all remaining trimmed zucchinis.

Assembling the Salad

To bring all the flavors together, follow these simple steps to assemble your delicious pesto zucchini ribbon salad:

1. Prepare the Zucchini Ribbons

Start by preparing your zucchini ribbons. Using a vegetable peeler, carefully slice lengthwise along the zucchini to create thin and even ribbons.

2. Toss with Walnuts

In a large mixing bowl, add the zucchini ribbons and gently toss them with walnuts for added crunchiness.

3. Add Goat Cheese

Next, crumble some creamy goat cheese over the top of the salad mixture. The tangy flavor of goat cheese pairs perfectly with both pesto and fresh vegetables.

4. Incorporate the Pesto Vinaigrette

Now it’s time to incorporate that vibrant homemade pesto vinaigrette into our dish! Pour enough dressing over the salad until everything is lightly coated but not overly saturated.

5. Toss Together

Toss all ingredients together using tongs or clean hands, ensuring each strand of delicate zucchini gets evenly dressed in that flavorful vinaigrette.

6. Garnish (Optional)

If desired, you can also garnish this refreshing summer delight with additional basil leaves or mint sprigs for an extra burst of freshness!

Remember that cooking should be fun and flexible – feel free to experiment by adding other optional ingredients such as cherry tomatoes or roasted red peppers if you want more color on your plate!

Once assembled, serve immediately while still crisp and enjoy every bite bursting with garden-fresh goodness!

Serving and Storage

When it comes to serving the delicious pesto zucchini ribbon salad, there are a few options that can elevate your dining experience. Here are some suggestions on how to serve this refreshing dish:

1. As a Light Lunch or Dinner:

  • Enjoy the zucchini ribbon salad as a standalone meal by adding grilled chicken or shrimp for added protein.
  • Serve it alongside crusty bread or garlic toast for a more substantial option.

2. Side Dish at Barbecues and Picnics:

  • Pair the zucchini ribbon salad with grilled meats such as steak, burgers, or kebabs.
  • Pack it in individual containers for easy transportation during picnics and outdoor gatherings.

3. Appetizer Option:

  • Present smaller portions of the salad on small plates as an appetizer before main courses.
  • Garnish each plate with additional fresh basil leaves for an extra pop of color.

4. Salad Bowl Variation:

  • Combine larger quantities of baby arugula with the dressed zucchini ribbons to create a heartier green base.
  • Top off with cherry tomatoes, sliced red onions, crumbled feta cheese, and toasted pine nuts for added texture and flavor.

Now let’s talk about storing any leftover pesto zucchini ribbon salad:

To keep your leftovers fresh without compromising taste quality follow these guidelines:

1. Refrigeration:

Store any remaining prepared salads in an air-tight container in the refrigerator within two hours after preparation to prevent bacterial growth from occurring due to prolonged exposure outside refrigerated temperatures.

2. Shelf Life:

The stored Zucchini Ribbon Pesto Salads will remain good up to three days when properly sealed and kept under ideal temperature conditions.

Remember not to freeze this particular recipe since freezing may cause changes in texture once thawed out again.

By following these simple tips, you’ll be able to enjoy the pesto zucchini ribbon salad for a few days after its initial preparation. Whether you serve it as a light lunch, side dish, or appetizer, this versatile and refreshing salad is sure to impress your family and friends!

Recipe Variations

Zucchini ribbon salad with pesto vinaigrette is a versatile dish that can be customized to suit your taste preferences and dietary needs. Here are some exciting variations and additions you can try:

Veggie Delight:

  • Add cherry tomatoes, sliced bell peppers, or thinly sliced red onions for an extra burst of color and flavor.
  • Toss in some roasted corn kernels or grilled asparagus spears for added texture.

Protein Powerhouse:

  • Incorporate cooked quinoa, chickpeas, or white beans into the salad to make it more filling.
  • Top it off with grilled chicken strips or sautéed shrimp for a protein-packed meal option.

Cheesy Twist:

  • Swap out goat cheese for feta cheese crumbles to add a tangy kick.
  • Sprinkle grated Parmesan over the top before serving for an additional layer of richness.

Nutty Crunch:

  • Experiment with different nuts such as pine nuts, almonds, or pecans instead of walnuts in both the dressing and garnish.
  • Toast them lightly beforehand to enhance their flavors even further.

Dressing Diversions:

  • Try using different types of pesto like sun-dried tomato pesto or spinach-basil pesto instead of traditional basil-based ones.
  • For those who prefer lighter dressings, drizzle balsamic glaze on top just before serving.

Remember that these suggestions are only starting points; feel free to get creative! Don’t hesitate to mix things up by adding fresh herbs like parsley or cilantro, or experimenting with other vegetables based on what’s available seasonally at your local market.

Conclusion

The pesto zucchini ribbon salad is a delightful and refreshing dish that combines the simplicity of zucchini ribbons with the vibrant flavors of homemade pesto vinaigrette. Throughout this blog post, we have explored various sources to bring you an easy-to-follow recipe for this delicious salad.

By using fresh ingredients like basil, mint, walnuts, garlic, lemon zest and juice in the dressing along with crisp zucchini ribbons tossed together with goat cheese and walnuts; every bite bursts with flavor. The combination of textures from creamy goat cheese to crunchy nuts adds depth to each mouthful.

Not only does this salad taste amazing but it also offers numerous health benefits. Zucchinis are low in calories yet packed full of vitamins A and C as well as dietary fiber which aids digestion. Additionally, by making your own pesto vinaigrette at home instead of opting for store-bought versions laden with preservatives or additives ensures you’re getting all-natural goodness without compromising on taste.

We encourage our readers to give this recipe a try! It’s perfect for those looking for light lunches or side dishes bursting with freshness during warmer months when gardens overfloweth (or even if they don’t). Don’t be afraid to get creative – experiment by adding other vegetables such as cherry tomatoes or grilled bell peppers into your mix!

Once you’ve made it yourself please share your experiences below so others can benefit too – whether through tips about substitutions based on personal preferences/dietary restrictions OR simply sharing how much joy these simple pleasures brought them throughout their day(s).

Remember that versatility is key here – feel free not just sticking strictly within boundaries set forth herein because sometimes breaking rules leads us down paths previously unexplored…and who knows what treasures await there?

References

  1. https://www.foodnetwork.com/recipes/zucchini-ribbon-salad-with-pesto-vinaigrette-3629541
  2. https://smittenkitchen.com/2018/07/grilled-zucchini-ribbons-with-pesto-and-white-beans/
  3. https://gourmandeinthekitchen.com/zucchini-ribbon-salad-recipe/
Categories
Recipes

Buffalo Cauliflower Lettuce Wraps: A Delicious and Healthy Alternative

Quick Answer

Buffalo cauliflower lettuce wraps are a tasty and healthy alternative to traditional buffalo wings. This recipe involves roasting cauliflower until crispy, coating it in buffalo wing sauce, and assembling it in lettuce wraps with toppings like avocado, blue cheese, and scallions. Serve with ranch or blue cheese dressing for a satisfying and flavorful meal.

Introduction

Buffalo cauliflower lettuce wraps offer a tantalizing twist on the classic buffalo wing. This innovative dish combines the bold flavors of spicy buffalo sauce with roasted cauliflower, all wrapped up in crisp and refreshing lettuce leaves. Not only are these wraps incredibly delicious, but they also provide a healthier alternative to traditional wings.

In recent years, buffalo-inspired recipes have gained immense popularity for their fiery flavor profiles and addictive tanginess. However, many people are looking for ways to enjoy this iconic taste without consuming meat or excessive calories. That’s where cauliflower comes into play – its versatility allows it to be transformed into an irresistible vegetarian option that satisfies even the most ardent carnivores.

One of the standout features of using lettuce as a wrap is its low-carb nature which makes it suitable for those following specific dietary restrictions such as keto or gluten-free diets. Lettuce provides a light yet sturdy vessel that perfectly complements the robustness of Buffalo-flavored dishes while adding freshness and crunch.

So if you’re craving something indulgent but want to keep things healthy at the same time, look no further than these mouthwatering Buffalo Cauliflower Lettuce Wraps!

Recipe Overview

Buffalo cauliflower lettuce wraps are a delicious and healthy alternative to traditional buffalo wings. This recipe combines the bold flavors of buffalo wing sauce with roasted cauliflower, wrapped in crisp lettuce leaves for a satisfying meal or snack.

Key Ingredients:

  • Cauliflower florets
  • Buffalo wing sauce
  • Lettuce leaves (green leaf or butter lettuce works well)
  • Avocado slices
  • Crumbled blue cheese or gorgonzola cheese (optional)
  • Scallions, cilantro, and chives for garnish

Preparation Steps:

  1. Start by roasting the cauliflower until it becomes tender on the inside and crispy on the outside. Tossing it in olive oil along with your favorite spices will enhance its flavor.
  2. Once roasted, coat the cauliflower generously with tangy buffalo wing sauce to give it that signature kick.
  3. Choose fresh lettuce leaves as your wrap base – green leaf or butter lettuce work best due to their pliable texture.
  4. Place a generous amount of buffalo-flavored cauliflowers onto each piece of lettuce.
  5. Top off your wraps with creamy avocado slices for added richness and freshness.
  6. If desired, add crumbled blue cheese/gorgonzola over top which adds an extra layer of creaminess & saltiness.
  7. Finally, garnish them beautifully using scallions, cilantro, and chives.

The beauty of this recipe lies not only in its incredible taste but also in how simple it is to prepare! With just a few steps involved from start to finish, this dish can be whipped up effortlessly, making these wraps perfect whether you’re hosting game day festivities or simply looking for a quick weeknight dinner option.

So why settle for ordinary when you can enjoy all those classic spicy flavors without any guilt? These Buffalo Cauliflower Lettuce Wraps offer everything we love about traditional chicken wings while providing a healthier twist. With every bite, you’ll experience the perfect balance of heat, crunch, and freshness. Give this recipe a try and prepare to be amazed!

Roasting the Cauliflower

Roasting the cauliflower is a crucial step in creating buffalo cauliflower lettuce wraps that are crispy and bursting with flavor. By roasting, we can transform this humble vegetable into a delicious centerpiece for our wraps.

Preparation

To begin, preheat your oven to 425°F (220°C). While waiting for it to heat up, prepare your cauliflower by cutting it into bite-sized florets. This ensures even cooking and allows each piece to absorb all those mouthwatering flavors.

Seasoning

Next comes seasoning – an essential part of bringing out the best in roasted vegetables. In a large bowl, toss the cauliflower florets with olive oil until they’re evenly coated. The oil helps create that desirable crispiness while also preventing them from drying out during baking.

Now let’s talk about spices! You have plenty of options here depending on how bold you want your buffalo flavor profile to be. A classic combination includes garlic powder, paprika or smoked paprika for some smoky undertones, salt and pepper for balance – but feel free to experiment according to personal taste preferences!

Baking

Once seasoned well enough (don’t hold back!), spread out the seasoned cauliflowers onto a lined baking sheet ensuring there’s space between each piece so they roast rather than steam together.

Place them in the preheated oven and bake for approximately 20-25 minutes or until golden brown around edges; remember not to overcook as we still need some texture left before tossing these beauties in Buffalo sauce later on!

While waiting anxiously near that heavenly aroma wafting through your kitchen windowpane, take time now if desired to add more seasonings like additional hot sauce drizzles atop already baked pieces. Then return the tray briefly under the broiler for just a few moments longer until everything melds perfectly together, giving us the ultimate spicy kick without overpoweringly burning tongues off mouths entirely…unless one prefers such a fiery experience!

Conclusion

Roasted cauliflower is the key to achieving a crispy and flavorful texture in our buffalo cauliflower lettuce wraps. By properly seasoning and roasting the florets, we can create a delicious base for this dish that will have everyone coming back for more. So don’t be afraid to get creative with your spices and enjoy the process of transforming simple cauliflower into something truly extraordinary!

Adding Buffalo Wing Sauce

Coating the roasted cauliflower in buffalo wing sauce is what gives these lettuce wraps their signature tangy and spicy flavors. The combination of crispy, roasted cauliflower with the boldness of buffalo sauce creates a mouthwatering experience that will have you coming back for more.

Coating the Cauliflower

To add the buffalo wing sauce to your cauliflower, simply toss it gently in a bowl or resealable bag until each piece is evenly coated. You can adjust the amount of sauce based on your personal preference for heat – whether you like it mild or prefer an extra kick, feel free to customize accordingly.

Homemade Buffalo Wing Sauce

If you’re looking for store-bought options, there are plenty available at most grocery stores. However, if you want to take things up a notch and make your own homemade buffalo wing sauce from scratch, we’ve got just the recipe! Combine hot pepper sauce (such as Frank’s RedHot), melted butter or margarine (for richness), vinegar (to balance out flavors), Worcestershire sauce (for depth), garlic powder (for added aroma) and salt into a small pot over low heat until well combined. Adjust seasonings according to taste preferences before tossing with your perfectly roasted cauliflower.

Balance of Heat and Flavor

Remember that while adding enough buffalo wing sauce to coat all pieces thoroughly ensures maximum flavor absorption, it’s important not to go overboard; otherwise, the dish may become overwhelmingly spicy. The goal here is to strike a perfect balance between heat and flavor so that every bite is enjoyable. Additional toppings such as sliced avocado or crumbled blue cheese can also help temper the spiciness of the cauliflower while adding creamy and tangy notes.

So don’t be afraid to tweak the sauce amounts according to your liking, and get ready to enjoy these buffalo cauliflower lettuce wraps with just the right amount of tang and sizzle.

Assembling the Lettuce Wraps

Step 1: Choosing the Appropriate Lettuce Leaves

  • Select fresh and crisp lettuce leaves for your wraps. Green leaf lettuce or butter lettuce works well as they provide a sturdy yet flexible base.
  • Rinse the leaves thoroughly under cold water to remove any dirt or debris, then pat them dry with paper towels.

Step 2: Arranging the Cauliflower on Top

  • Take a roasted buffalo cauliflower floret and place it in the center of a lettuce leaf.
  • Gently press down on the cauliflower to slightly flatten it, allowing other toppings to adhere better.

Step 3: Adding Additional Toppings and Fillings

  • Enhance both flavor and texture by adding various toppings according to your preference. Here are some suggestions:
    • Sliced Avocado: Add creamy richness by placing thin slices of ripe avocado over each piece of cauliflower.
    • Crumbled Blue Cheese/Gorgonzola Cheese (optional): Sprinkle crumbled blue cheese or gorgonzola cheese over top for an extra tangy kick that complements Buffalo flavors perfectly.
    • Scallions/Chopped Spring Onions: Finely chop scallions or spring onions into small pieces before scattering them generously across each wrap; this adds freshness along with mild onion notes.
    • Cilantro/Coriander Leaves: Tear off several cilantro/coriander leaves from their stems, sprinkle these fragrant herbs onto every wrap—adding brightness while balancing out spiciness levels nicely!
    • Chives/Fresh Herbs (optional): For added depth of flavor, you can also add chopped chives/fresh herbs like parsley/basil/mint, etc., which will elevate the taste profile further!

Feel free to mix-and-match these suggested ingredients based on personal preferences!

Once all desired fillings have been added, carefully fold one side of each lettuce leaf towards its center, then roll it up tightly from the bottom to create a neat and compact wrap. Repeat this process for each lettuce leaf.

Now your buffalo cauliflower lettuce wraps are ready to be enjoyed! Serve them as an appetizer or main course alongside some ranch or blue cheese dressing on the side for dipping. These wraps can also be paired with a refreshing salad or served in tortilla wraps if desired.

Remember, these recipes are highly customizable, so feel free to experiment with different toppings and fillings according to your taste preferences. Enjoy exploring various flavor combinations while savoring the deliciousness of buffalo cauliflower wrapped in fresh lettuce leaves!

Serving Suggestions

Buffalo cauliflower lettuce wraps are incredibly versatile and can be enjoyed in various ways. Here are some serving suggestions to enhance your culinary experience:

Dipping Delight:

  • Serve the buffalo cauliflower lettuce wraps with a side of creamy ranch or tangy blue cheese dressing for dipping.
  • The coolness of the dressings complements the spicy kick from the buffalo sauce, creating a perfect balance of flavors.

Salad Sensation:

  • Transform your buffalo cauliflower lettuce wraps into a refreshing salad by chopping up the wrapped ingredients and tossing them with mixed greens.
  • Drizzle some extra virgin olive oil and lemon juice as a light dressing, adding brightness to every bite.

Wrap it Up:

  • Take things up another notch by using large tortilla wraps instead of individual pieces of lettuce.
  • Spread some additional condiments like avocado spread or hummus on each wrap before layering in the buffalo cauliflower mixture along with other desired toppings such as sliced tomatoes, red onions, or shredded carrots.

Sandwich Savvy:

  • Elevate your lunch game by turning these delicious bites into flavorful sandwiches.
  • Slather bread slices (toasted if preferred) with mayo or mustard then pile on generous amounts of Buffalo Cauliflower Lettuce Wraps filling between two slices along with any extras you desire—think crispy bacon strips for added crunch!

Creative Combos:

  • Get creative! Experiment further by incorporating different elements that complement well together; try topping off your Buffalo Cauliflower Lettuce Wraps creation with crumbled feta cheese for an extra burst flavor sensation!

These serving suggestions provide just a glimpse into how you can enjoy this delectable dish beyond its traditional form while allowing room for personalization based on taste preferences and dietary needs.

Remember to have fun exploring new combinations that suit your palate best when enjoying these buffalo cauliflower lettuce wraps. Whether you choose to dip, toss in a salad, wrap it up, or create your own unique twist on the dish – there are endless possibilities for culinary enjoyment!

Personalization and Variations

Buffalo cauliflower lettuce wraps are a versatile dish that can be easily personalized to suit individual tastes. Here are some suggestions for personalizing the recipe and creating delicious variations:

1. Protein Swap:

  • If you prefer meat in your wraps, consider substituting chicken for cauliflower. Simply cook or grill boneless chicken breasts until they’re fully cooked, then shred or chop them into bite-sized pieces before tossing with buffalo wing sauce.
  • For a vegetarian option, try using tofu as an alternative protein source. Press firm tofu to remove excess moisture, cut it into cubes or strips, bake until crispy on the outside but tender inside, then toss with buffalo sauce.

2. Veggie Medley:

  • While cauliflower is the star of this recipe, feel free to experiment by incorporating other vegetables alongside it.
  • Add roasted bell peppers for extra sweetness and color.
  • Include sliced red onions for added crunchiness and flavor depth.

3. Sauce Selections:

  • Buffalo wing sauce provides classic tangy heat; however, you can switch things up by trying different sauces such as barbecue sauce, honey mustard, sriracha mayo, etc., to create unique flavor profiles.

4. Toppings Galore:

  • Customize your lettuce wrap toppings based on preference. Try adding crumbled feta cheese instead of blue cheese, garnish with chopped fresh parsley instead of cilantro, or sprinkle toasted sesame seeds over top.
  • Additional options include diced tomatoes, jalapenos, pickles, corn kernels, and even crushed tortilla chips!

5. Lettuce Alternatives:

  • Although green leaf lettuce works well due to its flexibility, butterhead (boston) lettuce leaves also make great alternatives. They have smaller cups which makes them perfect finger food at parties. You could also use large romaine leaves if desired. The choice is yours!

Remember, the beauty of cooking lies in experimentation. So don’t hesitate to get creative! Feel free to mix and match these suggestions or come up with your own unique variations. The possibilities are endless when it comes to personalizing buffalo cauliflower lettuce wraps, so have fun exploring different flavors and textures that suit your taste buds!

Conclusion

Buffalo cauliflower lettuce wraps are a fantastic alternative to traditional buffalo wings, offering all the tangy and spicy flavors without the guilt. In this blog post, we’ve explored various sources that provide recipes for these delicious wraps and discussed their popularity among food enthusiasts.

The beauty of buffalo cauliflower lettuce wraps lies in their simplicity and versatility. With just a few key ingredients and easy-to-follow steps, you can create a mouthwatering dish perfect for game day or quick weeknight dinners. Roasting the cauliflower is crucial to achieving that crispy texture while adding buffalo wing sauce infuses it with irresistible flavor.

Assembling the Lettuce Wraps

Assembling your lettuce wraps allows room for personalization – choose your favorite type of lettuce leaves as well as additional toppings like sliced avocado, crumbled blue cheese, scallions, cilantro, and chives to enhance both taste and presentation. Don’t be afraid to get creative! You could even try incorporating other vegetables or substituting chicken if desired.

Give it a Try!

We encourage you wholeheartedly to give this recipe a go! We’d love nothing more than hearing about your experiences experimenting with different variations in our comments section below. Your feedback will not only help us improve but also inspire others who visit our website seeking culinary inspiration.

Thank you so much for taking the time out of your busy schedule today to explore Brood’s collection of weekly recipes. We hope that Buffalo Cauliflower Lettuce Wraps become one of many dishes on rotation at home. If there’s anything else we can assist you with, don’t hesitate to reach out. And remember, to never stop exploring new tastes, enjoyment awaits around every corner!

Happy cooking!
– The Brood Team

References

  1. https://www.howsweeteats.com/2019/01/buffalo-cauliflower-lettuce-wraps/
  2. https://fortheloveofgourmet.com/buffalo-cauliflower-lettuce-wraps/
  3. https://www.thekitchn.com/recipe-buffalo-cauliflower-lettuce-wraps-228386
Categories
Recipes

Southwest Quinoa Salad Recipe: A Flavorful and Healthy Dish for Any Occasion

Quick Answer

The Southwest Quinoa Salad is a versatile and flavorful dish made with quinoa, black beans, corn, bell peppers, red onion, and cilantro. It is topped with a refreshing cilantro lime dressing and can be enjoyed cold or warmed up with added cheese. This gluten-free and vegan salad can be made ahead of time and stored in the fridge for up to a week, making it a convenient and healthy option for any meal or gathering.

Introduction

The Southwest Quinoa Salad is a versatile and flavorful dish that can be enjoyed for lunch, dinner, or as a side dish for cookouts. This salad combines the nutty goodness of quinoa with the bold flavors of black beans, corn, bell peppers, red onion, and cilantro. It’s not only delicious but also gluten-free and vegan-friendly.

Quinoa has gained popularity in recent years due to its numerous health benefits. Packed with protein and fiber, it provides sustained energy while keeping you feeling full longer. The addition of black beans adds even more protein to this already nutritious salad.

What sets this Southwest Quinoa Salad apart from others is the zesty cilantro lime dressing that brings all the ingredients together harmoniously. The tangy lime juice pairs perfectly with fresh cilantro leaves to create an explosion of flavor in every bite.

One great thing about this recipe is its versatility – you can enjoy it cold straight out of the fridge on hot summer days or warm it up slightly during cooler months when you crave something comforting yet healthy.

Whether you’re looking for a quick weekday meal option or planning your next backyard barbecue menu item – look no further than our mouthwatering Southwest Quinoa Salad! Let’s dive into how easy it is to make this delightful dish packed with Southwestern flair.

Ingredients

To make the delicious Southwest Quinoa Salad, you will need the following ingredients:

  • 1 cup quinoa
  • 2 cups water or vegetable broth (for cooking quinoa)
  • 1 can black beans, drained and rinsed
  • 1 cup corn kernels (fresh or frozen)
  • 1 red bell pepper, diced
  • Half a red onion, finely chopped
  • A handful of fresh cilantro leaves

These simple yet flavorful ingredients come together to create a vibrant and nutritious salad that is sure to impress. The combination of protein-packed quinoa with fiber-rich black beans and sweet corn creates a satisfying base for this dish. The addition of colorful bell peppers adds crunchiness while the tangy bite from red onions complements all other flavors perfectly.

Lastly, don’t forget about the refreshing touch provided by freshly chopped cilantro leaves. This herb brings an aromatic element that ties everything together in harmony.

With these readily available ingredients on hand, you are well-equipped to embark on your journey towards creating this mouthwatering Southwest Quinoa Salad!

Heading: Cilantro Lime Dressing

The cilantro lime dressing is a crucial component of the Southwest Quinoa Salad, as it adds a burst of fresh and tangy flavors that perfectly complement the other ingredients. This zesty dressing brings together the vibrant taste of cilantro with the refreshing citrus notes from limes.

Recipe for Cilantro Lime Dressing:

Ingredients:

  • 1 cup packed fresh cilantro leaves
  • Juice and zest of 2 limes
  • 3 tablespoons olive oil
  • 1 clove garlic, minced
  • Salt and pepper to taste

Instructions:

  1. In a blender or food processor, combine the packed fresh cilantro leaves, juice and zest of two limes.
  2. Add in three tablespoons of olive oil along with one minced clove garlic.
  3. Blend until all ingredients are well combined into a smooth consistency.
  4. Season with salt and pepper according to your preference.

This simple yet flavorful recipe allows you to easily whip up this delicious dressing at home without any hassle or complicated steps involved.

The combination of fragrant herbs like cilantro paired with bright citrus flavors creates an irresistible harmony that elevates every bite.

Heading: Cooking Quinoa in an Instant Pot

Cooking quinoa can be a time-consuming process, but with the help of an Instant Pot, you can save both time and effort. The Instant Pot is a versatile kitchen appliance that allows for quick and efficient cooking. Here are step-by-step instructions on how to cook quinoa using this handy device:

1. Rinse the Quinoa:

  • Start by rinsing your desired amount of quinoa under cold water.
  • This helps remove any bitterness or residue from the grains.

2. Add Water or Broth:

  • For every cup of rinsed quinoa, add 1 ¼ cups of liquid (water or broth) to the Instant Pot.
  • Adjust accordingly if you’re making more than one cup.

3. Set Pressure Cook Function:

  • Close the lid securely on your Instant Pot and set it to “Pressure Cook” mode.

4. Setting Time & Pressure Level:

  • Select high pressure level setting.
  • For white/quicker-cooking variety: Set timer for 5 minutes.
  • For red/black/whole grain varieties: Set timer for about 10 minutes.

5. Natural Release Method:

  • After completion, allow natural release method which takes around five minutes.

6. Fluff Up:

  • Once all steam has been released naturally, open up the pot and fluff up the cooked quinoa gently with a fork.

By following these simple steps, you’ll have perfectly cooked fluffy quinoa in no time! Using an Instant Pot not only saves precious moments in the kitchen but also ensures consistent results each time you prepare quinoa recipes.

Preparation and Assembly

Preparing the Southwest Quinoa Salad is a straightforward process that requires some basic cooking techniques. Here’s a step-by-step guide to help you create this delicious dish:

1. Cook the quinoa:

  • Rinse 1 cup of quinoa under cold water in a fine-mesh sieve.
  • In an Instant Pot, combine rinsed quinoa with 2 cups of water or vegetable broth.
  • Close the lid and set it to high pressure for 1 minute, followed by natural release for about 10 minutes.
  • Fluff the cooked quinoa with a fork and let it cool completely.

2. Drain and rinse black beans:

  • Open one can (15 ounces) of black beans and pour them into another sieve or colander placed over your sink.
  • Rinse thoroughly under running water until no more foam appears while stirring gently.

3. Prepare corn kernels:

  • If using fresh corn on the cob, remove husks from two ears of sweetcorn before washing them well under cold running water.
  • Alternatively, if using canned corn kernels, drain off any liquid present in cans.
  • If using frozen corn kernels, thaw out at room temperature.

4. Prepare bell peppers & red onion:

  • Wash all vegetables properly.
  • Dice half each green, red, yellow pepper finely.
  • Dice small size Red Onion.

5. Chop cilantro leaves:

  • Wash Cilantro Leaves Properly.
  • Chop Them Finely Using A Sharp Knife Or Kitchen Scissors.

6. Assemble The Salad:

In a large mixing bowl, add cooled down quinoa along with drained black beans, corn kernels, diced bell peppers, and diced onions. Mix well so that all ingredients are combined evenly. Add chopped cilantro to it as per your taste preference. Toss everything together gently until fully incorporated.

Now that you have prepared all the ingredients as mentioned above and assembled them, your Southwest Quinoa Salad is ready to be enjoyed. The combination of flavors and textures in this salad will surely impress your taste buds!

Make-Ahead and Storage

Making the Southwest Quinoa Salad ahead of time is not only convenient but also allows the flavors to meld together, resulting in a more delicious dish. Plus, it can be stored in the fridge for up to a week, making it perfect for meal prepping or enjoying leftovers throughout the week.

1. Allow salad to cool completely:

Before storing, make sure that your quinoa salad has cooled down completely. This will prevent condensation from forming inside the container and keep everything fresh.

2. Use an airtight container:

Transfer your quinoa salad into an airtight container with a secure lid. Mason jars are great options as they help preserve freshness while allowing you to see all those colorful layers!

3. Layer ingredients strategically:

If possible, layer ingredients such as beans or corn at the bottom of your storage container before adding cooked quinoa on top. This helps prevent any potential sogginess caused by direct contact between moist ingredients like tomatoes or cucumbers with dry ones like grains.

4. Store dressing separately (optional):

Consider keeping any dressings separate until serving if you prefer them freshly added right before eating rather than mixed beforehand during storage.

5. Labeling containers:

To avoid confusion later on when reaching out for meals, label each individual portion/container clearly indicating what’s inside along with the date prepared so that there’s no guesswork involved when deciding which one(s) to grab first.

By following these simple tips, you’ll ensure that every bite of this flavorful Southwest Quinoa Salad remains just as tasty even after being refrigerated!

Serving Suggestions

The Southwest Quinoa Salad is a versatile dish that can be enjoyed in various ways. Here are some serving suggestions to help you make the most of this flavorful salad:

Main Dish for Lunch or Dinner:

  • Serve a generous portion of the Southwest Quinoa Salad as a standalone meal for lunch or dinner.
  • The combination of protein-packed quinoa, black beans, and corn will keep you feeling satisfied and energized.

Side Dish for Cookouts:

  • Bring some Southwestern flair to your next cookout by serving the Southwest Quinoa Salad as a side dish.
  • Its vibrant colors and fresh flavors complement grilled meats perfectly.

Warm it up with Cheese Topping:

  • For an extra indulgent twist, warm up individual servings of the salad in the microwave or on stovetop.
  • Once heated through, sprinkle shredded cheese over each bowl and let it melt slightly before enjoying.
  • The melted cheese adds richness to every bite while enhancing all those delicious southwestern flavors.

Remember that these serving suggestions are just starting points – feel free to get creative! You could also try adding sliced avocado on top for creaminess or serve alongside tortilla chips if you’re looking for something crunchy.

No matter how you choose to enjoy it, one thing’s certain – this Southwest Quinoa Salad is sure to impress both your taste buds and any guests lucky enough to share in its goodness!

So go ahead; whip up this delightful salad today using our easy-to-follow recipe instructions above!

Customization Options

The great thing about the Southwest Quinoa Salad is that it can be easily customized to suit your taste preferences. Feel free to add or substitute ingredients based on what you have available in your pantry or fridge. Here are some suggestions for additional ingredients that can take this salad to the next level:

1. Avocado

Creamy and nutritious, avocado adds a delicious richness to the salad. Simply dice an avocado and gently fold it into the quinoa mixture.

2. Cherry Tomatoes

Bursting with flavor, cherry tomatoes provide a juicy pop of freshness in every bite. Slice them in half and toss them into the salad for added color and texture.

3. Grilled Chicken

If you’re looking for more protein, grilled chicken makes a fantastic addition to this already hearty dish.

4. Cucumber

For extra crunchiness, cucumber slices work wonders when mixed with other vegetables like bell peppers.

5. Feta Cheese

Crumbled feta cheese sprinkled over top will give an extra tangy kick.

Remember, these are just suggestions! Don’t hesitate to get creative by adding any other veggies or proteins that appeal to you personally – think roasted corn kernels, diced red cabbage.

Conclusion

The Southwest Quinoa Salad is a versatile and flavorful dish that can be enjoyed for various occasions. With its combination of quinoa, black beans, corn, bell peppers, red onion, and cilantro lime dressing, this salad offers a burst of fresh flavors in every bite.

Cilantro Lime Dressing

One of the highlights of this recipe is the homemade cilantro lime dressing. It adds a delicious flavor boost to the salad and complements all the ingredients perfectly. The best part? It’s incredibly easy to make!

Cooking Quinoa in an Instant Pot

If you’re looking for an efficient way to cook your quinoa without any hassle or messiness involved, we’ve got you covered! Our step-by-step instructions on cooking quinoa in an Instant Pot will save you time while ensuring perfect results every time.

Preparation and Assembly

Preparing and assembling this Southwest Quinoa Salad is simple yet satisfying. From properly cooking and cooling the quinoa to draining and rinsing black beans and corn – our detailed guide has got it all covered.

Make-Ahead and Storage

What makes this recipe even more convenient is that it can be made ahead of time! Simply store it in your fridge for up to a week so that all those wonderful flavors have enough time meld together into something truly extraordinary.

Serving Suggestions

When serving options are concerned with versatility being one key aspect here as well; enjoy it cold as-is or warm things up by topping off with some cheese – either way works like magic!

Customization Options

Feel free also customize your own version according personal preferences- add avocado slices if desired , cherry tomatoes could bring extra freshness grilled chicken would provide additional protein kick.

In conclusion, the Southwest Quinoa Salad ticks off many boxes when considering what constitutes a healthy meal option. It’s packed full of nutrients from vegetables along with high-quality plant-based proteins found within both Black Beans & Quinoa itself.

We highly encourage readers to try out our Southwestern inspired creation themselves at home; and don’t forget to share feedback too! We love hearing how these recipes turn out for others who give them a go.

References

  1. https://kristineskitchenblog.com/southwest-quinoa-salad/
  2. https://www.fitmittenkitchen.com/southwest-quinoa-salad/
  3. https://www.twopeasandtheirpod.com/southwest-quinoa-salad/
Categories
Recipes

Sesame-Ginger Glazed Salmon Recipe: A Delicious and Healthy Dish to Try

Quick Answer

Sesame-Ginger Glazed Salmon is a popular and healthy dish that combines the flavors of sesame, ginger, and soy sauce with succulent salmon. This article provides a comprehensive guide on how to make this delicious recipe, including tips for cooking salmon and serving suggestions. With its nutritional benefits and versatility, sesame-ginger glazed salmon is a must-try dish for seafood lovers.

Introduction

Sesame-Ginger Glazed Salmon is a mouthwatering dish that has gained popularity for its delicious flavors and health benefits. This recipe combines the richness of salmon with the aromatic blend of sesame oil, ginger, garlic, and other flavorful ingredients. If you’re looking to add some variety to your weekly meal plan or impress guests at a dinner party, this recipe is definitely worth trying.

To help you create this delectable dish in your own kitchen, we have gathered information from reputable sources such as How Sweet Eats and Damn Delicious. These websites provide detailed recipes along with step-by-step instructions on how to prepare Sesame-Ginger Glazed Salmon. Whether you are an experienced cook or just starting out in the culinary world, these resources will guide you through each stage of creating this delightful meal.

So let’s dive into the wonderful world of Sesame-Ginger Glazed Salmon! Get ready to tantalize your taste buds while reaping all the nutritional benefits that come with incorporating salmon into your diet.

Benefits of Salmon

Salmon is not only a delicious and versatile fish, but it also offers numerous health benefits. Incorporating salmon into your diet can provide you with essential nutrients that promote overall well-being. Here are some key reasons why adding salmon to your meals is beneficial:

1. Rich in Omega-3 Fatty Acids:

Salmon is known for its high content of omega-3 fatty acids, particularly EPA (eicosapentaenoic acid) and DHA (docosahexaenoic acid). These healthy fats play a crucial role in reducing inflammation, supporting heart health, and improving brain function.

2. High-Quality Protein Source:

Protein plays an important role in building and repairing tissues throughout the body. Salmon provides a rich source of complete protein containing all nine essential amino acids required by our bodies.

3. Essential Vitamins & Minerals:

In addition to being packed with protein and healthy fats, salmon contains various vitamins such as vitamin B12 which supports nerve function; vitamin D which aids calcium absorption for strong bones; selenium which acts as an antioxidant protecting cells from damage; potassium promoting proper heart functioning among others.

4. Promotes Heart Health:

The omega-3 fatty acids found abundantly in salmon have been shown to reduce triglyceride levels while increasing HDL cholesterol (“good” cholesterol), thus lowering the risk factors associated with cardiovascular diseases like stroke or heart attack.

5. Enhances Brain Function:

Omega-3s present within this oily fish help support cognitive functions including memory retention, focus, and concentration. They may even lower risks related to neurodegenerative disorders like Alzheimer’s disease.

6. Supports Overall Well-being:

Consuming nutrient-dense foods like salmon contributes positively towards maintaining optimal physical condition. Salmon’s anti-inflammatory properties aid joint mobility, reducing muscle soreness after exercise. Additionally, the presence of antioxidants helps protect against cellular damage caused due to free radicals.

Incorporating salmon into your diet can be as simple as enjoying a grilled fillet or adding it to salads, pasta dishes, and sushi rolls. With its impressive nutritional profile and delicious taste, there’s no doubt that including salmon in your weekly meal plan will provide you with numerous health benefits for both body and mind.

Sesame-Ginger Glazed Salmon Recipe

Are you looking for a delicious and healthy dish to impress your family or guests? Look no further than this mouthwatering sesame-ginger glazed salmon recipe. With its perfect balance of flavors, it’s sure to become a favorite in your household. Let’s dive into the step-by-step guide on how to make this delectable dish.

Ingredients:

  • 4 (6-ounce) salmon fillets
  • 2 tablespoons olive oil
  • 1 tablespoon sesame oil
  • 3 tablespoons rice vinegar
  • 2 tablespoons brown sugar
  • ¼ cup soy sauce
  • 3 cloves garlic, minced
  • 1 tablespoon grated fresh ginger
  • 2 teaspoons toasted sesame seeds
  • For garnish:
    • Green onions, sliced
    • Honey (optional)

Step 1: Marinating the Salmon

Start by marinating the salmon fillets. In a shallow bowl or zip-top bag, combine olive oil, sesame oil, rice vinegar, brown sugar, soy sauce, minced garlic, and grated ginger. Mix well until all ingredients are thoroughly combined. Place the salmon fillets in the marinade and ensure they are evenly coated with the mixture. Cover tightly if using a bowl method, otherwise seal properly if using a Ziploc bag. Refrigerate for at least one hour but preferably overnight. This will allow all those amazing flavors to infuse into every bite of fish.

Step 2: Preparing The Glaze

While waiting for our lovely piece of fish to soak up that incredible flavor, let’s prepare the glaze. In a small mixing bowl, add the remaining marinade from Step 1. Add honey (optional), sesame seeds, and minced green onion. Mix everything together until nicely incorporated. Set aside as we move onto the next step.

Step 3: Cooking Process

Now comes the time to cook our beautiful pieces of marinated salmon. Preheat a grill pan over medium-high heat. If grilling outside, preheat an outdoor grill instead. Once the grill pan is hot, remove the salmon fillets from the marinade and place them skin-side down on the preheated grill or outdoor grilling rack. Discard any remaining marinade as it has come into contact with raw fish. Cook for about 4-5 minutes per side until nicely charred but still moist in the center. Baste each side of salmon generously with glaze during the cooking process to enhance the flavor.

Step 4: Serving

Remove the cooked sesame-ginger glazed salmon from the heat. Transfer onto a serving platter. Garnish with additional green onions and toasted sesame seeds if desired. Drizzle a little honey over the top (optional) for added sweetness. Serve immediately while warm alongside steamed vegetables, rice, or a fresh salad. Enjoy!

Now that you have mastered this incredible recipe, you can impress your family and friends by creating a restaurant-quality dish right at home. So go ahead, give it a try, and savor every bite of this deliciously flavorful Sesame-Ginger Glazed Salmon!

Tips for Cooking Salmon

When it comes to cooking salmon, there are a few key tips that can help you achieve the best results. Whether you’re grilling, pan-searing, or broiling your fish, these guidelines will ensure that your sesame-ginger glazed salmon turns out perfectly every time.

1. Choose Fresh Fish:

Start with fresh and high-quality salmon fillets. Look for firm flesh with a vibrant color and no signs of discoloration or strong odor. If possible, purchase wild-caught salmon as it tends to have better flavor and texture compared to farmed varieties.

2. Properly Seasoning:

To enhance the flavors of your sesame-ginger glazed salmon, season it well before cooking. Sprinkle salt evenly on both sides of each fillet along with any additional spices or herbs according to personal preference.

3. Cooking Methods:

a) Grilling:

Grilling is an excellent way to cook seafood like salmon while imparting smoky flavors from the grill’s heat source.

  • Preheat the grill over medium-high heat.
  • Brush some oil onto both sides of each seasoned fillet.
  • Place them skin-side down on a greased grill grate (if using skin-on).
  • Cook for about 4 minutes per side until opaque in the center but still moist.

b) Pan-Searing:

Pan-searing allows you to quickly sear the outside while keeping moisture locked inside resulting in crispy edges yet tender interior pieces.

  • Heat some oil in a skillet over medium-high heat until hot but not smoking.
  • Carefully place seasoned fillets into preheated skillet (skin-side up if applicable).
  • Sear undisturbed for around 4 minutes then flip carefully using tongs/spatula.
  • Continue cooking another 3–5 mins depending upon desired doneness.

c) Broiling:

Broiling gives a similar charred effect as grilling without needing outdoor equipment.

  • Preheat the broiler and adjust the rack to a position about 6 inches from the heat source.
  • Place seasoned fillets on a greased baking sheet or foil-lined pan (skin-side down if applicable).
  • Broil for around 4–5 minutes, then flip carefully using tongs/spatula.
  • Continue cooking another 3–5 mins depending upon desired doneness.

Remember that salmon cooks quickly, so keep an eye on it to prevent overcooking. The fish should be opaque in the center but still moist.

By following these tips and choosing your preferred cooking method, you can create delicious sesame-ginger glazed salmon regardless of whether you have access to a grill or not. Experiment with different techniques until you find your favorite way of preparing this mouthwatering dish!

Serving Suggestions

Sesame-ginger glazed salmon is a versatile dish that can be enjoyed in various ways. Here are some serving suggestions to enhance your dining experience:

1. Pair with Steamed Vegetables:

Serve the sesame-ginger glazed salmon alongside a colorful medley of steamed vegetables, such as broccoli, carrots, and snap peas. The vibrant colors and crisp textures will complement the tender fish perfectly.

2. Serve over Rice:

Create a satisfying meal by placing the sesame-ginger glazed salmon on top of fluffy white rice or fragrant jasmine rice. The flavors from the glaze will seep into the grains, creating an irresistible combination.

3. Fresh Salad Accompaniment:

For those seeking lighter fare, serve this flavorful fish atop a bed of mixed greens or baby spinach leaves for added freshness and crunchiness. Drizzle it with additional dressing made from soy sauce combined with lime juice for an extra burst of flavor.

4. Incorporate Into Sushi Rolls:

Get creative by using leftover sesame-ginger glazed salmon to make homemade sushi rolls! Simply slice thin strips of cooked fish along with avocado slices, cucumber sticks, and roll them up tightly in sheets of nori seaweed together with seasoned sushi rice. The result? A delicious fusion between Japanese cuisine’s classic maki rolls and South African-inspired flavors!

5. Into Grain Bowls:

Transform your favorite grain bowl recipe by adding chunks of sesame-ginger glazed salmon. The savory flavors of the fish will complement the grains, vegetables, and other toppings in the bowl, creating a wholesome and satisfying meal.

Reader Reviews and Variations

At Brood, we love hearing from our readers who have tried out the recipes we share. Here are some comments and feedback from those who have made the sesame-ginger glazed salmon recipe:

Sarah M.

“I absolutely loved this recipe! The combination of flavors was incredible, especially with the ginger adding a nice kick to it. I added some sliced bell peppers and snap peas for extra crunch.”

John D.

“Being a fan of spicy food, I decided to amp up the heat in this dish by adding red pepper flakes to the glaze mixture. It turned out fantastic! My taste buds were dancing with joy!”

Emily T.

“As someone who is always looking for ways to incorporate more vegetables into my meals, I experimented by serving this salmon over a bed of zucchini noodles instead of rice or pasta – it was deliciously light yet satisfying!”

Mark S.

“I wanted something quick but still packed with flavor so I used pre-made teriyaki sauce instead of making my own glaze from scratch as suggested in one variation mentioned on How Sweet Eats’ website – saved me time without compromising on taste!”

Jessica L.

“This has become one of my go-to dishes when entertaining guests at home because not only does it look impressive but also tastes amazing every single time!”

These reader reviews showcase just how versatile and customizable sesame-ginger glazed salmon can be based on personal preferences. Whether you prefer an extra burst of spiciness or want to add your favorite veggies into the mix like these creative individuals did, there’s no limit when experimenting with variations! We encourage all our readers to try their hand at creating unique twists that suit their individual palates while keeping true to the essence of what makes Sesame-Ginger Glazed Salmon such a beloved dish among many households worldwide.

Conclusion

Sesame-ginger glazed salmon is a dish that combines delicious flavors with numerous health benefits. Throughout this blog post, we have explored the recipe for sesame-ginger glazed salmon and discussed its nutritional advantages.

Salmon itself is known to be an excellent source of omega-3 fatty acids, high-quality protein, and various vitamins and minerals. By incorporating this fish into your diet, you can promote heart health, improve brain function, and enhance overall well-being.

The recipe provided by our external sources offers a step-by-step guide on how to create the perfect sesame-ginger glaze for your salmon. With ingredients such as olive oil, rice vinegar, soy sauce, garlic, ginger, honey, brown sugar, green onions, and sesame seeds, each bite bursts with flavor.

We also shared some tips on cooking salmon in general – from choosing fresh fish to properly seasoning it before grilling or baking it just right.

To serve this delightful dish at home, consider pairing it with steamed vegetables, rice, or even adding slices of avocado on top! The possibilities are endless when experimenting with variations, so feel free to get creative!

Before wrapping up, let’s express gratitude towards our external sources who inspired us through their recipes, providing guidance throughout creating flavorful dishes like these ones mentioned today.

In conclusion, don’t miss out on trying Sesame-Ginger Glazed Salmon yourself; not only will you enjoy every mouthful but reap all those amazing health benefits too!

References

  1. https://www.howsweeteats.com/2012/03/toasted-sesame-ginger-salmon/
  2. https://damndelicious.net/2013/11/13/sesame-ginger-salmon/
  3. https://www.wellplated.com/soy-ginger-salmon/
Categories
Recipes

Lemon Turmeric Roasted Cauliflower Recipe: A Delicious and Healthy Dish for Various Dietary Needs

Quick Answer

Lemon Turmeric Roasted Cauliflower is a versatile and flavorful dish that caters to various dietary needs, including paleo, Whole30, AIP, keto, and vegan. This vibrant yellow dish combines the tangy taste of lemon with the earthy flavor of turmeric, resulting in a delicious and healthy side dish or main course option. With tips for achieving the best-tasting roasted cauliflower and suggestions for serving and modifying the recipe, this article provides everything you need to know to enjoy this flavorful dish.

Introduction

Lemon Turmeric Roasted Cauliflower is a flavorful and nutritious dish that has gained popularity among various dietary needs, including paleo, Whole30, AIP, keto, and vegan. This vibrant yellow cauliflower recipe combines the tangy taste of lemon with the earthy notes of turmeric to create a delicious flavor combination.

Cauliflower itself is known for its versatility as it can be used in many different dishes. However, when roasted with lemon and turmeric seasoning, it takes on a whole new level of deliciousness. The bright colors from the spices make this dish visually appealing while also providing numerous health benefits.

Whether you’re following specific dietary restrictions or simply looking for an exciting way to incorporate more vegetables into your meals – Lemon Turmeric Roasted Cauliflower fits perfectly into any meal plan. It’s not only tasty but also packed with essential nutrients like vitamins C and K along with antioxidants found in both lemons and turmeric.

In this blog post we will provide you with step-by-step instructions on how to prepare this mouthwatering dish at home using tips shared by experts who have perfected their own versions of Lemon Turmeric Roasted Cauliflower recipes online. So let’s dive right in!

Lemon Turmeric Roasted Cauliflower Recipe

Lemon Turmeric Roasted Cauliflower is a flavorful and vibrant dish that can be enjoyed by various dietary needs, including paleo, Whole30, AIP, keto, and vegan. This recipe combines the tangy freshness of lemon with the warm earthiness of turmeric to create a delicious flavor combination that will tantalize your taste buds.

Step 1: Preheat your oven

Start by preheating your oven to 425°F (220°C). This high temperature will ensure that the cauliflower gets crispy on the outside while remaining tender on the inside.

Step 2: Prepare the cauliflower

  • Take one large head of cauliflower and remove any leaves.
  • Cut it into florets of similar sizes so they cook evenly.
  • Dry off excess moisture from each floret before seasoning them. You can do this by patting them gently with paper towels or using a clean kitchen towel.

Step 3: Seasoning

In a mixing bowl or ziplock baggie combine:

  • Olive oil (or avocado oil)
  • Freshly squeezed lemon juice for brightness
  • Turmeric powder for its distinct color & health benefits
  • Minced garlic cloves
  • Sea salt according to taste preferences
  • Optional seasonings like black pepper, cumin, paprika, etc. as per personal preference

Mix everything well until all ingredients are combined thoroughly. Add in dried cauliflower, ensuring every piece is coated properly.

Step 4: Roasting Process

  • Spread out seasoned cauliflower pieces onto a baking sheet lined with parchment paper.
  • Make sure you arrange them in a single layer without crowding the pan. This allows even roasting resulting in a crispier texture.
  • Roast in the preheated oven for about 20 minutes, until golden brown.
  • You might want to flip halfway through the cooking time if desired but not necessary.
  • Remove from heat once done.

Step 5: Serve and Enjoy

Once the Lemon Turmeric Roasted Cauliflower is cooked to perfection, remove it from the oven. The florets should be tender on the inside with a crispy golden exterior.

Transfer them to a serving dish or plate and garnish with fresh herbs like parsley or cilantro for added freshness if desired. Serve hot as a side dish along with grilled chicken, steak, fish, etc. Or you can also enjoy this flavorful cauliflower in power bowls, pasta dishes, mixed into legumes for protein-rich main course options. The possibilities are endless!

The vibrant yellow color of this roasted cauliflower will surely catch your eye, while its tangy lemon flavor combined with earthy turmeric will leave your taste buds craving more. Give this recipe a try today and experience how simple ingredients can transform an ordinary vegetable into something extraordinary!

Heading: Nutritional Information

Lemon Turmeric Roasted Cauliflower is not only a delicious dish but also packed with nutritional benefits. Here’s the breakdown of its key ingredients and their health benefits:

Cauliflower:

  • Low in calories: A serving of cauliflower contains about 25 calories, making it an excellent choice for those watching their calorie intake.
  • High in fiber: Fiber aids digestion, promotes satiety, and helps maintain healthy blood sugar levels.
  • Rich in vitamins C and K: Vitamin C boosts immunity while vitamin K supports bone health.

Lemon:

  • Excellent source of vitamin C: Lemons are known for their high content of immune-boosting vitamin C that can help fight off colds and other illnesses.
  • Antioxidant properties: The antioxidants found in lemons may protect against cell damage caused by free radicals.

Turmeric:

  • Anti-inflammatory properties: Curcumin, the active compound present in turmeric has powerful anti-inflammatory effects which may reduce inflammation-related conditions such as arthritis or heart disease.
  • Antioxidants: Turmeric is richly loaded with antioxidants that neutralize harmful free radicals within our bodies.

By combining these nutritious ingredients into Lemon Turmeric Roasted Cauliflower recipe you’re providing your body with essential nutrients to support overall well-being. Whether you follow a specific dietary plan or simply enjoy flavorful dishes, this roasted cauliflower recipe offers both taste satisfaction and nourishment.

Serving Suggestions

Lemon Turmeric Roasted Cauliflower is a versatile dish that can be enjoyed in various ways. Here are some serving suggestions to help you make the most of this flavorful and nutritious recipe:

1. Side Dish:

  • Serve Lemon Turmeric Roasted Cauliflower as a delicious side dish alongside grilled chicken, fish, or tofu.
  • Pair it with your favorite protein for a well-balanced meal.

2. Power Bowl:

  • Create a vibrant power bowl by combining the roasted cauliflower with other colorful vegetables like cherry tomatoes, cucumber slices, and avocado.
  • Add cooked quinoa or brown rice for an extra boost of fiber and nutrients.
  • Drizzle with additional lemon turmeric dressing for added flavor.

3. Pasta Topping:

  • Mix the Lemon Turmeric Roasted Cauliflower into your favorite pasta dishes such as spaghetti or penne.
  • The tangy flavors from the lemon combined with earthy turmeric will add depth to any pasta sauce.

4. Protein-Rich Main Course:

  • Combine the roasted cauliflower with legumes like chickpeas or black beans to create a protein-rich main course salad.
  • Top it off with fresh herbs like cilantro or parsley for added freshness.

Remember that these serving suggestions are just starting points – feel free to get creative! You can customize this dish based on your personal preferences by adding different spices, herbs, sauces, or even incorporating it into wraps and sandwiches.

Ingredient Substitutions and Modifications

When it comes to cooking, flexibility is key. If you have dietary restrictions or personal preferences, don’t worry! The Lemon Turmeric Roasted Cauliflower recipe can be easily modified to suit your needs. Here are some ingredient substitutions and modifications that you can consider:

1. Dietary Restrictions:

  • Gluten-Free: This recipe is naturally gluten-free as long as the ingredients used are certified gluten-free.
  • Vegan/Vegetarian: The original recipe already caters to vegans and vegetarians by using plant-based ingredients.

2. Ingredient Substitutions:

  • Cauliflower Alternatives: If cauliflower isn’t your favorite vegetable or if it’s not readily available, feel free to substitute with broccoli florets for a similar taste and texture.
  • Spices Variation: While turmeric adds a vibrant color and earthy flavor in this dish, you can experiment with other spices such as cumin or paprika for different flavor profiles.

3. Additional Vegetables:

If you want more variety in your roasted vegetables, try adding other veggies alongside the cauliflower before roasting them together. Bell peppers (red/yellow/orange), zucchini slices, carrots sticks – all make great additions!

4. Spice It Up!

Feel free to get creative with additional seasonings according to your preference! You could add garlic powder for extra savory notes or sprinkle some chili flakes if you like heat.

Remember that these suggestions are just starting points; feel free to adapt the recipe based on what suits your tastes best while still maintaining its essence of lemon-turmeric goodness!

Experimenting with ingredient substitutions allows us all an opportunity for culinary exploration without compromising our dietary requirements or individual palates—so go ahead and customize this versatile dish however way makes sense for YOU!

Storage and Reheating Instructions

When it comes to storing and reheating your delicious Lemon Turmeric Roasted Cauliflower, there are a few things you should keep in mind. Proper storage will help maintain the flavor and texture of the dish, while following recommended reheating methods will ensure that it tastes just as good when enjoyed later.

To store leftover Lemon Turmeric Roasted Cauliflower:

  1. Allow the roasted cauliflower to cool completely before transferring it into an airtight container or resealable bag.
  2. Make sure to remove any excess moisture from the cauliflower by patting it dry with paper towels if necessary.
  3. Seal tightly and refrigerate for up to 3-4 days.

Reheating options may vary depending on personal preference:

Option 1: Oven

  1. Preheat your oven to around 350°F (175°C).
  2. Place the desired amount of cold roasted cauliflower onto a baking sheet lined with parchment paper or aluminum foil.
  3. Cover loosely with another piece of foil or use an oven-safe lid/dish cover if available; this helps prevent drying out during reheating but is optional.
  4. Heat in preheated oven for about 10-15 minutes until warmed through.

Option 2: Stovetop

If you prefer not using an oven, stovetop heating can be equally effective:

  1. Place a non-stick skillet over medium heat on your stove burner(s).
  2. Add some oil/butter/ghee/vegan butter substitute (as per dietary preferences) to coat its surface evenly once heated properly.
  3. Transfer desired quantity of chilled lemon turmeric-roast cauliflowers directly into the pan without overcrowding them. Stir occasionally till they’re hot throughout.

Remember these tips provided by external sources:

  • Avoid microwaving leftovers whenever possible since microwave cooking tends to dry out the vegetables and may affect their taste negatively.
  • If you find the reheated cauliflower to be slightly dry, consider drizzling a little extra lemon juice or olive oil over it before serving. This will help restore some moisture and enhance the flavors.

By following these storage and reheating instructions, you can enjoy your Lemon Turmeric Roasted Cauliflower even after it has been prepared in advance. Whether as a side dish or part of another meal creation, this flavorful roasted cauliflower is sure to impress with its vibrant colors and delicious taste!

Reader Comments and Feedback

Here are some comments and feedback from readers who have tried the Lemon Turmeric Roasted Cauliflower recipe:

1. Sarah M.

“I made this last night for dinner, and it was absolutely delicious! The combination of lemon and turmeric gave the cauliflower such a vibrant flavor. I served it as a side dish with grilled chicken, and my family loved it!”

2. Emily R.

“As someone following a vegan diet, finding flavorful recipes can be challenging sometimes. But this Lemon Turmeric Roasted Cauliflower exceeded my expectations! It’s now one of my go-to dishes when I want something healthy yet satisfying.”

3. Lisa T.

“I added some cumin powder to the seasoning mix in this recipe, just because I love its earthy taste with roasted vegetables. The result was fantastic! The flavors blended so well together that even my picky eater husband couldn’t resist having seconds.”

4. Mark D.

“Being on Whole30 can feel restrictive at times, but thanks to recipes like this one, eating clean doesn’t mean sacrificing taste or variety anymore! This Lemon Turmeric Roasted Cauliflower is packed with flavor while still being compliant – definitely adding it to our regular meal rotation!”

5. Samantha L.

“This has become an absolute favorite in our household since we discovered your blog post about Lemon Turmeric Roasted Cauliflower last month. The tanginess from the lemon combined perfectly with the warmth of turmeric. It’s not only tasty, but also super easy to make!”

These positive experiences highlight how versatile and enjoyable the Lemon Turmeric Roasted Cauliflower recipe is across different dietary needs including paleo, Whole30, AIP, keto, and vegan diets. Readers appreciate both its simplicity in preparation as well as its bold flavors. Many have found creative ways to personalize their versions by incorporating additional spices or serving suggestions. This reader feedback demonstrates the wide appeal and success of this recipe, making it a must-try for anyone looking to add some zest to their cauliflower dishes.

Conclusion

Lemon Turmeric Roasted Cauliflower is a dish that not only satisfies various dietary needs but also offers a burst of delicious flavors and numerous health benefits. The combination of tangy lemon and earthy turmeric creates an irresistible taste profile that will leave your taste buds craving for more.

Throughout this blog post, we have explored different recipes from external sources, all highlighting the versatility and appeal of Lemon Turmeric Roasted Cauliflower. Whether you follow paleo, Whole30, AIP, keto or vegan diets – this recipe has got you covered!

By following simple steps such as cutting the cauliflower into similar-sized florets to ensure even cooking and roasting in a single layer without overcrowding the pan for optimal crispiness; you can achieve perfectly roasted cauliflower every time.

Not only does Lemon Turmeric Roasted Cauliflower offer incredible flavor combinations but it also provides several health benefits. With its high fiber content and rich source of vitamins C & K along with anti-inflammatory properties found in turmeric; this dish supports overall well-being while tantalizing your palate.

We encourage our readers to give this recipe a try! Feel free to experiment by adding other vegetables or spices according to personal preferences. We would love to hear about your experiences with Lemon Turmeric Roasted Cauliflower – share any feedback or variations so others can benefit from them too!

So why wait? Get ready for an explosion of flavors on your plate by trying out our mouthwatering Lemon Turmeric Roasted Cauliflower recipe today!

References

  1. https://whatgreatgrandmaate.com/lemon-turmeric-roasted-cauliflower/
  2. https://www.staceyhomemaker.com/lemon-turmeric-basil-vegetables/
  3. https://www.theendlessmeal.com/roasted-turmeric-cauliflower/
Categories
Recipes

Vegan Chocolate Avocado Truffles: Creamy and Delicious Recipe

Quick Answer

Vegan Chocolate Avocado Truffles are a rich and creamy dessert made with avocado instead of heavy cream. With only four simple ingredients, these truffles are easy to make and packed with flavor. They can be customized with various flavor variations and stored in the fridge or freezer for future enjoyment.

Introduction

Vegan Chocolate Avocado Truffles are a delightful and guilt-free treat that combines the richness of dark chocolate with the creaminess of avocado. These truffles offer a healthier alternative to traditional recipes by replacing heavy cream with nutrient-packed avocados.

Avocados not only provide a velvety texture but also bring numerous health benefits to these indulgent treats. They are rich in heart-healthy monounsaturated fats, which can help lower bad cholesterol levels and reduce inflammation in the body. Additionally, avocados contain essential vitamins such as vitamin E and potassium, making them an excellent addition to any vegan dessert recipe.

One of the best things about this recipe is its simplicity – it requires just four basic ingredients: ripe avocados, dark chocolate chips or bars (preferably dairy-free), cocoa powder or cacao powder for dusting, and sea salt for enhancing flavors. With minimal effort required from your side, you’ll be able to create decadent truffles bursting with flavor.

Whether you’re following a plant-based diet or simply looking for healthier alternatives without compromising on taste, these Vegan Chocolate Avocado Truffles will surely satisfy your sweet tooth while providing nourishment at every bite.

Recipe Overview

Looking for a delicious and healthy vegan dessert option? Look no further than these Vegan Chocolate Avocado Truffles! Made with just four simple ingredients, these truffles are rich, creamy, and absolutely irresistible.

To make these delectable treats, you’ll need ripe avocados, dark chocolate chips (vegan-friendly), cocoa powder or cacao powder for coating the truffles later on in the process. A sprinkle of sea salt adds that perfect touch of flavor.

Pulsing the Avocado and Melting the Chocolate

The first step is to pulse the avocado in a food processor along with a pinch of sea salt until it becomes smooth and creamy. Meanwhile, melt your dark chocolate chips separately using either a double boiler method or by microwaving them at short intervals while stirring frequently.

Combining the Avocado and Chocolate

Once both mixtures are ready – the silky avocado puree and melted chocolate – combine them together in the food processor until well combined. The result will be an indulgent mixture that’s almost too tempting not to eat straight away!

Chilling the Mixture and Rolling the Truffles

However enticing it may be though, resist temptation as chilling this mixture is crucial before moving forward. Place it into the refrigerator for at least 30 minutes so that it firms up nicely.

After sufficient time has passed comes one of my favorite parts – rolling out those beautiful little balls! Take about tablespoon-sized portions from your chilled truffle mixture then roll each portion between your palms gently forming perfectly round shapes.

Coating and Storing the Truffles

For added decadence, coat each ball generously with cocoa powder or even better yet sprinkle some extra sea salt over top if desired, giving every bite an exquisite balance between sweet & salty flavors.

Remember when storing leftovers, keep refrigerated where they can last up to seven days. But don’t worry if you want more longevity, simply pop ’em into freezer bags instead which allows freezing potential lasting three months!

Serving Suggestions

These Vegan Chocolate Avocado Truffles offer endless possibilities whether enjoyed alone as a delightful after-dinner treat, paired alongside a steaming cup of hot cocoa or a glass of plant-based milk, or even as a sweet pick-me-up throughout the day. So why not give them a try? You won’t be disappointed!

Flavor Variations

When it comes to vegan chocolate avocado truffles, the possibilities for flavor variations are endless. While the basic recipe is already delicious on its own, adding different flavors can take these truffles to a whole new level of decadence. Here are some mouthwatering options you can try:

1. Chocolate Nut:

To create a delightful crunch and nutty taste in your truffles, simply mix in chopped nuts such as almonds or walnuts into the avocado mixture before rolling them into balls.

2. Berry Chocolate:

For those who love fruity flavors with their chocolatey treats, consider incorporating dried berries like cranberries or goji berries into the mixture along with dark chocolate chips.

3. Coconut Chocolate:

If you’re a fan of tropical flavors, why not add shredded coconut to your truffle mixture? The combination of creamy avocado and sweet coconut will transport you straight to paradise.

4. Chocolate Espresso:

Coffee lovers rejoice! To give your truffles an extra kick of caffeine goodness, stir in finely ground espresso beans or instant coffee powder when combining the melted dark chocolate with mashed avocados.

Regardless of which variation(s) you choose to experiment with first (or maybe even all at once), be sure that each ingredient complements one another harmoniously by tasting small portions throughout the preparation process. Remember that personal preference plays a key role here – feel free to adjust quantities according to the desired intensity of the flavor profile.

Storage and Shelf Life

When it comes to storing your delicious vegan chocolate avocado truffles, there are a few things you need to keep in mind. Proper storage ensures that the truffles maintain their freshness and flavor for as long as possible.

To store the truffles, place them in an airtight container or resealable bag. This will help prevent any moisture from getting into the truffles and causing them to spoil quickly.

In terms of shelf life, these delectable treats can be kept in the refrigerator for up to 7 days. The cool temperature helps preserve their texture and taste during this time period.

If you want your truffle stash to last even longer, consider freezing them! Simply transfer the chilled truffles into a freezer-safe container or bag before placing them in the freezer. When stored properly, they can stay frozen for up to 3 months without losing their quality.

Here are some tips on how best to store your vegan chocolate avocado truffles:

  1. Separate layers: If you’re stacking multiple layers of truffles together when storing either refrigerated or frozen ones, make sure each layer is separated by parchment paper so they don’t stick together.
  2. Thawing process: When ready to eat again after being stored inside the fridge/freezer, let thaw at room temperature until softened slightly but still firm enough not to melt away completely upon touch (about 10-15 minutes).

By following these simple guidelines for storage, you’ll ensure that every bite of your homemade vegan chocolate avocado truffle remains just as delightful as when it was first made!

So go ahead – whip up another batch knowing that with proper storage techniques, those decadent little morsels will continue bringing joy well beyond today’s indulgence session.

Serving Suggestions

When it comes to serving these delectable vegan chocolate avocado truffles, the possibilities are endless. Here are a few ideas on how you can enjoy them:

1. Pair with Hot Cocoa:

Indulge in the ultimate chocolate experience by pairing your truffles with a steaming cup of hot cocoa. The rich and creamy texture of the truffles perfectly complements the warm and comforting flavors of hot cocoa.

2. Enjoy with Plant-Based Milk:

For those who prefer something lighter, serve your truffles alongside a glass of plant-based milk such as almond milk or oat milk. The combination creates a delightful contrast between velvety smoothness and refreshing creaminess.

3. Dessert Delight:

Serve these decadent treats as an elegant dessert at dinner parties or special occasions for an impressive finale to any meal. Arrange them on a platter garnished with fresh berries or mint leaves for added visual appeal.

4. Sweet Treat Anytime:

Who says you need an occasion to indulge? These vegan chocolate avocado truffles make for perfect sweet snacks throughout the day! Keep some handy in your fridge whenever cravings strike – they’re sure to satisfy even the most persistent sweet tooth!

Remember that presentation is key when serving these little bites of blissful goodness; consider dusting them lightly with powdered sugar, rolling them in crushed nuts, or drizzling melted dark chocolate over each one before serving – get creative!

Whether enjoyed alone after dinner, shared among friends during afternoon tea time, or given as homemade gifts from-the-heart—these versatile delights will surely impress anyone lucky enough to taste their lusciousness.

Conclusion

In conclusion, vegan chocolate avocado truffles are a delightful and guilt-free treat that you must try. By using avocado instead of heavy cream, these truffles become rich, creamy, and packed with nutrients.

The recipe requires only four simple ingredients – avocado, dark chocolate chips, cocoa powder or cacao powder, and sea salt. The process involves pulsing the avocado with a sprinkle of sea salt in a food processor while melting the dark chocolate separately. These two mixtures are then combined until well blended.

After chilling the truffle mixture for at least 30 minutes in the refrigerator to firm up slightly, the fun part begins! Roll them into bite-sized balls before coating them either with cocoa powder or sprinkling some extra sea salt on top for added flavor.

What makes these vegan treats even more exciting is their versatility. You can experiment by adding different flavors such as nuts, chopped berries, toasted coconut flakes, or even espresso to create your own unique variations. The possibilities are endless!

Once prepared, you can store these delectable goodies in an air-tight container in the fridge for up to 7 days. Or if you want to enjoy them later, simply pop them into the freezer where they will stay fresh and delicious for up to 3 months. Just remember to properly seal each one so that no unwanted freezer burn occurs.

So why not give this easy-to-make dessert option a go? Whether it’s enjoying one after dinner, a midday pick-me-up with a cup of hot cocoa, or a sweet indulgence throughout the day – these vegan chocolate avocado truffles are sure to please your taste buds while keeping you on track with your healthy eating goals. So grab those avocados, dark chocolate chips, cocoa powder (or cacao powder), and sea salt – and get ready to transform the simplest ingredients into something truly extraordinary. Enjoy!

References

  1. https://www.eatingbirdfood.com/4-ingredient-chocolate-avocado-truffles/
  2. https://detoxinista.com/easy-dark-chocolate-avocado-truffles/
  3. https://www.rebelrecipes.com/chocolate-avocado-truffles-vegan/
Categories
Recipes

BBQ Pulled Jackfruit Sandwiches: A Vegan Twist on a Classic BBQ Favorite

Quick Answer

BBQ Pulled Jackfruit Sandwiches are a delicious vegan alternative to traditional pulled pork sandwiches. This recipe uses young green jackfruit in water, sautéed with onions and simmered in BBQ sauce, resulting in a smoky and tender filling. Topped with a quick avocado slaw and served on vegan buns, these sandwiches are packed with flavor and perfect for a satisfying meal.

Introduction

BBQ Pulled Jackfruit Sandwiches have gained popularity as a delicious vegan alternative to traditional pulled pork sandwiches. This innovative recipe showcases the versatility of jackfruit, a tropical fruit native to Africa, Asia, and South America. With its meaty texture and ability to absorb flavors, young green jackfruit has become a go-to ingredient for plant-based cooking.

The key ingredients in BBQ Pulled Jackfruit Sandwiches include young green jackfruit in water (not brine or syrup), BBQ spices, BBQ sauce, avocado slaw ingredients such as ripe avocados and shredded cabbage/carrots mixtures, and whole grain vegan buns for serving. The combination of these elements creates an explosion of smoky flavor that will satisfy even the most discerning taste buds.

To prepare this mouthwatering dish at home requires sautéing the seasoned jackfruit with onions until tender before simmering it in tangy barbecue sauce. This process allows the flavors to meld together beautifully while giving you that classic “pulled” consistency reminiscent of slow-cooked meats.

Whether you’re following a vegan lifestyle or simply looking for new ways to incorporate more plant-based meals into your diet, BBQ Pulled Jackfruit Sandwiches are sure not to disappoint!

Recipe Inspiration

BBQ Pulled Jackfruit Sandwiches have gained popularity as a delicious vegan alternative to traditional pulled pork sandwiches. The inspiration for this recipe comes from various sources, including a renowned vegan eatery in Kansas City that has perfected the art of creating mouthwatering plant-based dishes.

The idea behind these sandwiches is to recreate the smoky and tender texture of pulled pork using jackfruit, an exotic fruit commonly found in Africa, Asia, and South America. Canned young green jackfruit in water serves as the perfect meat substitute due to its fibrous consistency when cooked.

What makes this recipe truly remarkable is its simplicity and accessibility. Home cooks can easily find all the necessary ingredients at their local grocery stores or Asian markets. Young green jackfruit can be purchased canned online if it’s not readily available nearby.

By following just a few simple steps outlined below, anyone can create BBQ Pulled Jackfruit Sandwiches that are bursting with flavor:

1. Sautéed Perfection:

Start by sautéing your drained and rinsed young green jackfruit along with caramelized onions until they become fragrant and slightly golden brown.

2. Simmer & Infuse:

Next step involves simmering your seasoned mixture of sautéed onion-jackfruit combination into tangy barbecue sauce over low heat for about 20 minutes. This allows flavors develop fully while ensuring every bite delivers maximum taste satisfaction.

3. Tantalizing Toppings:

While waiting for your BBQ-infused concoction on the stovetop, you could prepare a quick avocado slaw made up of ripe avocados, maple syrup, lime juice, salt, pepper, shredded cabbage, and carrots. The creamy yet refreshing nature adds another dimension altogether. Additionally, topping off sandwiches with roasted salted cashews provides delightful crunchiness.

4. Serve & Enjoy:

Once ready, the succulent BBQ Pulled Jackfruit filling should be piled high onto homemade hamburger buns or whole grain vegan buns. The combination of the tender jackfruit, smoky barbecue flavors, creamy avocado slaw, and crunchy cashews creates a truly satisfying sandwich experience.

The simplicity and accessibility of this recipe make it an ideal choice for home cooks looking to explore plant-based alternatives without compromising on taste. Whether you’re a seasoned vegan or simply curious about incorporating more meatless meals into your diet, these BBQ Pulled Jackfruit Sandwiches are sure to impress both your palate and guests alike.

Key Ingredients and Substitutions

BBQ Pulled Jackfruit Sandwiches require a few key ingredients to achieve that smoky, tender, and flavorful result. Here are the main ingredients you’ll need for this recipe:

1. Young Green Jackfruit in Water:

  • This is the star ingredient of BBQ Pulled Jackfruit Sandwiches as it mimics the texture of pulled pork when cooked.
  • You can find young green jackfruit in water at Asian markets or online stores specializing in international products.

Substitution: If you don’t have access to young green jackfruit, you can try using canned hearts of palm or even mushrooms as alternatives. While they won’t provide exactly the same texture, they will still add a meaty element to your sandwiches.

2. BBQ Spices:

The combination of spices used gives these sandwiches their signature barbecue flavor.

3. BBQ Sauce:

A good-quality BBQ sauce adds tanginess and sweetness while enhancing the overall taste profile.

Substitution: Feel free to experiment with different types or flavors of BBQ sauces based on your personal preference—whether it’s spicy chipotle-infused sauce or sweet hickory-smoked varieties.

4. Avocado Slaw Ingredients:

To complement the rich flavors from our barbecued jackfruits, we’re going to make an avocado slaw which requires the following items:

  • Ripe Avocados

5. Vegan Buns:

For serving up those delicious BBQ Pulled Jackfruit Sandwiches, we recommend vegan buns. These soft bread rolls not only hold all that goodness together but also complement well with other components.

Now let’s talk about substitutions:

If finding young green jackfruit is a challenge, you can try using canned hearts of palm or mushrooms as mentioned earlier. These alternatives will provide different textures but still offer a satisfying bite.

When it comes to BBQ spices and sauce, there’s room for customization based on your taste preferences. If you prefer milder flavors, reduce the amount of spice used in the recipe or opt for a mild BBQ seasoning blend. Likewise, if you like things spicier or smokier, feel free to increase those elements accordingly.

Remember that cooking should be an enjoyable experience where creativity thrives—so don’t hesitate to make adjustments and substitutions according to what works best for you!

Heading: Cooking Method

To create delicious BBQ Pulled Jackfruit Sandwiches, follow these simple steps:

1. Prepare the jackfruit:

  • Drain and rinse a can of young green jackfruit in water.
  • Using your hands or two forks, shred the jackfruit into smaller pieces to resemble pulled pork.

2. Sautéing the jackfruit:

  • In a large skillet over medium heat, add some oil and sauté diced onions until they become translucent and slightly caramelized.

3. Adding flavor with BBQ spices:

  • Sprinkle desired BBQ spices (such as paprika, garlic powder, cumin) onto the sautéed onions for added smokiness and depth of flavor.

4. Simmering in BBQ sauce:

  • Add shredded jackfruit to the skillet along with your favorite vegan-friendly barbecue sauce.
  • Stir well to coat all pieces evenly with sauce.

5. Cooking process:

  • Reduce heat to low-medium setting.
  • Cover it up using a lid.
  • Simmer gently for about 20 minutes, allowing flavors to blend together while stirring occasionally.

6. Shredding technique:

  • Use two forks to shred the jackfruit for a finer texture.

7. Once cooked:

  • Remove from heat when you achieve a tender texture that resembles pulled meat consistency.

By following this cooking method outlined above, you will be able to prepare flavorful BBQ Pulled Jackfruit ready to use on sandwiches.

Avocado Slaw and Toppings

Avocado slaw is the perfect accompaniment to BBQ Pulled Jackfruit Sandwiches, adding a refreshing and creamy element that complements the smoky flavors of the jackfruit. Here’s how you can make this quick and delicious avocado slaw:

Ingredients:

  • Ripe avocado
  • Maple syrup
  • Lemon or lime juice
  • Salt and pepper to taste
  • Shredded cabbage (green or purple)
  • Shredded carrots

Preparation Method:

  1. In a bowl, mash one ripe avocado until smooth.
  2. Add maple syrup, lemon or lime juice, salt, and pepper to taste. Mix well until all ingredients are combined.
  3. Stir in shredded cabbage (you can use green or purple) along with shredded carrots for added crunchiness.
  4. Adjust seasoning according to your preference.

Now that you have prepared the flavorful avocado slaw, let’s explore some additional toppings that will take your BBQ Pulled Jackfruit Sandwiches up a notch!

Roasted Salted Cashews:

For an extra burst of flavor and texture in every bite, consider topping your sandwiches with roasted salted cashews! These crunchy nuts add richness while complementing both the sweetness of barbecue sauce as well as creaminess from avocados.

Pickles:

If you enjoy tangy flavors alongside savory barbecued goodness, then pickles are an excellent choice! Adding sliced dill pickles on top adds acidity which cuts through rich elements like pulled jackfruit beautifully, creating balance within each mouthful.

Additional Vegetables:

Feel free to get creative by incorporating other vegetables into your sandwich creation! Thinly sliced red onions provide sharpness while fresh lettuce leaves offer crispness – these additions enhance not only visual appeal but also contribute different textures, making each bite exciting!

By experimenting with various toppings such as roasted salted cashews, pickles, and additional veggies, you’ll be able to customize your BBQ Pulled Jackfruit Sandwiches according to your taste preferences. Whether you prefer a bit of crunch, tanginess, or extra freshness, these toppings will elevate the flavors and textures of this already delicious sandwich.

Now that we have covered all aspects from preparing the jackfruit filling to making avocado slaw and selecting various toppings, it’s time for you to get creative in assembling your own mouthwatering BBQ Pulled Jackfruit Sandwich!

Serving Suggestions and Storage

When it comes to serving BBQ Pulled Jackfruit Sandwiches, there are a few options that can enhance the overall experience. One popular choice is to use homemade hamburger buns or whole grain vegan buns as the base for your sandwich. The softness of these breads complements the tender jackfruit perfectly.

To complete your meal, consider adding some delicious sides. Classic choices like fries or coleslaw pair well with the smoky flavors of BBQ pulled jackfruit sandwiches. Alternatively, you could opt for a fresh salad loaded with crisp vegetables and tangy dressing to balance out the richness of the dish.

Now let’s talk about storage! If you happen to have any leftover jackfruit after making your sandwiches (which might be rare because they’re so tasty!), here’s what you need to know:

1. Refrigeration:

Place any remaining cooked jackfruit in an airtight container and store it in the refrigerator.

2. Shelf Life:

Properly stored leftovers should last up 3 days when refrigerated.

Remember that reheating may cause slight changes in texture but won’t affect its flavor significantly.

So go ahead and enjoy those mouthwatering BBQ Pulled Jackfruit Sandwiches knowing that if by chance there are leftovers, they’ll still make for a delightful meal later on!

Conclusion

BBQ Pulled Jackfruit Sandwiches are a delicious and satisfying vegan alternative to traditional pulled pork sandwiches. Throughout this blog post, we have explored the simplicity, flavor, and versatility of these mouthwatering sandwiches.

By using young green jackfruit in water as the main ingredient, you can achieve a meaty texture that closely resembles pulled pork. The jackfruit is seasoned with BBQ spices and simmered in tangy BBQ sauce for an explosion of smoky flavors. This recipe allows you to enjoy all the goodness of barbecue without any animal products.

One great aspect about this recipe is its adaptability. You can easily customize it by adding your favorite toppings or experimenting with different sauces or seasonings according to your taste preferences. Whether you prefer spicy heat or sweet tanginess, there’s no limit to how creative you can get with these sandwiches.

We encourage each reader to give this recipe a try! It only requires 10 simple ingredients and takes just 30 minutes from start to finish – perfect for busy weeknight dinners or weekend gatherings with friends and family.

Once you’ve made these delectable BBQ Pulled Jackfruit Sandwiches yourself, don’t forget to share your feedback! We would love hearing about your experiences trying out our recipes on Brood’s website (insert link). Your comments will not only help us improve but also inspire other readers who may be hesitant about venturing into plant-based cooking.

So go ahead – fire up that grill (or stovetop) – gather some fresh buns along with crunchy slaw fixings like cabbage and carrots; then prepare yourself for an unforgettable meal bursting with bold flavors!

Remember: eating plant-based doesn’t mean sacrificing taste satisfaction – it means discovering new ways of enjoying food while being mindful towards animals’ welfare & environmental sustainability.

References

  1. https://minimalistbaker.com/bbq-jackfruit-sandwiches-with-avocado-slaw/
  2. https://www.loveandlemons.com/bbq-jackfruit-recipes/
  3. https://pinchofyum.com/bbq-jackfruit-sandwiches
Categories
Recipes

Teriyaki Salmon Sushi Bowl Recipe: A Delicious and Healthy Meal Option

Quick Answer

This blog post explores the Teriyaki Salmon Sushi Bowl, a delicious and healthy meal option. It includes a recipe with step-by-step instructions, personal anecdotes from the authors, and positive feedback from readers who have tried the dish. The post also highlights the health benefits of the ingredients and provides serving suggestions for a complete meal experience.

Introduction

Teriyaki Salmon Sushi Bowl is a delightful and nutritious meal that has gained popularity among food enthusiasts. This delectable dish combines the flavors of teriyaki-glazed salmon with fresh sushi ingredients, resulting in a satisfying bowl packed with umami goodness. In this blog post, we will explore the recipe for Teriyaki Salmon Sushi Bowl sourced from various external sources to bring you an authentic and mouthwatering experience.

The inspiration for this article comes from three reputable websites – My GF Guide, Prevention RD, and Dishing Out Health. These sources provide not only detailed recipes but also personal anecdotes shared by their authors who have tried and loved this culinary creation themselves.

So let’s dive into the world of Teriyaki Salmon Sushi Bowls as we uncover how to make them at home using these trusted resources!

Ingredients

To make a delicious Teriyaki Salmon Sushi Bowl, you will need the following ingredients:

  • Short grain rice
  • Rice vinegar
  • Sugar
  • Salt
  • Black sesame seeds (for garnish)
  • Maple syrup
  • Toasted sesame oil
  • Low-sodium soy sauce
  • Garlic granules
  • Mirin
  • Salmon fillets
  • Shelled edamame
  • Avocados

These simple yet flavorful ingredients come together to create a mouthwatering sushi bowl that is sure to satisfy your cravings. The combination of tender salmon, creamy avocado, and crunchy edamame provides an exciting mix of textures in every bite.

The short grain rice serves as the base for this dish and adds a satisfying chewiness. It’s important to use short grain rice specifically because it has higher starch content which helps bind all the flavors together.

Rice vinegar brings tangy notes while sugar balances out any acidity with its subtle sweetness. A pinch of salt enhances all other flavors present in the dish.

For added visual appeal and nutty flavor, black sesame seeds are sprinkled on top as a finishing touch before serving.

Maple syrup lends its natural sweetness to complement the savory teriyaki glaze used for marinating our succulent salmon fillets. This sweet element perfectly balances out umami-rich low-sodium soy sauce along with toasted sesame oil adding depth and richness.

Garlic granules provide aromatic undertones enhancing overall taste profile whereas mirin contributes mild sweetness making each bite more delightful.

Lastly, shelled edamame not only add vibrant color but also offer plant-based protein punch alongside healthy fats from avocados – creating well-rounded nutrition within one bowl!

With these carefully selected ingredients at hand let’s dive into preparing this delectable Teriyaki Salmon Sushi Bowl!

Recipe Instructions

Step 1: Cook the Rice

  • Rinse 2 cups of short grain rice under cold water until the water runs clear.
  • In a medium-sized saucepan, combine the rinsed rice with 3 cups of water and bring to a boil over high heat.
  • Reduce the heat to low, cover with a lid, and simmer for about 15 minutes or until all liquid is absorbed.
  • Tip: To achieve perfectly cooked sushi rice, it’s important not to lift off the lid while cooking.

Step 2: Seasoning the Rice

  • While still hot, transfer cooked rice into a large mixing bowl.
  • Add in 4 tablespoons of seasoned rice vinegar (a mixture of sugar and salt) gradually while gently folding it into the warm rice using a wooden spatula or fork. This will give your sushi bowl that authentic tangy flavor.

Step 3: Prepare Teriyaki Salmon

  • Preheat oven broiler on high setting.
  • In small mixing bowl whisk together maple syrup, toasted sesame oil, soy sauce, garlic granules & mirin.
  • Place salmon fillets skin side down onto baking sheet lined with aluminum foil. Pour teriyaki marinade evenly over each piece making sure they are well coated.
  • Tip: For maximum flavor allow salmon to marinate at room temperature for at least half an hour before grilling.

Step 4: Broil The Salmon Fillets

  • Set rack positioned near top heating element so fish can be placed approximately six inches from direct broiling source.
  • Broil undisturbed without flipping them once until edges start caramelizing slightly, around fifteen minutes depending on thickness.
  • Note: It’s essential to always keep a close eye during this process as every oven varies greatly in terms of power output, which may result in either a burnt or undercooked dish if left unattended.
  • Once done, remove the tray carefully out of the oven and let the salmon rest for a few minutes before flaking it into smaller pieces using a fork.

Step 5: Assemble the Teriyaki Salmon Sushi Bowl

  • Divide the seasoned rice among serving bowls.
  • Top with flakes of teriyaki salmon, shelled edamame beans, sliced avocado, and sprinkle black sesame seeds over each bowl.
  • Tip: Feel free to add additional toppings such as cucumber slices or pickled ginger according to your preference.

Now that you have followed these simple steps, your delicious Teriyaki Salmon Sushi Bowls are ready to be enjoyed!

Personal Anecdotes

In the external sources, we came across some delightful personal anecdotes related to the Teriyaki Salmon Sushi Bowl. One of these anecdotes comes from Nicole Morrissey, who shared her experience on Prevention RD’s blog post.

Nicole mentioned that she had prepared and enjoyed the Teriyaki Salmon Sushi Bowl for dinner with her family recently. She expressed great satisfaction with how it turned out – a unique dish that was simple yet incredibly enjoyable for everyone at their table.

Additionally, readers also left comments sharing their own experiences and variations when trying this recipe. One reader suggested adding cucumber slices to add an extra crunch and refreshing element to the sushi bowl. This variation can be a fantastic way to enhance both texture and flavor in your meal.

Another reader accidentally forgot to include shelled edamame while preparing their Teriyaki Salmon Sushi Bowl but still found themselves loving every bite of leftovers! It goes without saying that you have room for experimentation or adaptation based on what ingredients are available or preferred by individual taste buds.

These personal stories not only showcase people’s positive encounters with this delicious dish but also highlight its versatility as they make small tweaks according to preference or availability of ingredients.

Health Benefits

The Teriyaki Salmon Sushi Bowl not only satisfies your taste buds but also provides numerous health benefits. Packed with nutritious ingredients like salmon, edamame, and avocado, this dish is a powerhouse of essential nutrients.

Omega-3 Fatty Acids from Salmon

Salmon is known for its high content of omega-3 fatty acids. These healthy fats are beneficial for heart health as they help reduce inflammation and lower the risk of cardiovascular diseases. Omega-3s also play a crucial role in brain function and can improve cognitive performance.

Plant-Based Protein from Edamame

Edamame, young soybeans that are harvested before they fully matured, adds plant-based protein to the sushi bowl. Protein is an important macronutrient that helps build muscle mass and repair tissues in our body. It keeps us feeling full for longer periods while providing sustained energy throughout the day.

Nutritional Advantages of Avocado

Avocado brings more than just creamy texture to this dish; it offers several nutritional advantages too! Avocados contain monounsaturated fats which have been linked to improved cholesterol levels by increasing HDL (good) cholesterol while reducing LDL (bad) cholesterol levels. They’re also rich in fiber which aids digestion and promotes satiety.

According to external sources such as My GF Guide’s recipe post on gluten-free teriyaki salmon sushi bowls [URL1], these ingredients work together harmoniously not only creating delicious flavors but offering various vitamins including vitamin D from salmon – vital for bone health – along with potassium found abundantly within avocados contributing towards maintaining normal blood pressure levels.

By incorporating these nutrient-dense foods into your diet through enjoying a Teriyaki Salmon Sushi Bowl regularly you’ll be nourishing both your body & mind!

Serving Suggestions

When it comes to serving the Teriyaki Salmon Sushi Bowl, there are a few suggestions that can elevate your dining experience. Here are some ideas to make your meal even more delicious:

1. Garnish with additional sesame seeds or green onions:

Sprinkling some extra black sesame seeds on top of the sushi bowl adds a beautiful contrast and enhances its visual appeal. You can also add thinly sliced green onions for an added burst of freshness.

2. Pair with miso soup:

To complete your Japanese-inspired meal, serve the Teriyaki Salmon Sushi Bowl alongside a warm bowl of miso soup. The savory flavors in the soup complement the teriyaki salmon perfectly and provide a comforting element to your dinner.

3. Serve with side salad:

For those looking for lighter options or wanting to incorporate more greens into their meal, consider pairing the sushi bowl with a fresh side salad dressed lightly in soy-ginger vinaigrette or ponzu sauce.

4. Additional toppings:

Feel free to get creative by adding other toppings such as pickled ginger slices, wasabi paste (if you enjoy spicy food), nori strips (seaweed sheets cut into thin strips) for added texture and flavor complexity.

These serving suggestions will not only enhance both taste but also presentation making this dish perfect whether you’re enjoying it alone at home or hosting guests! Experimenting is encouraged so feel free try different combinations until you find what suits bests suit yours tastes!

Remember that these recommendations are just starting points – don’t be afraid to experiment further based on personal preferences! Whether enjoyed solo during cozy nights-in or shared among friends at gatherings; let creativity guide how each individual enjoys their own unique take on this delightful recipe!

Conclusion

The Teriyaki Salmon Sushi Bowl is a delightful and nutritious meal option that combines the flavors of teriyaki salmon with fresh ingredients like avocado, edamame, and black sesame seeds. Throughout this blog post, we have explored various external sources to bring you an easy-to-follow recipe along with personal anecdotes from those who have tried it.

This sushi bowl offers a unique twist on traditional sushi by incorporating teriyaki-marinated salmon fillets. The combination of sweet maple syrup, savory soy sauce, and aromatic garlic granules creates a mouthwatering marinade that infuses every bite with incredible flavor. Paired with perfectly cooked short grain rice seasoned just right using rice vinegar and salt – each element in this dish complements one another harmoniously.

Not only does the Teriyaki Salmon Sushi Bowl taste amazing but it also provides numerous health benefits. Rich in omega-3 fatty acids found abundantly in salmon fillets; these bowls are not only delicious but also great for heart health! Additionally, shelled edamame adds plant-based protein while avocados contribute healthy fats making this dish both satisfyingly filling as well as nourishing.

We encourage you to give our recipe for the Teriyaki Salmon Sushi Bowl a try! Feel free to get creative by adding your own variations or toppings such as cucumber slices or even pickled ginger if desired – there’s no limit when it comes to customizing your perfect bowl!

Once you’ve prepared your very own Teriyaki Salmon Sushi Bowl masterpiece be sure to share your experience with us too! We love hearing about how readers put their spin on recipes featured here at Brood so don’t hesitate—share photos or stories via social media platforms using #BroodRecipes hashtag—we can’t wait see what culinary adventures await!

In conclusion, the Teriyaki Salmon Sushi Bowl is a delicious and healthy option that combines flavors of teriyaki salmon with fresh ingredients. Give it a try and share your experiences!

References

  1. https://www.mygfguide.com/gluten-free-teriyaki-salmon-sushi-bowl-recipe/
  2. https://preventionrd.com/teriyaki-salmon-sushi-bowl/
  3. https://dishingouthealth.com/salmon-sushi-bowls/

Privacy Policy | Terms & Conditions | Cookie Policy | Sitemap

Copyright © 2023 Brood.co.za, All Rights Reserved